Wednesday, April 29, 2015

Garbanzo Bean Salad with Lime Herb Vinaigrette

image
Garbanzo Bean Salad with Lime Herb Vinaigrette
 
Salads are the perfect lazy meal. Add a little of this and a little of that and you have a great meal that didn't involve 1 minute of cooking. It's no wonder I love them so much.  When I'm in the mood for a hearty and filling salad, I always use legumes as base and build out from there. This salad makes the perfect lunch, or lazy dinner.
Pin It!
Pin It!


Ingredients:
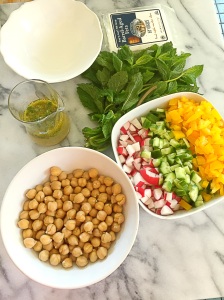
10 ounce can of organic garbanzo beans--drained and rinsed
1/2 cup of  organic persian cucumbers, diced
1/2 cup of organic radish, diced
1/2 cup of organic bell pepper, diced
3-4 oz of Feta cheese--crumbled
Sea salt to taste
Lime Herb Vinaigrette
1/4 cup of fresh organic lime juice
3 tablespoons of olive oil
3 tablespoons of finely chopped fresh mint
1 medium clove of garlic, grated
1/2 teaspoon of ground cumin
Sea salt to taste
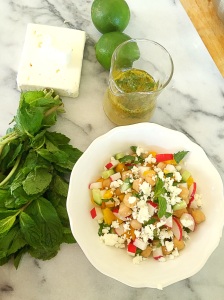
Directions:  Add all of the ingredients for the Lime herb vinaigrette to a bowl,  whisk together and set aside.  To a large bowl add the ingredients for the salad, season with sea salt and toss gently.
image


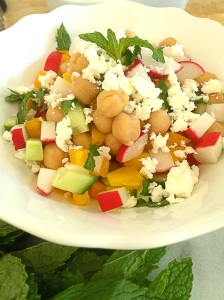
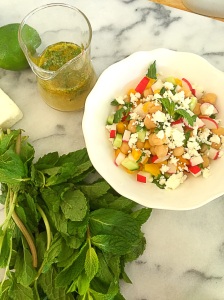
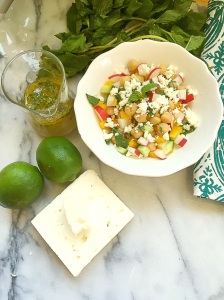
Pour the vinaigrette over the salad, toss once more and enjoy!
image
image
image
 

Tuesday, April 28, 2015

Brown Butter Chocolate Chip Cookies

Brown Butter Chocolate Chip Cookies
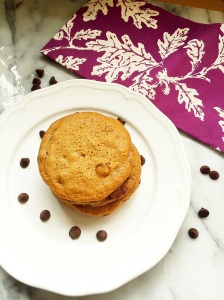
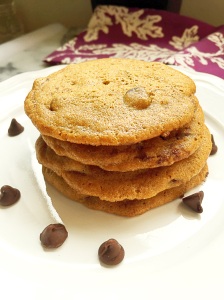
Before I had my own child, I spent countless hours in the kitchen with my nieces and nephews baking cookies.  It was a tradition actually. A tradition that my  now 22-year-old niece looks back on fondly.  Great considering the fact that I do not consider myself a baker.  This particular recipe is a chocolate chip recipe from Serious eats, but with my spin on it.  By spin, I mean I used the listed ingredients, mostly--and a little extra chocolate, but I did not follow the directions as written.  I sort of did things my way.  If you want to make these cookies exactly as Kenji over at Serious eats intended, then by all means follow this recipe.  In either case, this recipe is tried and true. The brown butter in this recipe lends a nice toffee flavor to these cookies.  I let the dough rest before cooking these.  My intent was to let it rest over night, but the dough smelled so good that Page insisted that we bake a few right away, so we did, after it rested for about 8 hours.  To be honest there was not really a noticeable difference between the cookies we baked early and the ones that were baked the next day.  Good cookies are just good cookies. But that could have been a result of me not following the directions word for word.  But that aside, these cookies were amazing!!!  If you were lucky enough to have one of these at a bake sale--you'd be a lucky duck indeed!
Pin It!
Pin It!


Time: 30 minutes
Ingredients
10 ounces of all purpose flour (about 2 cups)
8 ounces of cooled brown butter (2 sticks) see directions for browning butter here
3/4 teaspoon baking soda
5 ounces  of granulated sugar or 3/4  cup
5 ounces of  tightly packed brown sugar or 1/2 cup plus 2 tablespoons (go to my Instagram account to see how to make your own)
10 ounces of chocolate chips
2 teaspoons of kosher salt--I used Pink Sea Salt
2 eggs
2 teaspoons of vanilla extract
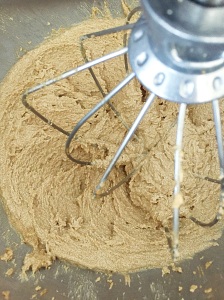
Directions: Add  flour, salt and baking powder to a bowl, mix and set aside.  Add cooled brown butter and sugars to a bowl with the whisk attachment.  On medium speed, cream together, for about 5 minutes. Kenji's recipe calls for using brown butter that has not fully solidified, but I am a busy woman, I put my brown butter in the refrigerator, and came back for it 3 hours later, so I decided to cream it with the sugars.
image
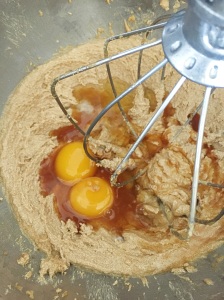
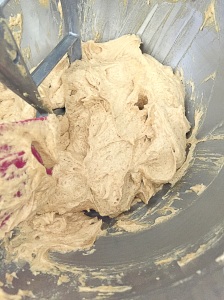
After butter and sugar mixture has creamed, change to the paddle attachment and add in the eggs and vanilla mix on medium speed until the mixture comes together.
image
image
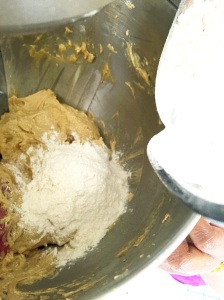
Add in the flour mixture and mix on low speed until dough  is just barely combined , about 15 seconds.
image
There should still be some dry flour remaining.
image
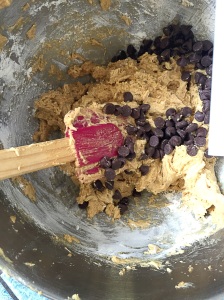
Turn off mixer, add in chocolate chips, using a silicon spatula, fold the chocolate chips into the dough,
image
 
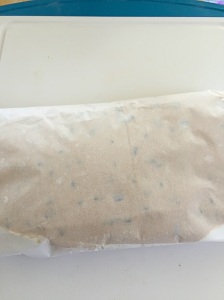
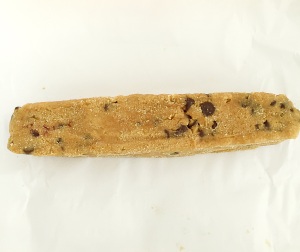
Transfer to an air tight container and refrigerate.  I rolled the dough out onto parchment and then sealed it in a Ziploc bag.  Then separated it into 3 equal sized cookie logsso that I could freeze them for later--that didn't really happen--I gave one roll away, and we ate the rest:
image
 
image
 
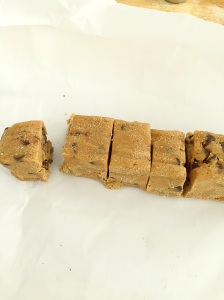
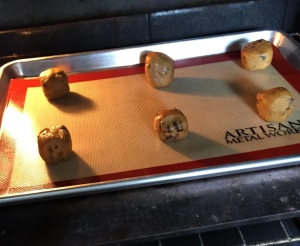
Allow the dough to rest overnight, or as long as you can--up to 3 days in the refrigerator, then cut or scoop dough out into tablespoon sized  portions on to a silpat or parchment lined cookie sheet.
image
image
Bake on 325F for 13-16 minutes.  The cookies should be brown on the edges but soft in the middle.  Remove from oven, transfer to a wire rack to cool, then enjoy!
image
image
 
image

Wednesday, April 22, 2015

How to Brown Butter

How to Brown Butter
How to Brown Butter
It has been said that butter makes everything better.  In my opinion  brown butter is butter in it's best form.  The nutty, butterscotch notes butter has once it has been browned are heavenly!  I love to use brown butter in everything from sauces to baked goods.  In fact, the other day, Page and I were baking with browned butter, and even she--in all of her 3-year-old astuteness--could not stop saying how good the brown butter smelled.  The aroma had us both in a euphoric trance--I'm not exaggerating--we were both giddy over the smell--and the cookies...the cookies were AMAZING!!!  I'll share that post another day.  You can make as much or as little of this as you'd like.  Once the butter has browned you can place in the refrigerator to use for later.  A good brown butter sauce can liven up everything --even veggies.
Pin It!
Pin It!
Prep time: none
Cook time: 5-7 minutes
Ingredients:
2 sticks of butter
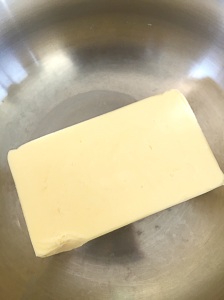
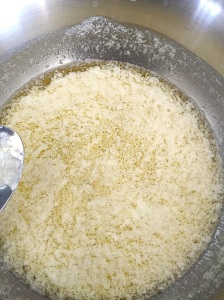
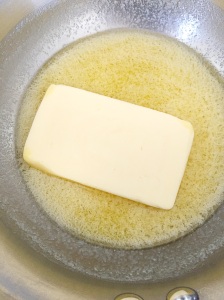
Directions: Place the butter in a stainless steel or clear bottom sauce pan
image
and melt over medium low heat.
image
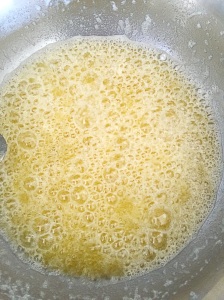
Once the butter has completely melted, things move along pretty quickly, the solids have already begun to separate for me and it's been about two minutes:
image
At about 5 minutes in the butter will start to bubble and and splatter, stir, stir, and stir some more:
image
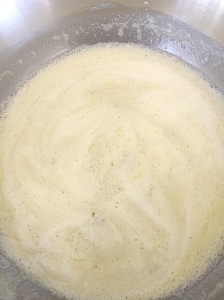
Now is the time to watch the butter like a hawk, because then this happens:
image
Foam, a lot of foam, which makes it hard to see if the butter has browned underneath, so move the foam to the side with a spoon to see if the butter has browned. image
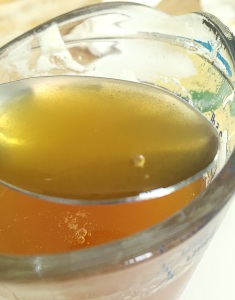
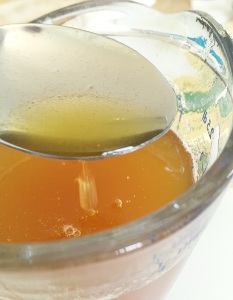
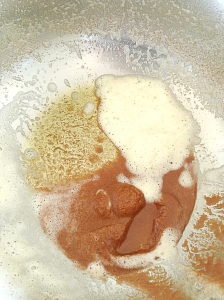
You'll be able to tell the butter has browned because you'll start to see brown bits of milk solids on the spoon and in the pan.
image
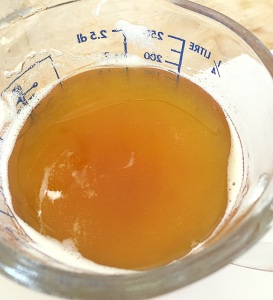
The butter will also start to smell AMAZING!! It takes on a sweet, nutty almost butterscotch aroma.  I was happy with the color at this point, but you could go a little longer--just be careful not to go too much longer, because the butter continues to brown even after you remove it from the heat. After you're happy with the color,  remove it from heat and transfer to a heatproof container.  Make sure to transfer all of the butter milk solids--the milk solids are the best part.  They don't look appetizing but they are.  I added them after I took this picture, just so you guys could see what they look like.:
image
Continue to stir for a  few minutes to help cool it down.
image
Use it right away or allow the brown butter to cool to room temperature before transferring to an air tight container and then the refrigerator for later use.

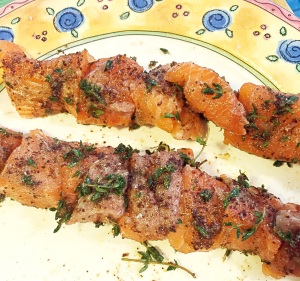
Persian Spiced Salmon Kabobs

Persian Spiced Salmon Kabob's
 
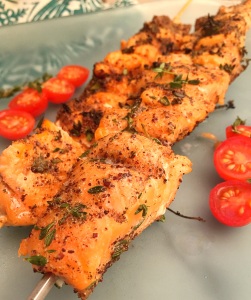
I love a good kabob and lately I've been craving them.  Salmon is such a hearty fish, and there are many great ways to prepare salmon, but when you want to switch things up a bit--grilled salmon is the way to go.  I made a paste to adorn this salmon, and it's rich in Mediterranean flavors.  I used sumac, which can be found in any middle eastern store, or in your local Trader Joe's--it's where I got mine.  Sumac is tart,  sour and is often used in place of lemon in middle eastern recipes.   If you can't find sumac, then by all means feel free to substitute with the zest of a lemon.  The flavor is this dish is fantastic.  The fresh thyme was amazing! I felt like I was eating at one of my favorite Persian restaurants.  Page really loved it, and my husband could not stop with the compliments.
Pin It!
Pin It!


Prep time: 5 minutes
cook time: 7 minutes
Total time: 12 minutes
 
Ingredients:
1lb of salmon-- dried with paper towels, de-skinned, and cubed into 1 inch pieces
1 teaspoon of sumac powder-- can substitute with lemon zest
1/2 teaspoon of garlic powder
1/2 teaspoon of cumin
1 teaspoon of fresh thyme-stems removed
1 teaspoon of olive oil--or oil of your choice
sea salt to taste
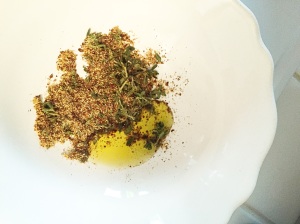
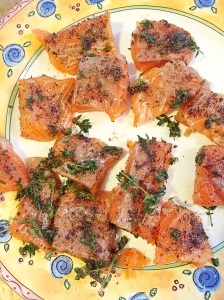
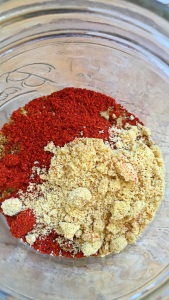
Directions: To a small bowl add the garlic powder, cumin powder, fresh thyme and oil, mix well and set aside.
image
Rub the spice mixture on the salmon,
image
 
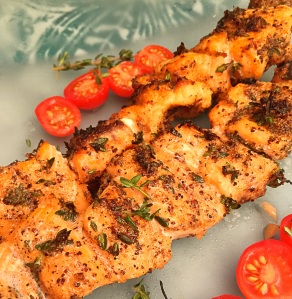
then add the salmon to skewers,
image
 
Grill the salmon for 3-4 minutes on each side, remove from grill, serve and enjoy!
image
 

Wednesday, April 15, 2015

Pineapple Rings--How to make dehydrated Pineapple Rings

Dehydrated Pineapple Rings
One of my go to snacks is dehydrated fruit.  I'm a particular fan of pineapple rings.  But, if you've ever purchased organic dehydrated pineapple rings, then you probably know that pineapple rings are a snack that can be out right expensive! I mean outlandishly expensive! On top of the expense, it's pretty hard to find pineapple rings that haven't been soaked in baths of sugar.  I'm not a fan of adding sugar to dehydrated fruit.  It's sort of an oxymoron to me that sugar is added to dehydrated fruit at all, because if you know anything about dehydration--then you know that the sugar in fruits concentrate when dehydrated, so there really isn't a need to add sugar--unless you're dehydrating something really tart like cranberries then I could see the purpose of adding sugar. Last week I purchased a pineapple, I fully intended to eat it fresh. However,when I cut, and tasted it-- it was pretty tasteless. Disappointing for sure. The pineapple clearly needed to ferment more.  Rather than chuck it, I sliced it and put it in the dehydrator and made pineapple rings. The resulting pineapple rings were not only flavorful, but they were sweet--everything you want would want in a fresh bite of pineapple--minus the juice of course.  The pineapple rings lasted all of 2 minutes, my sister in-law, my niece and Page, gobbled them right up--I'm pretty sure they would've passed on the fresh slices.
Pin It!
 
 
Prep time: 10 minutes
Cook time 6-8 hrs 10-12hr for thicker slices
Ingredients:
2 whole fair trade organic pineapple
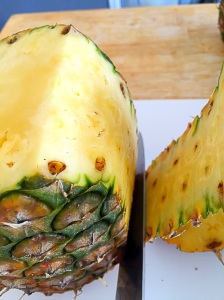
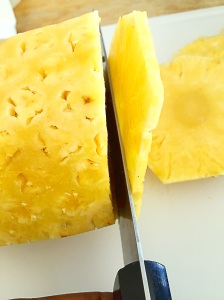
Directions: Remove the stem from the pineapple, then slice off the top and bottom.  Slice off the skin, making sure to remove all the eyelets.
image
Now slice the pineapple thinly.
image
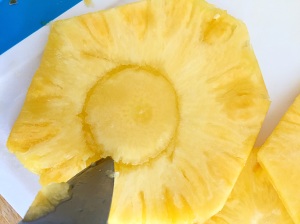
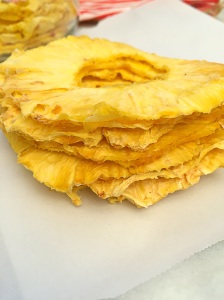
Keep in mind that the thicker you slice it, the longer it will take to dry.  If it's too thin your pineapple rings will turn out crisp, if they are a bit thicker, they'll be more leathery, so it' just a matter of what you're seeking in consistency.  After slicing, cut out the center core by carving a circular cut in the middle of the pineapple.
image
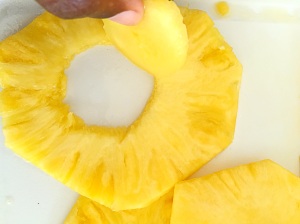
Remove the core and discard it.
image
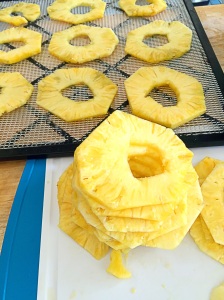
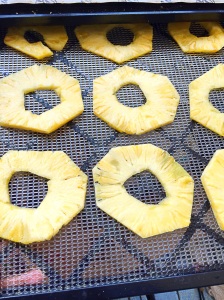
Place the pineapple rings on your dehydrator sheet,
image
Set the dehydrator to 135F.  If you're doing this in the oven, set the oven to 150F or the lowest possible setting.  Dehydrate for 6-8 hours, 10-12hrs if you cut thicker slices.
image
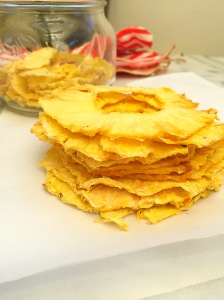
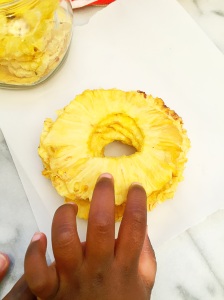
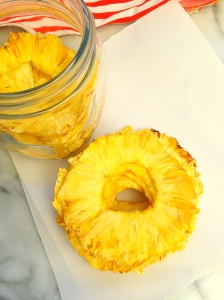
Once dry let cool, then enjoy!
image
Page could not wait for me to take a picture, she loves these so much!
image
image
if you like this recipe, try the recipe for my pineapple fruit roll-ups!

Tuesday, April 14, 2015

Spice rubbed Salmon with Lemon Cream Sauce

Spice rubbed Salmon with lemon cream sauce
Spice Rubbed Salmon with Lemon Cream Sauce

I love salmon, especially perfectly cooked salmon. When cooked correctly salmon is moist, tender, and oh so satisfying.  Most recipes for salmon include dill, lemon, garlic or some variation of those three ingredients. I'm a big fan of garlic and lemon, but dill is just not a flavor I'm in love with.  Besides, salmon is not a fragile fish, it can hold up to more bold flavor profiles.This particular salmon recipe is proof of that.  
Prep time: 5 minutes
Cook time: 8 minutes
Total time: 15 minutes
Ingredients:
1 lb salmon fillet
1/4 teaspoon of paprika
1/4 teaspoon of granulated garlic
1/4 teaspoon of onion powder
1/4 teaspoon of ground cumin
1/2-1 teaspoon of avocado oil or coconut oil
sea salt & black pepper to taste
Lemon cream sauce (optional)
2 Tablespoons of sour cream --can sub with yogurt
1/4 teaspoon of tabasco
1 tablespoon of lemon juice
sea salt to taste
Directions: Pre-heat oven to 425F. Mix the ingredients for the lemon sauce in a small bowl and set aside. Dry salmon fillet with paper towels, drizzle with oil on both sides, then salt, place on a foil lined bake sheet and set aside. In a small bowl mix together the paprika, garlic, onion, and cumin.  
image
Sprinkle the spice mixture over the salmon,
image
Place the salmon in the oven for 8-10 minutes depending on how thick your fillet is.  My fillet was about 1/2 inch thick and it was done in 8 minutes.  Remove from oven, drizzle with lemon sauce and enjoy!
image