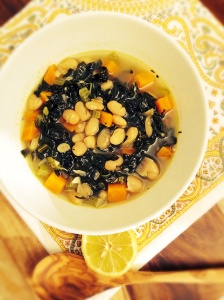
- Kale and White Bean Soup

I feel like I haven't shared enough vegetarian recipes with you guys, at least not as a full meal. My daughter is just beginning to appreciate veggies the way my husband and I do...thank God, I was beginning to worry she would be one of those kids who would refuse everything green. But somehow, and by the grace of god she has taken to eating veggies. While I was making this she kept reaching up to steal pieces of carrots! It made my heart leap with every bite she took! She loves this soup, and I love that she loves it, because it's nothing but veggies!
Prep time: 10-15 minutes
Cook time: 25 minutes
Total time: 35-40 minutes
Ingredients:
1 bushel of organic kale, sliced thinly
1 cup of shallots, chopped
1 cup of carrots, cubed
1 cup of celery, cubed
3 cloves of garlic, chopped
3/4 cup of white wine Sauvignon Blanc
4 cups of vegetable stock
1.5 tablespoons of lemon juice
1/2 teaspoon of thyme
Sea salt and black pepper to taste
2 tablespoons of olive oil
15 oz can of Organic white beans, drained and rinsed
Directions: Heat the oil on medium heat, add garlic, shallots, celery, and carrots, cook until tender,

add in thyme and kale, sauté for 5 minutes.

Add in the wine, vegetable stock and beans, bring to a boil and cook until greens are tender about 15 minutes. Add in lemon juice, adjust the seasoning with sea salt and black pepper, serve and enjoy