Thursday, December 12, 2013

Roasted Chicken Thighs with Lemon and Oregano

Roasted Chicken Thighs with Lemon and Oregano

It is officially lemon season! I love lemons, I love the smell of them, the tastes of them, but most of all I love cooking with them. This recipe is perfect for the cold weather we are having here in California. Nothing warms up a house better than roasting chicken, and while I avoid using my stove  11 months of the year, I always love to use it in December. Maybe it's the Christmas season, I don't know, but there is just something about pulling something out of my actual oven  that makes me feel in tune with the season.

Prep Time: 5 minutes
Cook Time: 25 minutes
Total time: 30 minutes

Ingredients:
4 chicken thighs skin on
1 lemon divided in half with one half sliced thinly into rings and the other half cut into 2 wedges
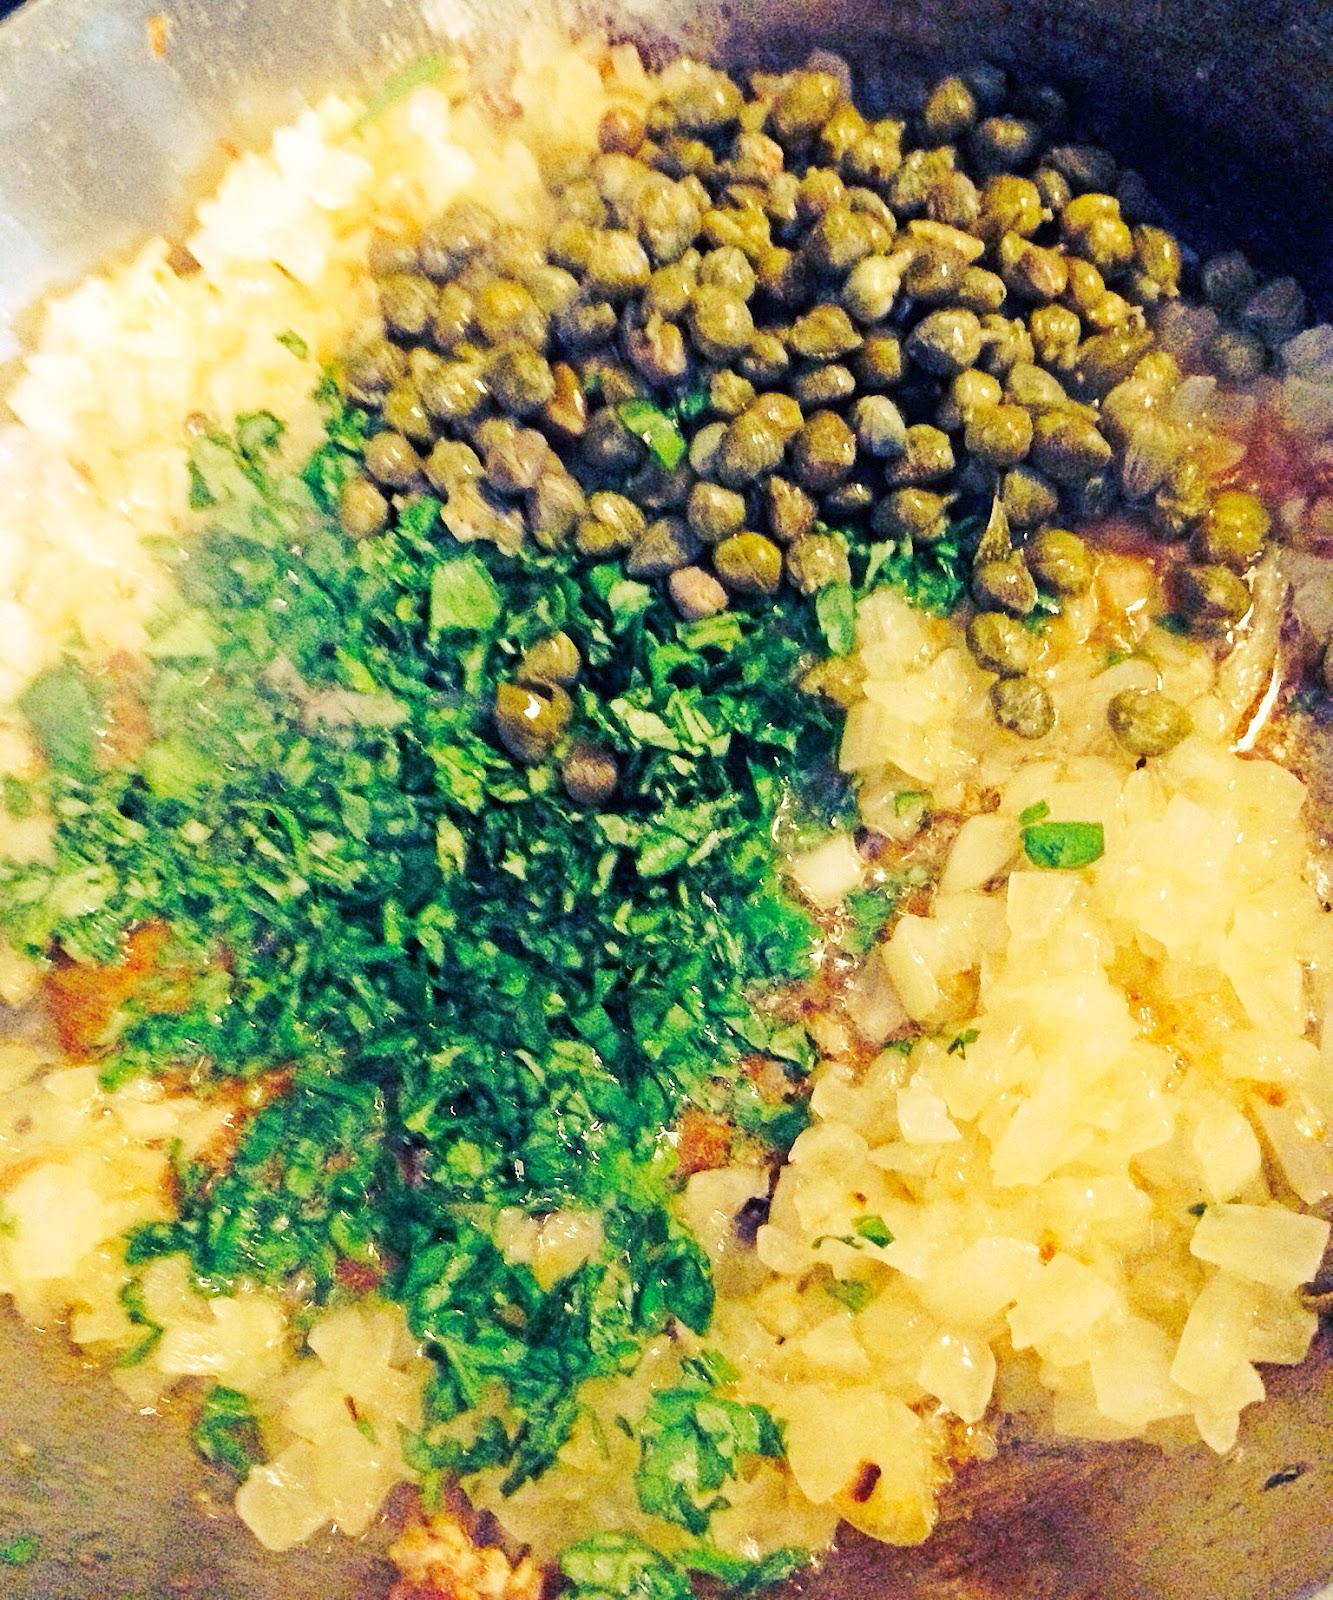
1/4 cup of onion chopped finely
1 teaspoon of dried oregano
1/8 teaspoon of red pepper flakes
1/4 cup of white wine Sauvignon Blanc
1/2 cup of low sodium chicken stock
1 clove of garlic
3 tablespoons of olive oil
Sea salt & pepper to taste

Directions:
Pre-heat oven to 425 F. Add 1 tablespoon of the olive oil to a skillet. Season chicken with sea salt and black pepper, then add it skin side down to the skillet. Allow to brown, without turning for 10 minutes or until chicken is cooked half  through. Pour off excess oil, maintaining a thin layer of oil in the pan. Place half the lemon slices on the bottom of the pan, and the other half on top of the chicken.  Move the skillet to oven and allow chicken cook through about another 6-8 minutes. Remove chicken  from oven, and transfer to a plate. Add in the onion, oregano, garlic and red pepper flakes to the skillet and let cook for 2 minutes, remove the skillet from the fire, add in the wine and give a quick stir. Return the skillet to the fire  cook for 2 minutes and add the chicken stock cook for another 3 minutes or until the sauce has thickened a bit,  add in the remaining olive oil. Return the chicken to the skillet. At this point you can taste the sauce to see if you need more lemon, I usually add in the juice of one of the two remaining wedges. Add sea salt and black pepper if necessary,  serve and enjoy!

What is your favorite cold weather oven meal?

Follow and like me on Facebook: www.facebook.com/lazygirldinners


Tuesday, December 10, 2013

Roasted Cauliflower with Parsley Lemon Sauce

Roasted Cauliflower with Parsley Lemon Garlic Sauce

I love roasted Cauliflower, it's one of my favorite side dishes. My daughter loves it too. Since we eat so much of it, I decided to try it with this little twist. I'm so glad I did because it is definitely something I will add to my arsenal of cauliflower recipes!

Prep time: 5 minutes
Cook time: 20 minutes
Total time: 25 minutes

Ingredients:
1 head of cauliflower roughly sliced
1 cup of flat leaf parsley
1/2 juice of a medium lemon
1 clove of garlic
6 tablespoons of olive oil
Sea salt and black pepper to taste

Directions:
Pre heat the oven to 425 F. Place cauliflower on a roasting sheet/pan toss with 4 tablespoons of olive oil, salt and black pepper, and roast for 15-20 minutes, or until cauliflower is fork tender and takes on a bit of color. While the cauliflower is roasting, place, the parsley, lemon juice, garlic, and remaining 2 tablespoons of oil in a small blender or processor and blend until it comes together. Season the sauce with sea salt to taste. Once the cauliflower is done, toss with 1 tablespoon of the sauce and reserve the rest to serve on the side.

Follow and like me on Facebook: www.facebook.com/lazygirldinners


Thursday, December 5, 2013

How to make Salt Dough Ornaments

Salt Dough Ornaments

I have a confession, I have a borderline ornament addiction. Okay it's an all out addiction! I love ornaments! The holiday season and purchasing our tree and decorating it is a big deal in our house. Even before I had my daughter, I would always make a big deal of decorating our tree. I obsess over ornaments. I constantly buy new ornaments. I cannot go into a store with ornaments and leave without a new one. It's bad I know! I have storage container, upon storage container of ornaments. Last year, I decided to try to make my own. I figured it would be a great tradition to start with my daughter. The ornaments turned out awesome, and this year, I worked out most of the kinks I encountered last year, so these are near perfect. The best part about making these is that with the exception of polyurethane, you probably have everything you need to make these. You can use any molds, paints, or glitters that you have. If you don't care whether or not these last years to come, you can even skip the polyurethane and use Elmer's glue.

Ingredients
1/2 cup of flour
1/2 cup of salt
1/4 cup of water
Glitter
Polyurethane clear coat/ a clear glue
Paint ( I use Martha Stewart brand)
Parchment paper

Directions:
Preheat your oven to 200F degrees Add all ingredients to a bowl, mix until the dough comes together, then knead the though until it's smooth and forms a ball. Place the dough on a sheet of foil or parchment paper. Using a rolling pin roll the dough out into an even layer, then use cookie cutters to cut out fun shapes. Move the parchment paper with the cut outs to a cookie sheet. Using a toothpick punch a small hole in the top of the ornament. You'll need the hole to string through ribbon or an ornament hook, so make sure it's big enough. Just stick the toothpick in and swirl around until you reach the thickness you need:

 Place the ornaments in the oven for 1-2 hours or until they are hard and dry. Once they are hardened remove from the oven and let them cool completely about 20 minutes.

Now the fun begins. Paint the ornaments on both sides with your choice of paint.


Once the paint dries (10-15mins) use a paint brush to apply a coat of polyurethane, immediately add glitter, and let dry for 5 minutes then repeat on the other side.


Once both sides are dry, you can string through your ribbon and you're done. You can save these for your own tree or give them away as gifts!


What are some of your favorite holiday traditions?

Follow and like me on Facebook: www.facebook.com/lazygirldinners


Sunday, December 1, 2013

Tamales


Now that Thanksgiving is over, you're probably trying to think of ways to use all of the leftovers. These tamales are a great way to rid your refrigerator of all that left over turkey. They're simple to make, but very delicious! If you're family ate all the turkey and you don't have any leftover, chicken works just as well for these tamales, in fact I usually make these with chicken.

Prep time: 5 minutes
Cook time: 30minutes
Total time: 35 minutes

Ingredients:
2 cups of cooked turkey or chicken shredded
1 cup corn meal
1/2 cup flour
1.5 teaspoons baking powder
1/2 teaspoon baking soda
3/4 cups of buttermilk ( substitute with 3 /4 cup of yogurt, or add 1 teaspoon of white vinegar to 3/4 cup of milk and let sit for 10 minutes before using)
1/4 teaspoon of sea salt
1 10 ounce can of  enchilada sauce
1 teaspoon of cumin
1.5 cups of creamed corn (see my recipe Here)
1 egg
1 cup of shredded cheese cheddar

Directions:
  1. Preheat oven to 400°. Combine 1/4 cup cheese, corn meal, egg, milk, sea salt, baking powder, baking soda, cumin, creamed corn and flour in a large bowl, stirring just until moist. Pour mixture into a baking dish coated with cooking spray. Bake at 400° for 15 minutes or until set. Pierce entire surface liberally with a fork; pour enchilada sauce over top. Top with turkey/chicken, and sprinkle with remaining 3/4 cup cheese. Bake at 400° for 15 minutes or until cheese melts. Remove from oven; let stand 5 minutes. Serve with sour cream, and salsa, and enjoy!

Friday, November 15, 2013

Homemade Granola Bars with Cranberries & Walnuts

Homemade Granola Fruit and Nut Bars

I don't know about you, but around this time of the year, I start to scale back on my weekday cooking in order to prepare my refrigerator for all of the things I am making for Thanksgiving. This year my self imposed scale back has nothing to do with needing room for my thanksgiving dishes, instead I'm scaling back in preparation for not being home. We are joining millions of travelers this year, we are going to visit my in-laws in Nevada for Thanksgiving. Since we'll be in the car for more than 3 hours, I decided to prepare some healthy snacks for us to munch on during the drive. This granola bar fits the bill perfectly. It has nuts, 3 kinds of fruit, and no refined sugar!

Prep time: 10 minutes
Cook time: 10 minutes
Total time: 20 minutes

Ingredients:
3/4 cup of maple syrup
2 tablespoons coconut oil or butter plus more for oiling the baking dish
2 cups old-fashioned rolled oats
1 1/3 cups chopped nuts I used walnuts
1/4 teaspoon sea salt
1 cup of dried fruit, I used a mixture of sour cherries, cranberries, and raisins
1/3 cup creamy almond or peanut butter
1/4 cup honey

Directions:
Preheat oven to 375 degrees. In a small saucepan, heat 1/4 cup of the maple syrup and the 2 tablespoons of coconut oil over low. Cook, stirring, until the oil melts. In a large bowl, combine oats, nuts, and pinch of salt. Drizzle maple mixture over oat mixture and stir to combine. Spread mixture evenly on a large rimmed baking sheet. Bake until golden brown, about 10 minutes. Place the oats in large bowl, add dried fruit and mix well. 

Lightly butter an 8-inch square baking dish. 

In saucepan, combine remaining 1/2 cup of maple syrup, almond butter, and honey over medium heat. Cook, stirring occasionally, until mixture comes to a boil. Drizzle over oat mixture and stir until combined; transfer  mixture to buttered baking dish. With a spatula, firmly press granola into dish. Refrigerate until firm, about 1 hour, then cut into bars or squares.


What are your plans for Thanksgiving?

Since I'll be visiting family next week, I am not sure I will have time to post. My daughter is turning 2 on Thanksgiving day, so when we return I'll be focused on celebrating this major milestone with her. Happy cooking, and a very Happy Thanksgiving to you all!


Wednesday, November 13, 2013

Corn Griddle Cakes with Turkey Sausage


Corn Griddle Cakes with Turkey Sausage


Do you ever have breakfast for dinner? I don't mean a bowl of cereal, I mean one of those Sunday morning, bacon, and eggs, with a side of cinnamon french toast kind of breakfast dinners! Aren't those the best? There is just something about eating breakfast foods at night that makes them all the more tasty! Cue these corn cakes! They have everything your love about breakfast mixed up in one fluffy delicious cake! Top them with warm maple syrup, and you get the picture!


Ingredients:
7 ounces of breakfast sausage, I used turkey sausage, casings removed
1.5 cups of fresh or frozen, thawed, corn kernels
1 cup of yellow cornmeal
1/2 cup of whole wheat flour
1 tablespoon of maple syrup, or sweetener of your choice
1 teaspoon of sea salt
1 teaspoon of black pepper
1/2 teaspoon of baking soda
1/4 teaspoon of baking powder
1 1/4 cup of butter milk, (can substitute plain yogurt, or add 1 tablespoon of vinegar or lemon juice to 1 1/4 cup of milk and let sit at least 10 minutes before adding it to the recipe)
2 large eggs
1/4 cup of green onions, can use brown onion as substitute.
Butter or ghee for cooking cakes.

Directions:
  • Cook sausage in a skillet over medium heat, breaking up into small pieces, until browned and cooked through, about 8 minutes. Using a slotted spoon, transfer sausage to a small bowl. Add corn to same skillet and cook over medium-high heat, stirring often, until browned, 5–6 minutes. Transfer corn to bowl with sausage and let cool. Wipe skillet clean and reserve.
  • Whisk cornmeal and the rest of the dry ingredients in a medium bowl. Whisk buttermilk, maple syrup and eggs together, and add to the dry ingredients, whisk until just combined. Fold in sausage, corn, and scallions.


  • Heat 1 Tbsp.  butter in a skillet; working in batches and adding butter as needed between batches, add batter to pan by tablespoonfuls. Cook until cakes are crisp and golden brown, 2–3 minutes. Turn cakes over and cook until browned, 1–2 minutes longer. Transfer cakes to paper towels to drain. Serve warm drizzled maple syrup yum!!!!

    What's your favorite breakfast for dinner meal?

    Follow and like me on Facebook: www.facebook.com/lazygirldinners 

Thursday, November 7, 2013

Indian Spiced Cabbage


Indian Spiced Cabbage

I love cabbage! I wish more people shared my love for it. I say that because, it's rarely on menu at restaurant's, and when I go to a friends house for dinner, it's rarely served. I don't quite understand that, because it's one of the most soul fulfilling veggies I know, in the same league as collard greens, and kale. I would happily eat it any day of the week! This is one of my favorite ways to prepare and eat cabbage! If you've ever been to an Indian restaurant then you've probably had this. It's so quick to make at home that it's almost an afterthought!


Prep time: 5 minutes
Cook time: 10 minutes
Total time: 15 minutes


Ingredients
1 small head do cabbage, chopped finely
1 teaspoon of black mustard seeds
1/2 teaspoon of ground turmeric
2 tablespoons of olive oil
Sea salt to taste


Directions:
In a cast iron skillet heat the oil along with the mustard seeds and turmeric, when the seeds begin to pop add in the the cabbage, cook for 10 minutes, allowing the cabbage to breakdown a bit. Add salt, toss, turn off fire, cover for 5 minutes, serve and enjoy!

What is your favorite cabbage recipe? 

Follow and like me on Facebook: www.facebook.com/lazygirldinners

Wednesday, November 6, 2013

Braised Chicken in Caper Sauce

Braised Chicken in Caper Sauce


I love capers, something about their salty brininess speaks to my taste buds. This dish is so simple, and easy to make. All the work is in remembering that you're cooking it, so that you don't burn down the house!


Prep time: 5 minutes
Cook time: 25 minutes
Total time: 30 minutes

Ingredients:
1lb of chicken ( I used skinless, boneless thighs, you can use bone in with skin, but just be aware it will extend the cooking time a bit.)
1/3 cups white wine vinegar
1.5 cups of organic chicken broth
1/3 cup of capers drained and rinsed
1/2 cup of fresh parsley
1 medium onion
Sea salt and black pepper to taste


Directions:
  • Heat 2 Tbsp. oil in a large heavy skillet over medium heat. Season the chicken with sea salt and black pepper, then add the chicken and brown on both sides. Add in the  onion; cook, stirring often, until softened. Add the parsley, and capers to skillet; cook for 1 minute. 


    Stir in broth and vinegar.  Reduce heat to medium-low; cover and simmer until meat is tender and  cooked through falling off the bone, about 20 minutes.
  • Transfer chicken to a large platter. Spoon sauce over chicken; garnish with parsley.

Wednesday, October 30, 2013

Caramel Popcorn with Almonds and Coconut Flakes


Coconut Caramel Popcorn


You didn't think that I would let Halloween pass without a giving you a recipe for a delectable goodie did you. Okay I almost did. It's been a busy week for me and I haven't had much time to devote toward taking pictures for the blog. But, I rallied, and summoned the rest of my energy to make this popcorn for you guys. I'm selfless what can I say:-). If you're looking for something chewy and soft, similar to a popcorn ball, then this is not the recipe for you. This recipe is more like the popcorn you'd find in those large tins people give you at Christmas, only this is 1000 times better.


Cook time: 30 minutes
Servings: 6 cups

Ingredients:
1/4 cup of Organic non GMO popcorn
3 Tablespoons of Coconut oil
1/4 cup plus 2 Tablespoons of Almonds
1 cup of Organic Sugar
4 Tablespoons of grassfed butter
3 Tablespoons of Organic Corn Syrup
1 teaspoon of Sea salt
1/4 cup of water
1/4 cup of coconut flakes (optional)

Spray a large baking sheet with coconut oil. Preheat the oven to 300 degrees F.
Add popcorn kernels and 3 Tbsp. coconut oil to a large, heavy-bottomed pot. Cover and cook over medium-low heat, shaking frequently. You will start hearing the corn pop after a few minutes—keep cooking until there’s a gap of about 5 seconds or more between pops. Immediately remove the pan from heat and pour the popcorn onto the prepared baking sheet. Add the almonds.
In a medium saucepan, combine the sugar, butter, corn syrup, and water. Place over medium heat and cook, without stirring, until the mixture is a light caramel color, about 10 minutes. Add the salt and stir to combine. Pour the caramel over the popcorn and almonds.


Place the baking sheet in the oven and cook until the caramel becomes thin and shiny, about 10 minutes. Remove the baking sheet from the oven and with a rubber spatula, fold the popcorn and Almond to coat with the caramel. When the caramel hardens, you'll know it because the popcorn mixture will be harder to move, return the baking sheet to the oven. Repeat this process as many times as necessary to completely coat the popcorn and Almonds with caramel and until the caramel has darkened to a dark amber color. I did this 5 times checking on the popcorn and tossing it, in 3 minute intervals. On my 4th turn and check I added the coconut flakes. I just sprinkled them in and gave good toss.

Once you remove the popcorn, let it cool for 2-3 minutes, then break up the popcorn into bite-size pieces. Let cool completely. It will last two weeks stored in an air-tight container.

What's your favorite Halloween treat? 

Follow and like me on Facebook: www.facebook.com/lazygirldinners 


Tuesday, October 29, 2013

Almond Milk--How to make Almond Milk

Raw Almond Milk

I have made a lot of nut milks, in my life, so I would be untrue to you if I didn't share at least one of  my recipes for them with you. We don't drink cows milk in my house, so nut milks have been a great alternative for us. I have tried my hand at making almost every milk alternative out there, from soy milk to hemp milk, I've tried it all. The truth is that once you make one, you can just substitute the seeds or the nuts, and you can make them all. The only exception to that rule is soy milk. For soy milk things get a bit more complicated, because it has to be heated to a certain temperature, for it to be safe for consumption. Luckily for us all someone invented the soy milk maker. I have one and I love it! The one I have also allows me to make raw nut milks. Personally I prefer to use it only for making soy milk. My blender does a better job at making the nut milks. For this recipe, you'll need a either a nut milk bag, which you can purchase here,or at Whole Foods, or cheese cloth. I've used both, and they both work well, but it becomes a bit expensive if you make nut milks a lot, to keep buying cheese cloth. The nut milk bags are reusable and more user friendly for this purpose.

Ingredients:
2 cups of raw almonds, soaked in a bowl of water overnight, then drained and rinsed
4 cups of water
1/2 teaspoon of vanilla extract (optional)
sweetener of choice (maple syrup, agave, 4 dates) (optional) to your taste.

Equipment:
1 cheese cloth folded  into 4 layers
Blender, or food processor

Directions:
Add raw almonds to a bowl and add enough water to cover them,  then refrigerate overnight.


 Drain and rinse the soaked Almonds and add them to the blender, along with the water, vanilla extract and sweetener if you're using them.

Cover the blender and blend on high for 2-4 minutes, depending on how high powered your blender is it could take more or less time. Blend until a milk forms and the almonds resemble a fine grain paste.


 Place your nut milk bag, or  folded cheese cloth over a large bowl, and pour the blended mixture into the bag or cheese cloth to strain it, squeezing until all the liquid is out and what is left behind is fairly dry almond pulp.


Place the milk in an air tight container like a mason jar, and refrigerate for up to 5 days. You can add cocoa powder and have chocolate almond milk, or leave it plain. Whatever you choose to do, this milk is delicious. You can use the left over almond pulp too! If you spread it out on a cookie sheet and place it in the oven on 175- 200F to dry it out, what you get is homemade almond meal. You can bake muffins, make pancakes, and a number of other delicious baked goods with it.

What is your favorite milk alternative? Have you ever made it at home?

Follow and like me on Facebook: www.facebook.com/lazygirldinners

Thursday, October 24, 2013

Smoked Paprika Lime and Garlic Chicken

Smoked Paprika Lime & Garlic Chicken

One of my favorite Mexican restaurants serves this super yummy and tangy chicken with paprika and lime. As always I love to try to recreate my favorite restaurant meals in my own kitchen. Let's face it, it's not always convenient to eat out, especially with a toddler who doesn't like to sit for an hour with her hands in her lap. This chicken dish can be made with just parts of the chicken, you don't have to use a whole chicken. I used two kinds of paprika, but if you only have one kind use that.


Prep Time: 5 minutes
Cook  Time: 45 minutes
Total time: 50 minutes

Ingredients
1 Tablespoon of paprika
1 Tablespoon of smoked paprika
2 large cloves of garlic grated or pasted
Sea salt to taste
Black pepper to taste
The juice of two limes
Handful of cilantro
Two tablespoons of oil

Directions:
In a bowl mix the garlic, paprika and oil into a paste, then rub it into the skin of the chicken. Season the chicken generously with salt and pepper. Place on a baking sheet and bake at 425F degrees  for 45 minutes to an hour until the bird is cooked through. Remove bird from the oven, pour on the lime juice and sprinkle with cilantro. Serve and enjoy! It's tangy with a kick from the smoked paprika!


Tuesday, October 22, 2013

Turkey Chili


Turkey Chili

Chili is another one of my favorite winter weather comfort foods. On a cold blistery day, nothing is as warming as a hot bowl of chili. As a private chef my chili was a favorite amongst my clients. I made so many variations of this recipe and everyone is fantastic. If you want to use something other than ground turkey in this go right ahead. I've done this with ground chicken, beef, venison, and even textured vegetable protein(TVP) for my vegetarian friends, all  variations work for this. If you are using TVP 1 cup will do in this recipe. I add it in at the point where I add the meat in the recipe.  I'm not a big fan of TVP because I would rather use something not so processed. But I will say that I have served TVP chili to unsuspecting friends and family and they didn't realize that it was not meat! It actually tastes like ground meat.

Prep Time: 5 minutes
Cook Time: 25 minutes
Total time: 30 minutes

Ingredients:
1 15 ounce can of organic kidney beans, drained and rinsed
1 15 ounce can of organic pinto beans, drained and rinsed
3 cloves of garlic, minced
1 15 ounce can of organic tomato sauce
1 pound of ground turkey
1 cup of water
3 tablespoons of olive oil
4 tablespoons of ground cumin
Sea salt to taste
Black pepper to taste

Directions:
Heat the oil in a pan, add onion and garlic and cook until onions are translucent. Add in cumin, and cook for 2 minutes. Add in ground meat, season with sea salt and black pepper. Cook until meat is brown. Add in tomato sauce, water, and beans. Stir well, cover and cook for 10-15 minutes,  it's done when the mixture thickens a bit. Serve with a dollop of sour cream, and enjoy.


Thursday, October 17, 2013

Peruvian chicken soup


Peruvian Chicken Soup

As a little girl I could count on my mom offering me 3 things when I was sick, saltines, ginger ale, and chicken noodle soup. Chicken soup is every moms go to meal when there is a sick little one in the house. It's the perfect meal for almost any ailment, soothing for soar throats and upset tummies.  It is like a bowl of love, with the ability to heal anyone, one spoonful at a time. This particular recipe is my take on a chicken soup I have at my favorite Peruvian restaurant. It is everything that most people love about chicken soup, but the fresh cilantro brightens it up a bit. I use my pressure cooker to cut out spending hours in the kitchen making this. I am able to get a ton of flavor in this soup in half the time it takes to make this without the pressure cooker.

Prep time: 5 minutes
Cook time: 35 minutes
Total time: 40 minutes

Ingredients:
1lbs of chicken legs (I prefer making soup with the bones in, it lends more flavor to this)
8-10 cups of water
7 celery ribs chopped
3 medium potatoes cubed
3 cloves of garlic minced
1 medium onion chopped
2 cups of fresh or defrosted frozen spinach
Sea salt to taste
Black pepper to taste
3 tablespoons of olive oil
Handful of  cilantro

Directions:
Season the chicken with sea salt and black pepper. Heat the oil in the pressure cooker. Add the chicken and brown on both sides.


Add in the onion and garlic, toss, and cook for 3 minutes. Add the water, make sure the chicken is fully covered with water. Bring to a boil, close and lock the pressure cooker according to the manufacturers instructions. Cook for 30 minutes undisturbed. Turn off the fire. Depressurize your pressure cooker according to the manufacturers instructions. Remove the bones and any skin on the chicken. This shouldn't be hard to do, the meat should fall off the bone at this point. Turn on the fire, Add in the potatoes, and celery, close and lock the pressure cooker according to the manufacturers instructions. Cook for another 7 minutes undisturbed. Turn off the fire and depressurize the pressure cooker according to the manufacturers instructions. Remove the lid, add in the spinach and cilantro, mix well, then serve. You can add noodles to this if you'd like. You can also make this without the pressure cooker, just cook the chicken for 45 minutes to an hour, then add the potatoes and celery and cook for another 15-20 minutes, before adding in the cilantro and spinach.

What did your mom give you to comfort you when you were sick?

Follow and like me on Facebook: www.facebook.com/lazygirldinners


Tuesday, October 15, 2013

No cream Creamed Corn

Creamed Corn

One of my favorite things in the world is creamed corn. I remember at 5 years-old requesting it as a meal. My mom always bought the canned Del Monte brand, back then you could buy 4 cans for $1. While other kids were begging for cookies and their favorite brand of cereal, I was begging my mom for cans of creamed corn. I, of course, don't eat the canned version any more, the preservatives alone keep me away from that stuff. Not to mention that it is extremely difficult now a days to find organic corn, let alone corn that is not genetically modified. Fortunately, I'm lucky enough to have a local farm in my area, where I can buy organic and non GMO fresh corn. If you have never tried making fresh creamed corn without the cream, then you're in for a treat! It's just as delicious as creamed corn with cream. The key to making this creamed corn, is a shallow cut.

Prep time: 5 minutes
cook time: 12 minutes
Total time: 15 minutes

Ingredients
4 raw fresh corn cobs husks removed
1 tablespoon of butter (optional)
1/4 cup of water

Directions:
Place the corn inside of a sauce pan, it helps to cut the bottom end of the corn so that you have a flat surface to work with. Cut down the sides of the corn, again the key here is to cut shallow, you really only want to cut the tops of the corn kernels. Once you have cut down all sides, slide the knife back up the cob in the opposite direction.


Be careful of splatter here, it can get messy. Continue to run the knife back up the cob until the cob is dry and all the corn and milk has been removed.

Place the pan over medium low heat, add the butter and allow it to cook for 3 minutes.


Add the water, note if your corn had a lot of moisture you do not need to add all of the water, add as much as you'd like, lower the heat to simmer, and cook covered for another 7-10minutes. Serve and enjoy!

What was your favorite childhood food or snack?

Follow and like me on Facebook: www.facebook.com/lazygirldinners

Friday, October 11, 2013

Thai style ground chicken and green beans


Whenever we go out for Thai food my husband orders one of two things, ginger chicken or, green bean chicken. He absolutely loves these two dishes, and rarely ventures out to try anything else on the menu-- unless venturing out is tantamount to him taking a few bites of my dish. I love ginger chicken, but I have yet to ever try this green bean dish that he loves so dearly. However, the ever ambitious girl that I am in the kitchen, decided to try to recreate this dish for him at home the other night. I can not say whether or not I hit the mark on what he has in the restaurant, but this dish definitely hit the mark for me! I loved it! My husband did too. He said "Mmmm...this is delicious" after every bite. You can substitute any ground meat that you choose in this dish.

Prep Time: 10 minutes
Cook Time: 15 minute
Total Time: 25 minutes

Ingredients:
1 lbs of ground chicken
2 cups of chopped fresh green beans
1/2 cups of green onion chopped
2.5 Tablespoons of low sodium soy sauce
1/2 cup of cilantro chopped
1 teaspoon of grated ginger
2 cloves of garlic chopped
1 tablespoon of flour optional
1-2 teaspoons of chili pepper flakes
3 tablespoons of olive oil
1/2 cup of water
Sea salt to taste.

Directions:
Heat oil in a skillet. Add ginger, onion, and garlic, and saute for 1 minute, stirring so that the ginger and garlic don't burn. Add in the ground meat, cook until browned. Add in the soy sauce, toss, then add in the flour if using. Toss again, add in the green beans, and water, cover and cook for 5-7 minutes, or until the green beans are fork tender. Remove from heat, add cilantro, serve over brown rice, and enjoy!

What restaurant meals have you had success recreating at home?

Monday, October 7, 2013

Strawberry ice cream with Chocolate Balsamic Fudge Sauce


Despite the fact that almanac says that Fall season has officially arrived, the weather here in Southern California continues to mimic Summer weather with temperatures in the 80's. I decided to make ice cream, and since my daughter loves everything that involves strawberries, I decided to make strawberry ice cream. Since you could google any number of strawberry ice cream recipes, I wanted to make my recipe original and a little bit more sophisticated, so I came up with this balsamic chocolate sauce.  I absolutely love balsamic cream sauce, especially drizzled over strawberries. Talk about an easy dessert!  It absolutely doesn't get better and easier than pre made balsamic creamdrizzled over fresh strawberries! If you don't have a bottle of balsamic cream in your pantry definitely run out and get one, but first try this fudge sauce. The first time I tried to make this sauce, I burned the vinegar, so be forewarned that this isn't one of those recipes, that you can put on the stove and walk away from. You really have to watch the vinegar, because it can go from perfectly fine to burnt in a matter of seconds. With that said this is pretty easy to make once you get past reducing the balsamic vinegar. I decided to use Organic corn syrup in this recipe. It's not one of my favorite things to use, but I didn't want a sauce that would get hard once it touched the cold ice cream. The corn syrup prevents it from doing so. If you want a crackling hard sauce then by all means leave out the corn syrup. The corn syrup that I is used is Organic, and it is not High Fructose corn syrup--big difference, so make sure you don't get the latter, read the bottle!

Prep Time: 1 minute
Cook Time: 7-10 minutes
Total time: 11 minutes

Ingredients for Chocolate Balsamic Fudge sauce:
3 ounces of bittersweet dark chocolate (I used 60%)
1/2 cup of a good balsamic vinegar
2.5 Tablespoons of maple syrup or a sweetener of your choice
1 Tablespoon of butter
2 Tablespoons of organic corn syrup

Ingredients for ice cream:
1.5 cups of organic milk
2 cups of organic cream
1 teaspoon of vanilla extract
1cup of chopped strawberries
3/4 cup of maple syrup or sweetener of your choice
5 egg yolks

Directions for sauce: 
Add the balsamic vinegar to a sauce pan, and bring to a boil. Once boiling lower the heat to simmer and cook until the vinegar thickens and reduces by half. Turn off the fire, add the chocolate corn syrup and butter and whisk until smooth. Serve with the strawberry ice cream, or just some fresh berries.

Directions for ice cream:
 In a sauce pan heat milk, vanilla extract, and 1 cup of cream and maple syrup to just below a boil-- do not let boil! Turn off the fire, slowly add 1 cup of the hot mixture to the egg yolks whisking so that the eggs don't scramble. Slowly whisk the egg mixture into the hot mixture still in the pan. Immediately add the remaining cream to the pan and turn the fire on to medium low. Stir the mixture
until it thickens and coats the back of the spoon. Turn off the fire, and pour the hot cream into a bowl to cool. Allow the mixture to cool to room temperature, then follow the directions for making ice cream according to your ice cream makers manufacturer.

Friday, October 4, 2013

Green beans with turmeric and mustard seeds


One of my husbands favorite veggies is green beans. I could serve him green beans every day for a year, and he would never get tired of them. The problem is that I would get tired of green beans, and I'd get tired very quickly.   This recipe is one of my favorite ways to eat green beans. It's simple, it's quick and very delicious!


Prep time: 5 minutes
Cook time: 15minutes
Total time: 20 minutes

Ingredients
1 lbs of fresh green beans, you can use frozen but make sure they're defrosted
1 teaspoon of black mustard seeds
1/2 teaspoon of ground turmeric
4 tablespoon of olive oil
Sea salt to taste


Directions:
In a cast iron skillet heat the oil along with the mustard seeds and turmeric, when the seeds begin to pop add in the green beans, cook for 10-15 minutes, allowing the beans to brown some and loose most of the water in them. Add salt toss turn off fire, serve and enjoy!

What is your favorite green bean recipe? Follow and like me on Facebook: www.facebook.com/lazygirldinners

Wednesday, October 2, 2013

Salmon Sorrentino

Salmon Sorrentino

This week has been so hectic on the work front for me, so I apologize for not posting a recipe sooner, but sometimes life really does get in the way of me posting. One of my favorite types of restaurants are those hidden gems nestled within a quaint neighborhood. For some reason the city that I live in is scattered with exactly those types of restaurants. Literally there is a home lined street and at the end of that street is a restaurant. The locals here love these little gems and know exactly where they are. So there is little fear that any of these restaurants will actually ever go out of business. We have this amazing little Italian Cafe near our house, and one of my favorite things on the menu there is Salmon Sorentino. All the elements in the dish speak to me. I love the saltiness of the kalmata olives, and the brininess of the capers, they all work together perfectly in the cream sauce. This recipe is my version of the restaurant version.

Prep time: 5 minutes
Cook time: 15 minutes
Total time: 20 minutes

Ingredients:
1lb of salmon
1 cup of heavy cream
1 clove of garlic chopped
3 tablespoons of capers drained
1/2 cup of kalmata olives
5 basil leaves chopped
2 tablespoons of olive oil


Directions:  Add oil and garlic to a frying pan and cook until you can smell the garlic 15-20 seconds. Add in cream, salmon, olives, and capers, cook for 7-10 minutes or until salmon is cooked through. Add in basil, turn off fire and enjoy on a bed of pasta, or spinach, or with some steamed veggies.  If you love this, you will probably love my recipe for Chicken with Lemon Caper Cream Sauce

Follow and like me on Facebook: www.facebook.com/lazygirldinners


Thursday, September 26, 2013

Chocolate Pots de Creme

Chocolate Pots de Creme

In keeping with my theme this week of putting an adult twist on popular foods loved by kids, I decided to make a pudding that you will love as much as your little ones do. Warning, do not make a double batch of these ( it makes 4-5 servings), because you will eat them all. Moderation is key! I had to fight my husband and my daughter for my own serving, that is how amazing these are! But try not to eat all 5 servings, at least not in 1 sitting.

Prep time: 5 minutes
Cook rime: 5 minutes
Total time: 10 minutes

Ingredients:
4 ounces of 60% bittersweet chocolate--chopped
3 egg yolks
1 cup of heavy cream
1 cup of milk
3 tablespoons of maple syrup or sweetener of your choice
1/2 teaspoon of vanilla extract
1/8 teaspoon sea salt

Directions:
Place the chocolate in a blender. Whisk the milk, 1 cup cream, egg yolks, granulated sugar and salt in a heavy-bottomed medium saucepan over medium heat. Cook, stirring constantly, until the mixture is thick enough to coat the spoon and almost boiling, 5 to 6 minutes.  Pour the hot mixture over the chocolate in the blender. Put the top on the blender and blend until combined and smooth, stopping to scrape down the sides of the blender as needed. Divide the chocolate mixture among ramekins or small cups. Refrigerate until set, about 2 hours. Enjoy!


Monday, September 23, 2013

Artisan Prosciutto Tomato and Basil Pizza


Okay I admit it, I'm lazy and don't feel like cooking most days. But if I gave into my impulses to not cook, I'd likely starve. When I'm feeling especially lazy I take out a pre made pizza dough and  the most basic jar of tomato sauce I can find and make pizza. I love pizza and I feel like it gets a bad wrap because of all the frozen pizzas out there. Rightfully so too. Frozen pizzas lack the flavor of fresh ones, and no matter what you add to them, they just cannot compete with a fresh hot  homemade pizza. Pizza also doesn't have to be just for kids, with the right toppings you can take a plain pizza dough and turn it into something that is sophisticated and grown up without too much effort. This recipe is a great example of that. Start with a great Proscuitto, I get mine at my Whole Foods deli. They slice it fresh, on the spot. The fresh basil in this is also a must, dried just doesn't bring the flavor you need for this, so don't take the shortcut unless you absolutely have to.


Prep Time: 3 minutes
Cook Time: 12 minutes
Total Time: 15 minutes

Ingredients:
1 whole wheat Pizza dough,
1/2 cup of organic tomato sauce
Proscuitto 1/4 of a pound
1/2  cup of fresh basil leaves
1 cup mozzarella cheese grated
1 tomato sliced

Directions:
Preheat your oven according to the instructions on your pizza dough. Dust a working surface with flour, and roll out your pizza dough. Try to get an even thickness, shape doesn't really matter. Top with a generous amount of tomato sauce, then add cheese, tomato slices, basil and lastly the Proscuitto .


Put it in the oven on either a pizza stone or a foil lined cookie sheet (make sure you spray it with a little oil) until the dough is golden brown, about 10-12 minutes. Slice and enjoy!


What are some of your favorite pizza toppings?  Follow and like me on Facebook: www.facebook.com/lazygirldinners 

Wednesday, September 18, 2013

Amara's Indian Fish Fry

Amara's Fish fry

I've had many Indian style fish fry's in my life, but this particular one carries special meaning for me, because it is a recipe that was taught to me by my mother-in-law. Like many mother-in-law and daughter-in-law relationships ours didn't begin easy. But our relationship turned into a relationship filled with deep love, admiration, and mutual respect. Our relationship was hard in the beginning because my mother-in-law had such a deep love for her son. It was hard for her to take a second seat to me, but the truth is she didn't have to, my husbands heart is, and was, big enough for both of us to be in it. You could see the mutual love they had for each other upon every meeting. Every time my husband entered his moms presence, she would beam with joy! The whole room would light up from her smile when she saw him. I've never met a man who was as close to his mother as my husband was to his mom. He's a better man, a better husband, and a better father because of that love. I will always be thankful to her for that. One of the things I loved doing most with my mother-in-law was cooking. We didn't cook together that often, because she wanted to cook for me and my husband not with us. She especially loved cooking for my husband, and he loved eating her food. He would often call me to come over and have dinner with them, while we were dating, and when I arrived there would be this massive meal just for the 3 of us. This recipe is simple in every way, but it's delicious, and more importantly dear to my heart.

Prep Time: 5 minutes
Cook Time: 10 minutes
Total Time: 15 minutes
Servings: 2

Ingredients:
1 lb of white cod, cut and cubed
2-3 teaspoons of ground turmeric
3 tablespoons of safflower oil for frying
Sea salt to taste
1 tablespoon of chopped cilantro
4-6 Lemon wedges

Directions:
Heat the oil in a cast iron pan. Season the cod with sea salt, then lightly dust all sides of the cod with the turmeric, and place into the hot oil.

Cook for 3-4 minutes on both sides, remove from oil, and serve with lemon wedges and cilantro, enjoy!

Monday, September 16, 2013

Ground chicken Larb--the ultimate lettuce cups


One of my favorite Thai meals, besides Crab fried rice, is Larb! It's light, refreshing, and so flavorful. It literally makes my taste buds do a happy dance with every bite. This recipe is a great way to use any ground meat that you have, but it works especially well, with chicken and pork. If you have never tried Larb before, then your taste buds are in for a real treat!

Prep time: 5 minutes
Cook time: 10 minutes
Total time: 15 minutes

Servings 8-10 lettuce cups

Ingredients
1lb of ground chicken
1/2 cup of green onion chopped
1 clove of garlic chopped
1/2-3/4 cup of fresh mint leaves
1/3 cup of chopped red onions
1/4 cup of chopped cilantro
Sea salt to taste
1 cup of shredded cabbage
1/2-1 teaspoon of chili pepper flakes or more if you like
1 head of romaine lettuce, or butter lettuce, leaves removed and cleaned to use as cups

Larb Dressing:
4 Tablespoons of fish sauce( available at any store in the ethnic food isle)
1/3 cup of fresh lime juice
2 cloves of garlic chopped

Directions:
In a small bowl add the ingredients for the dressing, mix well and set aside.
Season and brown the ground chicken with the red onions and garlic. Once the meat is browned pour out any excess liquid, then add in the green onions, half of the mint, chili pepper flakes, and the dressing. Cook for 1-2 minutes then turn off the heat.


Spoon the meat mixture into the lettuce cups, top with remaining fresh mint, shredded cabbage, cilantro leaves and enjoy!

Tuesday, September 10, 2013

Crab Taco's with yogurt lime cilantro sauce


How lovely would it be to come home and have a dinner that you don't have to cook? Well my friends this is your lucky day! This a recipe that doesn't involve any cooking. It has been so hot here that the last thing I want to do is to turn on my stove to cook. So this week when I went shopping I concocted a meal plan that would allow me to do as little cooking as possible. My meal plan thus far has been quite genius not to mention delicious! I can't wait to share some of the recipes with you, but first these no cook taco's.

Prep Time: 15 minutes
Cook Time: 0 minutes
Total Time: 15 minutes

Ingredients Taco filling
10 ounces of fresh lump crab meat steamed
1/2 teaspoon of cumin
1-2 teaspoons of Lime juice
Sea salt to taste
1/2 cup of Shredded carrots
1/2 cup of shredded cabbage
1/2 cup of diced tomatoes
1/3 cup of chopped fresh cilantro

Ingredients for lime cilantro yogurt sauce
1 cup of Greek yogurt
Juice of half a lime
1 clove of garlic chopped
Sea salt to taste
2 tablespoons of chopped cilantro

Ingredients for pickled red onion
1 red onion sliced thinly
1/2 cup of apple cider vinegar
1 cup of water
1 tablespoon of sugar
1.5 teaspoons of kosher salt

Directions yogurt sauce:
In a small bowl add all the ingredients for the yogurt sauce, mix well and set aside.

Directions for pickled onion:
In a medium bowl whisk the salt and sugar into 1 cup of water, until the salt and sugar dissolves, add in the vinegar and onions and let sit at room temperature for at least 1 hour. Hint you can do this the night before you need to use the onions.

Directions for Taco:
In a medium bowl, mix the cumin and lime juice with the crab meat. Warm corn tortillas and add the crab, top with cabbage, tomato, carrot, pickled onion, cilantro, and some of the yogurt lime cilantro sauce, and enjoy!  How easy was that?

What is your favorite no cook meal?

Follow me on Facebook: www.facebook.com/lazygirldinners

Sunday, September 8, 2013

Nut and fruit snack bars


I love Kind bars, but they can get a bit pricey at almost $2 a pop. I know how easy these type of bars can be to make, so I decided to make my own. The only real work involved is mixing the ingredients. The great thing about these is that you can use your favorite nuts and dried fruits. I happened to have some Hawali dates that I got from the farmers market, so I added those, and some raisins. You can add whatever you have, and make these your own. These are a great snack, I usually have one for breakfast, or a afternoon snack. You can't really go wrong with these since they are pure protein and fiber.

Prep time: 5 minutes
Cook time: 10 minutes
Total time: 15 minutes

Ingredients:
1 cup of Organic almonds chopped
1/2 cup of organic sunflower seeds
8-10 dates chopped
3 tablespoons of organic raisins chopped
3 tablespoons of unsweetened coconut flakes
1/3 cup of brown rice syrup, or honey

Directions:
Add all ingredients to a medium size bowl and mix well:

Spread mixture out evenly onto a lightly greased foil lined 9 inch pan:

 Bake on 325F for 10 minutes. Remove from oven and let sit for 10 minutes, just long enough for it to cool, but not completely cool. After ten minutes, cut into bars, and let cool completely before eating. If you use honey after cooling place in the refrigerator, so that the bars set completely.