Wednesday, July 30, 2014

Lemony Chicken Orzo Soup

Lemon Orzo Chicken Soup

Last week I was out with my husband running errands and we were trying to decide on lunch.  He wanted something filling, and I wanted a really great salad.  As easy as salads are to make and obtain, very few match the salads that I make myself.  I knew it would not be easy to find a place to eat in which we would both leave happy.  After verbally running through a list of eateries, my husband saying no to some, me saying no to others, we both compromised and settled on Panera. I ordered my salad, and after some time mulling over the menu, my husband ordered a bowl of lemon orzo soup.  The ceasar salad  I ordered, was not as great as the  Ceasar salad I make at home, but I was expecting that. However, my husband really enjoyed his soup.  I didn't taste the soup, but it looked really good, and since he enjoyed it, I decided I would try to make it at home for him.  He is such a big fan of soups in general. When I make soup, which is not often, he rants and raves, because to him, soups are a big treat. The key to any great soup is the broth.  I made some broth with the leftover carcass of a roast chicken that we had for dinner.  I will share that recipe and two other ways to make chicken broth with you later.  For this soup use the best organic chicken broth that you can find.  I used a gluten free orzo for this, you can leave it out for a paleo version of this soup, or use a regular pasta orzo for an authentic Lemon chicken orzo soup.
Pin It!
Pin It!


Prep time: 5 minutes
Cook time: 45 minutes

Ingredients:
1lb boneless skinless chicken thighs or 4 cups of pre-cooked chicken cubed
1 cup of diced carrots (3 medium carrots)
1 cup of diced celery (4 celery stalks)
1 large onion diced
2 large cloves of garlic (finely chopped)
1 cup of spinach finely chopped
2-3 tablespoons of finely chopped cilantro
3-4 Tablespoons of Lemon juice less or more depending on your taste
6 cups of organic chicken broth
1/2 cup of orzo
Sea salt and black pepper to taste
2 tablespoon of olive oil

Directions: Season chicken with sea salt and black pepper and set aside. In a stock pot heat oil, add onion, carrot, celery and garlic. Saute until onions turn translucent, add chicken stock, and chicken. Bring to a boil, reduce heat and simmer until chicken is cooked through, about 15-20 minutes.


  Add in orzo and cook until orzo is al dente (10 minutes), then stir in spinach, cilantro and lemon juice, turn off fire, serve and enjoy!


Tuesday, July 29, 2014

Strawberry Creamsicles


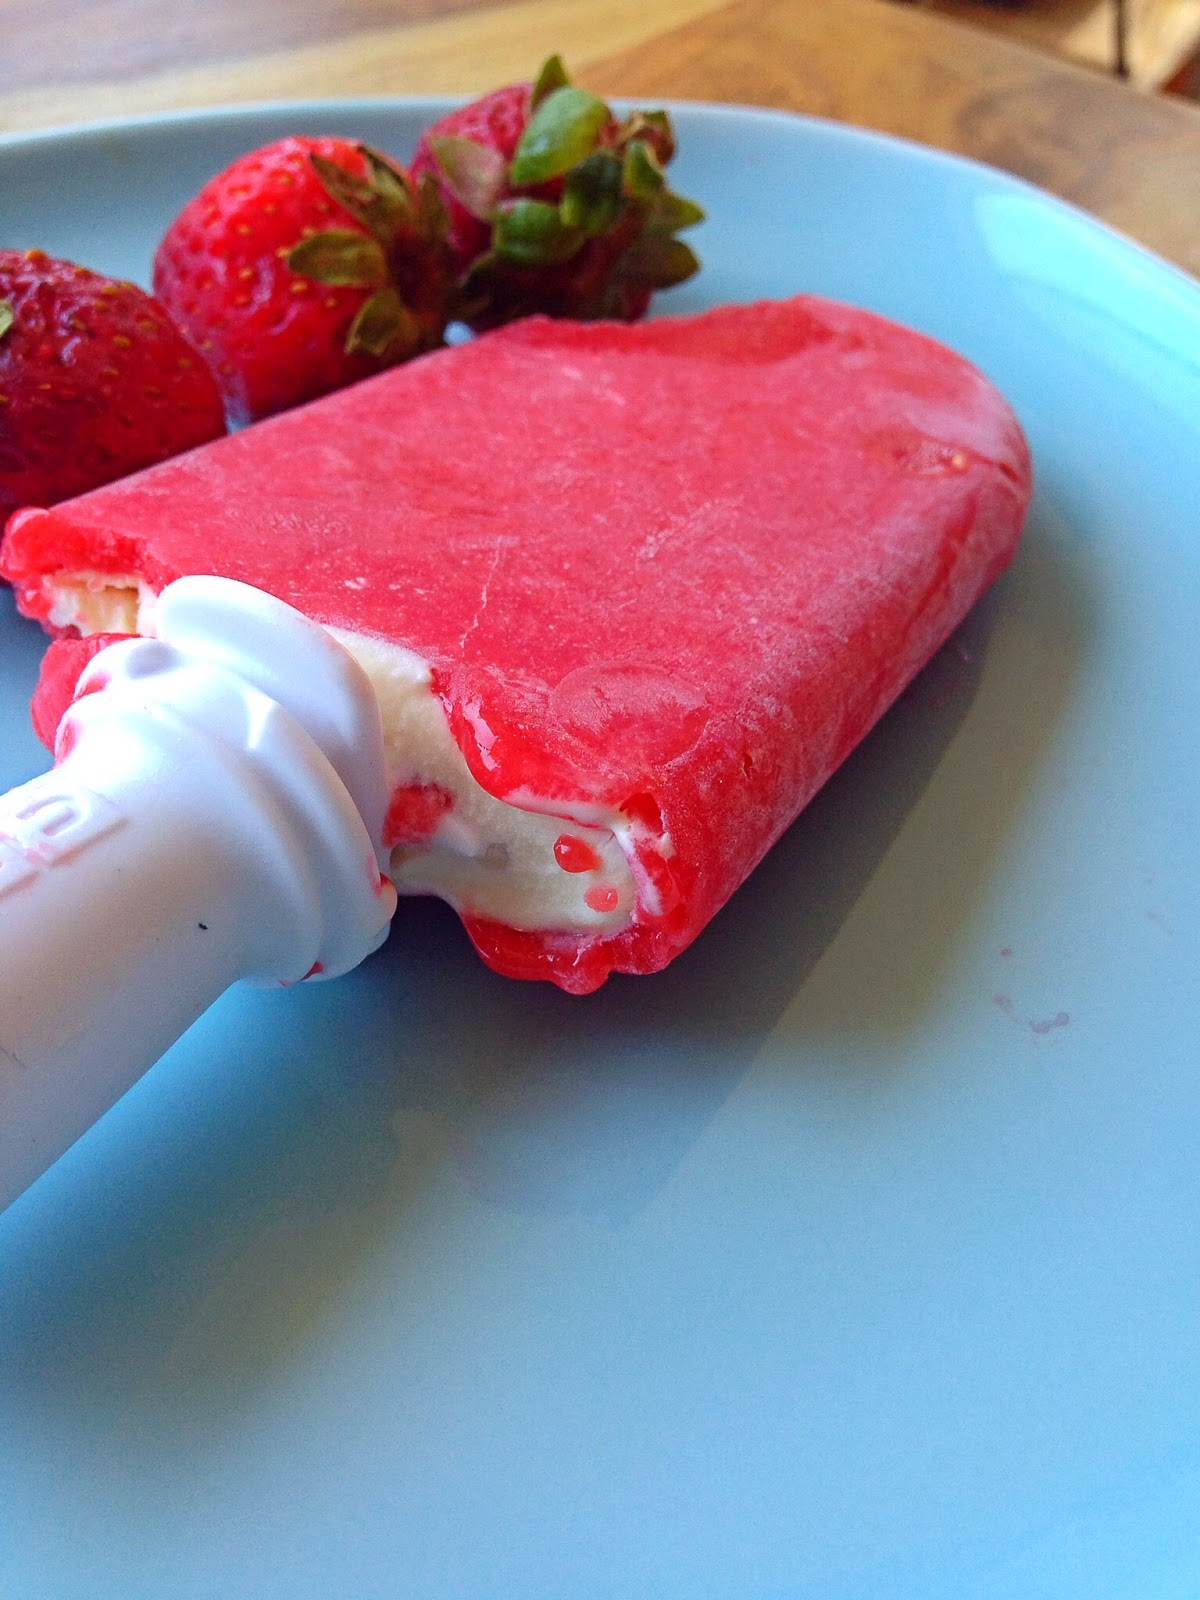
Strawberries and cream, what's not to love about this combination?  When I was making Orange Creamsicles the other day I decided I'd make a few strawberry cream bars as well.  My daughter loves strawberries, and she loves ice cream, so I thought since it's so hot out lately I'd give her the best of both worlds.  The verdict? She loved this creamsicle of course--who wouldn't?  If you are doing this, my suggestion is to use very ripe, and very sweet berries, otherwise you'll have to add sugar in some form to make these sweet.
Pin It!
Pin It!


Prep time: 5 minutes
Makes 2-3 strawberry creamsicles

Ingredients:
1 cup of pureed organic strawberries
1 cup of heavy cream or coconut cream
1/2 teaspoon of vanilla extract
2 tablespoons of maple syrup

Directions: Add the cream, vanilla extract and maple syrup to a cup, mix well and set aside.  If using classic pop molds, place all ingredients in a blender and blend until well combined.  Divide mixture evenly among molds and freeze for 6-8 hours or until frozen solid.
If you are using the Zoku Quick pop maker, Pour the strawberry juice into the molds and allow to set for 2-3 minutes.  At the 2 minute mark siphon out the remaining unfrozen juice with a straw or a unused infant aspirator--I purchased one just for this.  Zoku sells a tool kit for $20 which includes a siphon tool, but the aspirator is $3 and does the job equally as well.  After you have removed all of the juice, pour cream into the molds, and allow to set for another 4-5 minutes, then follow the directions for removing the pops.  If you aren't going to eat the pops right away, you can store them in sandwhich size zip lock bags and place them in the freezer until you're ready to eat them.  These never last longer than a few hours in our house, so I can't say how long you could store them that way.  If you like these, you'll probably love my Orange creamsicle recipe too.


Wednesday, July 23, 2014

Orange Creamsicles


How to make Homemade Orange Creamsicles--How to make Half and Half bars
Pin It!
Pin It!


Another favorite frozen treat of mine when I was a little girl was orange creamsicles. We used to call them half and half bars, because that's exactly what they were, half juice pop and half cream center.  Whatever you call them, I think we can all agree that they are super delicious. Unfortunately creamsicles are not made the way they used to be made, they have a ton of ingredients in the boxed versions in the store, none of which contain real juice or cream. This recipe takes care of that.  I used freshly squeezed orange juice for these, but if you can find some fresh juice in the store that does not have added sugar and preservatives, then go for it.  If you decide to squeeze the juice yourself, just make sure that the oranges that you're using are very sweet, that way you don't have to add sugar to sweeten the juice.  If heavy cream isn't your thing (my vegan friends) don't fret, I've done these with coconut cream, and they are just as yummy if not more.   Lastly I used the Zoku Quick Pop Maker to make these, it's the only way to get a true half and half bar, with that creamy center filling, but if you don't want to spend the $25 (for a single), $38( for the duo), or $50 (for the triple) pop maker, you can still make these, but you'll have to blend the mixture, or just pour half juice and half cream into regular molds, ( I used Zoku Classic pop molds), you'll get a verticle half and half bar--still delicious.

Prep time: 10 minutes
Ingredients:
1 cup of freshly squeezed organic orange juice
1 cup of heavy cream or coconut cream
1/2 teaspoon of vanilla extract
2 tablespoons of maple syrup
Directions: Add the cream, vanilla extract and maple syrup to a cup, mix well and set aside.  If using classic pop molds, place all ingredients in a blender and blend until well combined.  Divide mixture evenly among molds and freeze for 6-8 hours or until frozen solid.
If you are using the Quick pop maker, Pour the orange juice into the molds and allow to set for 2-3 minutes.  At the 3 minute mark siphon out the remaining unfrozen juice with a straw or a unused infant aspirator--I purchased one just for this.  Zoku sells a tool kit for $20 which includes a siphon tool, but the aspirator is $3 and does the job equally as well.  After you have removed all of the juice, pour cream into the molds, and allow to set for another 4-5 minutes, then follow the directions for removing the pops. 


If you aren't going to eat the pops right away, you can store them in sandwhich size zip lock bags and place them in the freezer until you're ready to eat them.  These never last longer than a few hours in our house, so I can't say how long you could store them that way. 

 These are the Orange and Coconut Creamsicles that I made using the classic Zoku popsicle molds


Tuesday, July 22, 2014

Fudgesicles

Coconut Cream Fudgesicles

One of my favorite treats as a kid was a fudge pop. Back then they were sold as the low-fat, low-calorie version of ice cream.   Not that any of that mattered to me , I was 7!  I just really enjoyed the creamy chocolate treat!  Back then fudgesicles contained 3 or 4 key ingredients, Milk, chocolate, and cream.  That is a far cry from the ingredient list we see today on a fudgepop box.  When formulating this recipe, I wanted to stick to what made fudgesicles great when I was little, a few ingredients and not much else.  I switched out the milk for coconut milk, and added some coconut cream for richness, the result----Heaven--creamy fudge heaven!  I didn't add any extra sugar to this, for my palate it didn't need it.  My daughter and husband both loved these without any added sugar as well.  However, if you like fudgesicles on the sweeter side, add 2 tablespoons of maple syrup to the mix before freezing.  Although I used coconut milk and cream as a base for these, you can use milk and cream, or just use milk.   You can also use my recipe for Chocolate Tofu Pudding just freeze and enjoy!
Pin It!
Pin It!


Prep time: 10 minutes
Cook time: 5 minutes
Freeze time: 4-6 hours

Makes 4-6 pops

Ingredients:
2 ounces of semi-sweet chocolate chopped
1 tablespoons of unsweetened  cocoa powder
1 teaspoon of vanilla extract
1 cup of coconut milk
3/4 cup of coconut cream

Special equipment:
Popsicle molds

Directions: Add the milk, cream and cocoa powder to a sauce pan over medium heat, and whisk until well combined and mixture is just below a simmer--DO NOT BOIL!!! Remove from heat.  Add in chopped chocolate, and whisk until all the chocolate is melted, stir in the vanilla extract.  


Divide the mixture evenly among the popsicle molds,
 Freeze for 4-6 hours or until solidly frozen. Follow your popsicle molds instructions for removing pops from molds and enjoy!


Wednesday, July 16, 2014

Grilled Cumin Spiced Chicken Kabobs

Grilled Cumin Spiced Chicken Kabobs

I made these chicken kabobs over the fourth of July weekend, and everyone loved them.  They were super easy to make and didn't require a lot of time or effort to marinate. They're a perfect quick fix dinner item, so I'm giving you the recipe.  My husband is still raving about these.  It just goes to show that a great meal doesn't require a lot of time or ingredients.

Prep time:10 minutes
Cook time:15 minutes
Total time: 25 minutes

Ingredients:
1lb of boneless skinless organic chicken thighs--cubed
1 teaspoon of cumin
1 teaspoon of paprika
2 cloves of garlic, minced
1/4 cup of flat leaf parsley, finely chopped
Sea salt to taste

Directions:  In a large bowl mix the ingredients for the chicken kabobs together,


Then place the chicken on skewers:


Grill chicken on a hot grill until cooked through, about 10-15 minutes 


 Serve and enjoy!

Tuesday, July 15, 2014

Chicken Enchilada's with Salsa Verde

Easy Chicken Enchiladas with Salsa Verde Sauce


Chicken enchilada's are so easy to make. You can throw almost anything in enchiladas and not mess them up and they're done in less than 30 minutes. A friend gave me some homemade salsa verde, and the moment I tasted it, I knew that it would make these enchiladas sing!  For the chicken in these I just threw a chopped onion and 1 pound of chicken thighs in my pressure cooker with enough water to cover, and cooked the chicken for 20 minutes--easy peasy.  But if you have leftover chicken you can use that.

Prep time: 10 minutes
Cook time: 15-20 minutes
Total time: 30 minutes

Ingredients:
1 lb of cooked chicken (shredded)
2 cups of cheddar cheese (grated)
2 cups of salsa verde
1/2 cup of black olives, sliced
10-12 corn tortilla's

Directions: Pre-heat the oven to 375F. Lightly greese a 9x11 baking dish, then line the bottom of  the baking dish with corn tortillas.  Top the tortillas with the shredded chicken, top the chicken with salsa verde, top the salsa verde with cheese, and  finally add a layer of  black olives.  Cover the olives with one more layer of corn tortillas, add a  layer of salsa verde, a layer of cheese and the last of the olives.


 Place in the oven for 15-20 minutes, or until the cheese has melted, remove from the oven, serve and enjoy!


Tuesday, July 8, 2014

Marinated Mushroom Steaks


Marinated Mushroom Steaks

I make an entire meatless meal at least once a week.  Going vegetarian, or vegan, even once a week is great for your health, excellent for your pocket book, and a very environmentally friendly thing to do.  One of my favorite vegetarian meals is faux steak, with beans, rice, salsa, and plantains.  It's simple--yes! But so delicious, and it reminds me of the delicious dinners I had while in Puerto Rico.  I switch out the steaks for marinated, grilled mushrooms, and the result is perfection!

Prep time: 30 minutes
Cook time: 7-10 minutes

Ingredients: 
2 large Portabello mushrooms, undersides and stem removed
1/2 teaspoon of worcestershire sauce
1 large garlic clove sliced thinly
1 tablespoons of olive oil
1 tablespoon of white wine vinegar
sea salt and black pepper to taste

Directions: Mix together all the ingredients for the marinade in a small bowl.  Pour over Mushrooms and let marinade for 30 minutes.  Grill on a hot grill for 3-4 minutes on each side, remove from grill and serve!

Monday, July 7, 2014

Sauteed Beet Greens with Garlic and Feta Cheese


I planted a garden about four months ago, the first thing to sprout from my garden were these lovely beet greens stalks. They were so beautiful and perfectly green that I found myself fighting the urge to pick them too soon.   For the longest time I had no idea that I could actually eat the tops of the beets, which means many, many, beet greens have been thrown in the trash by me without a thought. When it finally hit me that these beautiful greens were actually edible and that I could cook and eat them, I wondered why it had taken me so long to do so!  My husband is not a fan of beets at all. However, he is an ultra fan of the stalks on this vegetable.  I can't blame him, the greens produced from the beets are delicious and tender, and when cooked, they are reminiscent of tender spinach.

Prep time: 5 minutes
Cook time: 10 minutes
Total time: 15 minutes

Ingredients:
5 cups of beet greens chopped
2 large garlic clove (sliced thinly)
1 teaspoon of balsamic vinegar
1/4 cup of crumbled feta cheese
2 tablespoons of olive oil
sea salt to taste

Directions:
Add the oil and garlic to a saute pan over medium heat.  Cook until you smell the garlic, about 20 seconds.

 Add in the beet green and saute until they begin to wilt.  Add in the balsamic, and cook for another 3-4 minutes. 

 Transfer the greens to a bowl, top with feta cheese, and enjoy!


Tuesday, July 1, 2014

Cherry Hand Pies


Cherry Hand Pies

I am not a fan of baking, but every now and then I get a craving and I drag myself into the kitchen and have a go at it. Baking involves a lot of science, and only after one has mastered the science, can one move onto the artistry of baking. In cooking you can add a little here and  there and the final result will not be drastically altered, with baking, well let's just say, baking is much less forgiving, and that my friends is why I avoid it if I can. There is a reason why chefs on top chef avoid doing desserts--sooo many things can go wrong. This recipe took me several tries before I was happy with the final product. I tried this with puff pastry and I was less than impressed. I moved on to a gluten free do it yourself pie crust and was highly disappointed. It was my fault really, the dough was good, but I used way too much butter, and the dough spread and wouldn't stop spreading.  Finally, I gave in and bought ready made pie crusts, the kind you roll out--not the kind already in a pie tin--and I was very pleased with the result.  These little hand pies make a great addition to a picnic, they're small, mess free, and you don't have to worry about having a knife to cut the pie because these are single serving.

Prep time:10 minutes
Cook time: 30 minutes

Ingredients:
2 cups of fresh cherries, halved and  puts removed
1/2 cup of maple sugar (can use maple syrup, cane sugar, or sweetener of your choice)
1 tablespoon of lemon juice
1  teaspoon of vanilla extract
1 tablespoon of arrowroot powder (can sub with xantham gum, cornstarch or flour)
1/8 teaspoon of sea salt
1/8 teaspoon of cinnamon
1 package of ready made pie crusts--the kind you roll--not the kind that are already in pie tins

Directions:
Add the cherries, lemon juice, sea salt and sugar to a sauce pan over medium heat. 

Cook until cherries begin to release juices, about 5-7 minutes.

In a small bowl mix together arrowroot and 1 teaspoon of water,

 Add it to the cherry mixture, stir and cook until mixture thickens. 

Remove from heat and allow to cool to room temperature. Once mixture has cooled. Pre-heat oven to the recommended temperature on the box for the pie crust you are using. Roll out your pie crusts, then cut out your desired pie shape. I used a tarlet tin to cut out tarlet pie shapes--two circles for each pie. Fill one of the shapes for each pie with 2-3 tablespoons of the cherry filling, top it with the other pie shape, seal it by pressing the borders with a fork. Place the pies on a silicone/parchment lined baking sheet and bake until golden brown-- about 20-30 minutes. Remove from oven, allow to cool, then enjoy!