Monday, May 14, 2018

Blue Star Range Review


I have been putting off buying a new stove for a while now, mainly because I knew it was going to be a big and expensive purchase, something best saved for a remodel. Christmas dinner was my turning point. We had Christmas dinner at our house this year, which meant I was responsible for cooking the entire meal.  I can't even begin to tell you the level of frustration I experienced while cooking that dinner. Let's just say I would have sold a body part for a larger oven and an extra burner!   The stove we had was great at broiling--but nothing else! I was literally guessing what temperature I was setting the stove to because the spots on the dial indicating temperature had come off.
I already knew I wanted a Blue Star range, it has been my dream stove for about 15 years.  Two months ago I looked at the Blue Star website, found a dealer near me and took the plunge!  Just a note of advice--NEVER do this!  When you order a range of this caliber jumping into it is the wrong move--there is a reason most people put it in during a remodel! I bought the range went home--told my husband--then preceded to panic! I, the queen of reviews, had not read one review--except for Marcus Samuelson's 15 years prior!  So off I went down the rabbit hole of reviews--to find complaints of hot doors--doors so hot that they fuse shut--and a list of reasonable requirements for installation--none of which I had thought of--I just wanted a new stove!  Mind you most of the reviews were old--circa 2003-2010!So if you're reading this--you're welcome! After sorting through hundreds of the reviews I found that Blue Star was very responsive to customer complaints and fixed every complaint. The ranges no longer have any of the issues I read about in the reviews.  I was particularly concerned with the hot door issue because of Page--she loves to hang out with me while I cook so I couldn't have that.  The installation requirements were not anything huge, nothing that most kitchen remodels wouldn't cover, for instance, we had to install a non-combustible tile behind the range, and we also had a base wall that we had to cover with non-combustible material--luckily the wall met the depth 24in requirement. We had to install an electrical outlet just for the range and lastly we had to install an oven hood.  The hood installation was actually the most stressful of all of the amendments we had to make.  The installer had to remove the cabinets we had above the range, and in the middle of that he found that we had a faux ventilation system--the people who lived here before us set up a vent piece that had no piping to the outside--dangerous for us for sure! While I'm grateful that we now have a ventilation system that actually vents to the outside--it ended up costing 3 times the amount we were quoted to install the hood--but again what's a few dollars compared to our lives!

Now let's discuss the range.  Blue Star is made right here in the USA. Most if not all of the production of the range is handmade--which is why it takes so long to get one--7 weeks--each range is custom made.  There are several iterations of a Blue Star range but the big decision for me was choosing between a sealed burner range or an open burner range.  I chose the latter. Blue Star ranges are known for open burners and simplicity-- no frills, computer boards, timers, or self-cleaning ovens. They are as close to a commercial restaurant range as you can get. Why choose and open burner range? The beauty of an open burner is that open burners allow for better oxygen flow, that equates to more even heat and more firepower in the form of BTU's.  I went with the base open burner model the RCS--which on my 36-inch range includes 5-15k BTU burners and 1-9500k BTU simmer burner.  I have 6 burners ya'll!

The open burners are on this range are powerfully hot!! In fact other than searing and boiling water, I don't see a need for using the full power of the 15k burners.
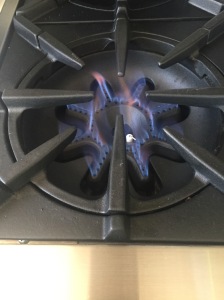
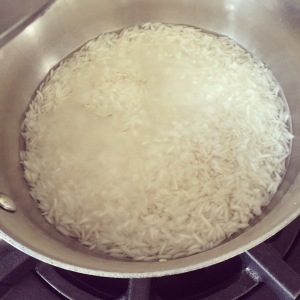
The simmer burner is great. I've used it to cook rice. The water barely moves, but 10 minutes later I have perfectly cooked rice. It's like magic!
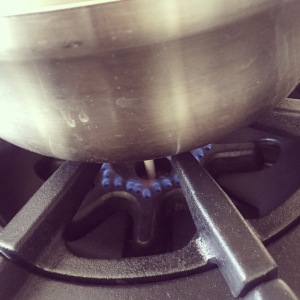

The oven is not talked about a lot in most reviews, so let me say a few things. The oven is huge! I can fit 2 commercial sheet pans in it at the same time! This will definitely cut the time I spend making caramel popcorn this Christmas in half.

The broiler is amazing!  Lamb chops under the broiler were done in 6 minutes, short ribs in 2!

[wpvideo nMNhXqBd]
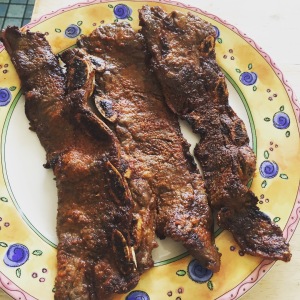
I've never worked with infrared anything, and I was a little concerned that I wouldn't like the broiler on this oven because the one in my old oven was pretty great, but consider me a convert--infrared is awesome-- 1850F of straight awesomeness!  Many have complained about the broiler being too small--for me, it's not, I could easily broil 2 or 3 small steaks at once, which for me is perfect! I mean look at the crust on the short ribs I made! As good as any grill could ever accomplish! The oven is optional convection, meaning you flip a switch to turn on the convection fan. Once the oven reaches temperature, it holds temperature well!  It takes a good 30 minutes to preheat the oven just because it's so big. I've made brownies, brussel sprouts, kale chips, and sweet potatoes all with great success in this oven!  Overall, I love this range! It's a pleasure to cook on and in this range, things cook quickly and evenly.  Getting this stove has made me realize how much time I wasted cooking on my last stove, by buying this range I actually spend less time cooking--that is always my goal!

Just so you know, this is not in ANY way a sponsored post.  I bought and paid for this range with my own money, and the review you're reading is my own personal experience with this range.

Wednesday, October 28, 2015

Popcorn Balls with Peanut butter and Marshmallows

Popcorn Balls with Peanut butter and Marshmallows
Now that Page is in school--two schools if we're being technical--there are always opportunities for me to cook, or prepare treats for her classes.  This week has been particularly hectic because both schools are doing fundraising drives, and if you're a parent then you know the schools require a lot of participation from parents in the form of raising money and volunteering to bring food and elbow grease.  Luckily for me none of the kids in Page's class have food allergies, so I decided to make these popcorn balls.  Popcorn balls have always been one of my favorite Halloween treats.  They contain popcorn and marshmallows, really what's not to love? These popcorn balls also have a yummy touch of peanut butter, you can omit it, or sub with sun butter or almond butter if you have a little one with allergies. If not--live a little--tis the season! You can make your own marshmallows here's how, or you can buy a store brand.  I got a gluten free version from Whole Foods.
Pin It!
Pin It!


Makes 12 medium popcorn balls
Here's what you need:
Ingredients
6 cups of organic Non-GMO popcorn (equal to 1/4 cup of unpopped popcorn)
3 cups of marshmallows
2 tablespoons of butter
1/2 teaspoon of sea salt
1 tablespoon of organic peanut butter
Directions: Pop 1/4 cup of popcorn kernels then set aside in a large bowl.
To a sauce pan add the butter,
Processed with VSCOcam with c3 preset
let it melt then add the peanut butter, marshmallows,
Stir until melted,
Processed with VSCOcam with c3 preset
Working quickly pour the marshmallow mixture over the popcorn.
With a spatula work quickly to coat the popcorn in the marshmallow mixture.  Once all the popcorn has been coated, work quickly to form the popcorn into balls.
The mixture will still be quite warm so be careful and try not to burn your hands.  Once all the balls have been formed serve and enjoy!
Processed with VSCOcam with c3 preset
If you like this you'll probably love my Caramel popcorn with Almonds and coconut recipe, it's crunchy and oh so delicious!

Tuesday, October 20, 2015

Avocado and Cilantro Crema

Avocado and Cilantro Crema

We have a black bean tostada night once every 2 weeks.  It's simple, and definitely a lazy girl dinner, because I open a can of black refined beans heat them then add them to a piping hot and crisp tortilla. I top the tortilla with cheese, sliced tomatoes, cilantro, and either a fresh guacamole or this Avocado Crema.  The result is a delicious and lazy dinner! Simple ingredients, but oh so good. My husband raves about this dinner every time we have it. The best thing about this is that you throw everything into a blender and a minute later the sauce is done. If you want to make this vegan, paleo or Whole 30 approved just omit the yogurt and replace with 1/4 cup of water.

Pin It!
Pin It!


Here's what you need:
Ingredients
1 large ripe avocado
3 tablespoons of yogurt--can sub sour cream
1/4 cup of cilantro
juice of 1/2 lime==more if you like
1/2 teaspoon of garlic powder
1/2 teaspoon of onion powder
Directions:  Add all the ingredients to a blender.
Processed with VSCOcam with k2 preset
Blend on high until smooth and lump free.
Processed with VSCOcam with k1 preset
Serve and enjoy!
Processed with VSCOcam with k1 preset

Wednesday, October 14, 2015

Peruvian Chicken

Processed with VSCOcam with s3 preset

I love California, as a matter of fact I'd be hard pressed to name a state within this union that I'd consider leaving California for.  One of the many great things about living here, besides the diversity here, is the weather.  On a great day, the temperature ranges between 78F and 82F.  Since we live by the beach, there is seldom a day without a cool ocean breeze.  Lately however, the temperatures have been 10-20F degrees above normal, and for the last two weeks temps have settled in around 89-98F---HOT!!!!!!  So hot that the last thing I want to do is to turn on the stove.  So we've adapted, I've been marinating meat in the morning for my husband to grill in the evening when things start to cool down a bit.  This marinade is super simple, and if you've ever had grilled Peruvian chicken you know how yummy and it can be.  The vinegar in this really gives this chicken a yummy tang and kick.  I've tried this with Rice vinegar and white wine, both are yummy, but plain white distilled vinegar is just as yummy.

Pin It!
Pin It!


Here's what you need:
Ingredients
1 lb of boneless skinless organic chicken thighs
1 tablespoon cumin powder
1 tablespoon of smoked paprika
3 cloves of garlic grated
1 tablespoon of white wine vinegar--can sub with white vinegar or rice vinegar

Tuesday, October 13, 2015

How to Make Queso Fresco Cheese

How to maker Queso Cheese
              How to make Queso Fresco Cheese
This week I've spent a lot of time in the kitchen making things that I had on my "list of things I want to make"--yes I actually have a list. This cheese has been on that list for quite some time.  It's so unbelievably easy to make that now I am left to wonder why it took me so long to try it.  It's also a great way to use milk that would not get used otherwise. This cheese was a great addition to  my Peruvian Chicken taco's that recipe will be on the blog tomorrow.
Here's what you need:
Ingredients
1 quart of whole organic milk
2 -3 Tablespoons of fresh lemon juice--can sub with vinegar
Sea salt to taste
Equipment:
cheesecloth
Sieve
Directions: Add the milk to a saucepan,
Heat the milk to 180F whisking to prevent the milk from scorching.
Once the milk reaches 180F remove from heat.
Add the lemon juice or vinegar 1 tablespoon at a time, stirring gently until the curds separate from the whey. This happens almost immediately.
Allow the curds to continue to separate, let the mixture sit in the pot uncovered for 15-20 minutes.

Processed with VSCOcam with f2 preset

Processed with VSCOcam with f2 preset
From here you can decide to just strain the mixture in a cheesecloth lined sieve, add salt to taste and be done--you'll have a perfectly soft crumble cheese.
Processed with VSCOcam with s1 preset
Or you can strain, then squeeze out excess whey, add salt, form into a ball, and press into a firmer queso,
I placed my queso into a circular cookie/biscuit cutter, which I wrapped in my cheesecloth, and then placed a sealed water-filled 4-ounce mason jar on top for 5-10 minutes to squeeze out excess whey.  I placed these items over a sieve with a bowl underneath to collect the whey.
For a firmer paneer type cheese extend the time that the cheese is pressed from 10 to 20 minutes. Refrigerate if you don't plan on using the cheese right away.  It will keep in the refrigerator for 3-5 days.


Processed with VSCOcam with h3 preset

Processed with VSCOcam with h3 preset

Wednesday, October 7, 2015

Korean Barbecue Chicken

Korean Barbecue Chicken

I love Korean barbecue, what's not to love?  Grilled meat, pickled and fermented veggies...mmmh it's a veritable umami bomb on a plate.  The fermented veggies alone are enough to get me into the door of a Korean restaurant.  I love banchan savory sprouts, kimchi, cucumber kimchi, and dashi radish make the heaviness of the barbecued meats lighter.  I remember my first experience eating Korean food.  The week of my wedding my best friend suggested that we go to a Korean bath spa together.  She said it would be a great mini break for me to table the stress of planning a wedding and at the same time get my skin nice and polished for the wedding.  I happily agreed, we had gone to many a spa together throughout our friendship, so why not make another happy memory with my best friend before I sailed off into wedded bliss, I thought.  The day before our appointments my best friend called to say that something came up at work and she could not join me, but she insisted that I go alone because I needed to destress, so I did.  The spa was unlike any other the spa that I had ever been to. After checking in, I was led on a guided tour of the steam rooms, jade rooms, and showers.  Everyone within the walls, except for the technicians, was completely naked and Asian.  I stuck out like a sore thumb.   First of all, I wasn't at all prepared to be completely naked in front of anyone other than a technician. At all the spa's  that I had ever been to everyone wore something, be it a robe, or bathing suit, but not this spa.  I also was not prepared to leave without having had my body polish.  I had read the Yelp reviews and this place was the best!  I wanted to sparkle and shine at my wedding and the only thing standing in the way of that happening was me getting naked, so I did.  I was sitting in the sauna with three women, and they could sense my unease.  They were so kind, they chatted me up, and when I felt comfortable one of them asked me how I found out about the spa.  I told them and they laughed.  I'm guessing that the spa didn't get very many non Asian patrons, which is too bad, nakedness aside, it was a great spa. The spa lacked the more polished elegance of a Burke Williams, but what it lacked in elegance it made up for it other areas, namely the food area.  After getting my scrub, and detoxing in the sauna, I walked over to the jade rooms, and just beyond that was a bar and the scent coming from the bar was intoxicating.  The bar/restaurant had a full menu of soups with fermented and pickled veggies, JACKPOT! I grabbed a folded robe from a pedestal near the entrance into the bar--you didn't think they would make us eat naked did you?--and sat down to a deliciously healthy meal.  If only all spa's included this kind of service.  That was my first experience eating Korean food, and since then I've fallen in love with it.  This recipe is my take on chicken Korean barbecue.  I have to say that this chicken is delicious!  Better than the chicken that I've had at most restaurants that I've been to.  This recipe requires Gochujang--a spicy fermented chili paste. You may need to venture into an Asian market for the Gochujang.  I purchased a jar at my local Whole Foods, they had several varieties of it, I chose a garlic Gochujang.

Here's what you need:
Ingredients:
1lb of boneless skinless organic chicken thighs, cut each thigh into 3 or 4 pieces
1.5 tablespoons of Gochujang
2 teaspoons of sugar--can sub with maple sugar or syrup
1 teaspoon of garlic grated
3 green onions chopped finely both whites and green parts
1 teaspoon of grated ginger
2 teaspoons of sesame oil
1 teaspoon of olive or grapeseed oil
2 tablespoons of soy sauce
sea salt to taste
Directions: Season the chicken with sea salt and set aside.
To a large mixing bowl or medium size bake pan add the remaining ingredients,
combine and mix well,
then toss in the chicken, tossing to coat the chicken completely in the marinade.
Cover with foil and place in the refrigerator for at least an hour.
Remove the chicken from the refrigerator 30 minutes before cooking.  Grill the chicken on a hot grill, 5-7 minutes on each side, serve and enjoy!


Ginger Garlic Fried Rice

Ginger Garlic Fried Rice
              Ginger Garlic Fried Rice
Ahh...rice. The staple food for many cultures.  In fact, rice is so important to my good friend Gina's parents that they will not even travel without bringing along their rice maker.  It's the first thing her mom unpacks in the hotel room. My husband and my daughter are huge fans of rice.  Page is a particular fan of basmati, and I can't say that I blame her.  A good basmati  is aromatic, light and airy, like eating a cloud.     I don't cook rice that often, so even a small bag could last us months.  Whenever I do make rice, as much as my husband and daughter love it, we always have leftovers.  I hate to throw it away so I always try to find a way to use it.   Page loves fried rice--who doesn't?  She is a particular fan of my Crab Fried Rice.  But we don't always have crab in the house.  So I use what I have, usually a few vegetables, and an egg.  One of the fish restaurants we frequent makes a garlic rice that Page just devours. So I decided to do my own take on the garlic rice which she loves so much.
Pin It!
Pin It!


Here's what you need:
Ingredients
2-3 cups of room temperature left over rice
1/2 teaspoon of tumeric
1 tablespoon of minced garlic
1 tablespoon of minced ginger
1 tablespoon of oil
sea salt or soy sauce to taste
Directions: Add the oil,  garlic,  tumeric and ginger to a saute pan and heat on medium heat until garlic and ginger slightly brown,
Processed with VSCOcam with s1 preset
add in the rice, toss until rice is heated.
Processed with VSCOcam with c1 preset
Transfer to a serving bowl, season with soy or sea salt, and a drizzle of sesame oil, garnish with cilantro, serve and enjoy. This is AMAZING with my Korean barbecue chicken, stay tuned for that recipe tomorrow!
Processed with VSCOcam with s5 preset

Wednesday, July 15, 2015

Berbere Spiced Lentil Stew (MISR WOT)

Berbere Spiced Lentil Stew

So I've decided that this will be my last post until the summer is over.  Mainly because we'll be traveling for at least  three weeks in August, and today is Page's last day in her summer program at school.  We have about a week of lounging around and playing in the back yard before she starts her Spanish immersion summer program.  I want to spend as much time as I can with her, without looking at my phone to do all that blogging requires of me.  I'll be sure to update my Instagram account with all of my food adventures--as usual.  So if you aren't following me on Instagram, click on the link to the right to do so.  Now to the recipe. Berbere Chicken was one of the first recipes that I shared on this blog.  It's one of Page's favorite chicken dishes--although lately it is getting some strong competition from Sous Vide Chicken Thighs with Thyme and Garlic. She still love this chicken nonetheless. After make the chicken the last time, I was so impressed with the flavors, I wanted to add it to something else, and then it occurred to me how awesome this seasoning would be on lentils, in a soup.  As I walked around my kitchen, grabbing ingredients and  formulating a recipe in my head, lentils, tomatoes--because my garden is overflowing with them, onion, garlic, lemon, and berbere spice, it occurred to me that I had these flavors before in a dish at an Ethiopian restaurant.  Sure enough there was a recipe for a stew by none other than Marcus Samuelson.  While I did not follow his recipe exactly, my own isn't so far off.  I used some Organic Green French Lentils, which I sprouted.  His recipe and I guess the traditional recipe calls for red lentils. I added some of the preserved lemon salt to my bowl as a finish.  If you haven't made my preserved lemon salt yet, a little preserved lemon would be awesome with this.
Pin It!
Pin It!


Ingredients
1 cup of sprouted organic green lentils
1 large tomato chopped
1 small onion, chopped
4 cloves of garlic
2 tablespoons of oil --your choice I used butter
2 tablespoons of berbere spice
1 lemon cut into wedges
3 cups of water
Ingredients for Berbere Spice
Ingredients:
3 Tablespoons of Paprika I used a smoked
1 tablespoon of red pepper flakes
1 tablespoon of ground ginger
1 tablespoon of cumin seeds or ground cumin
1teaspoon of ground turmeric
1teaspoon of sea salt
1 teaspoon of fenugreek powder, or seeds
1 teaspoon of coriander
6 cardmom pods or 1 teaspoon of ground cardamom
1/2 teaspoon of ground cinnamon
1/2 teaspoon of allspice
1/2 teaspoon of black peppercorns
8 whole cloves
Directions for spice blend:
Place all the spices in a dry cast iron skillet and cook over medium high heat, stirring constantly until toasted about 3-5 minutes. Cool completely  place all ingredients in a spice grinder or blender until finely ground. Transfer to an air tight storage container for up to 3 months.
Directions: Heat the oil along with the onion, and garlic and cook until onion is translucent.
image
Add in the lentils and berbere spice.
image
Allow the mixture to cook for 2-3 minutes, then add in the tomato,

image
cook for another minute or two,

image
then add in the water.  Bring to a boil, then allow the lentils to simmer for 20-30minutes, or until lentils are tender.
image
You can serve at this point, by adding the stew to a bowl and squeezing a few lemon wedges over the soup.  I wanted a little more texture, so I blended a quarter of my lentils then added them back into the stew.
image
It made the soup thicker and creamier.  Delicious either way!
image