Showing posts with label fit food. Show all posts

Wednesday, September 10, 2014

How to Make Pure Maple Sugar

How to Make Pure Maple Sugar


It took me about a year, but I finally got around to making maple sugar. I have been planning to make it since I made maple cream for my husband, and just never got around to it. To be honest the weather just hasn't permitted it. It has been so humid here in California lately, and making maple sugar in humid weather is a nightmare. I've been waiting, and waiting, and waiting for the weather to change and it's just not happening. The other day when I was in the grocery store, I picked up a package of maple sugar, it was $19.99 for about 5 ounces, and I thought to myself: "Really? I could just make this!" So I put the package back and picked up a 32 ounce bottle of maple syrup instead, it was the same price as the 5 ounce package of maple sugar---see where I'm going with this? Even with the humidity, making maple sugar is a better option than buying it--although I don't recommend it--making maple sugar really is a nuisance in humid weather--it's doable, but a total headache! You need the sugar to be dry, wet air doesn't help in that process. Without humidity the process of making maple sugar is pretty simple. After you make it, you'll wonder why you never made this before. If you're wondering why I even bother...sugar is sugar, right? Wrong, at the caloric base, yes, sugar is sugar, whether you consume the white stuff, the raw stuff, or the home made maple sugar, your body metabolizes it all the same. But when you factor in things like how sugars are processed, and the chemicals used to process those sugars, which remain on the sugar, then you can see that not all sugars are created equally. The great thing about maple sugar, is that it contains minerals and nutrients that you would not otherwise consume, so it's sugar with an added mineral bonus.

If you want to see how I do this with a silpat check out my youtube channel, and don't forget to  subscribe  to my channel while you're at it!


Pin It!
Pin It!


Prep time: none
Cook time: 7-10 minutes
Total time: varies but about 1 hour
This makes about 11/4 cups of maple sugar

Ingredients:
1 cup of  pure 100% maple syrup (I used grade A but B works)

Tools:
Wooden spoon
Heavy bottom pot (medium size)
Thermometer that can read well over 250F
Stand mixer or you could stir this manually

Directions: Pour the maple syrup into pan, and heat over medium high heat


Heat until your thermometer reads 255-265F


Remove from heat and pour into stand mixer fitted with the paddle attachment.  Turn the mixer on medium speed (about 6) and mix.


The maple syrup will start to change color and texture as it cools, it will also begin to dry out--you want this keep going until it is completely dry.


Once it looks dry, put a small amount into a sieve, and push it through with a wooden spoon, continue doing this until you have sifted all the sugar. Or you could just put this in the blender and save yourself the time.  I prefer to sift, I sift even after I blend, just to make sure that all of the crystals are uniform.


Place the sugar into an airtight container.  I use maple sugar in every recipe that calls for sugar, the substitution ratio is 3/4 cup maple sugar = 1 cup granulated sugar.

Trouble Shooting: If you decide to do this on a hot and humid day, one of the issues you may encounter is that your mixture will not harden--this is especially the case for doing this without a mixer--but even with a mixer it can still occur.  If you pour this out of the hot pan and onto the silpat and the humidity prevents it from hardening--you can still save it.  Place it into the fridge to harden, then break it up and process in a blender/processor.  It will become sticky, pliable, and clumpy as it melts--humidity is a you know what-- spread it back out on the silpat and let it sit out in the open.  Like stale bread it will begin to absorb the moisture in the air--which is a good thing--confusing I know--but once it has absorbed all the moisture that it can hold--it will harden and become dry--very dry and very hard, and that's what you want.  Once it's hard, place it in the processor/blender and like magic you have granulated maple sugar. 


Wednesday, July 16, 2014

Grilled Cumin Spiced Chicken Kabobs

Grilled Cumin Spiced Chicken Kabobs

I made these chicken kabobs over the fourth of July weekend, and everyone loved them.  They were super easy to make and didn't require a lot of time or effort to marinate. They're a perfect quick fix dinner item, so I'm giving you the recipe.  My husband is still raving about these.  It just goes to show that a great meal doesn't require a lot of time or ingredients.

Prep time:10 minutes
Cook time:15 minutes
Total time: 25 minutes

Ingredients:
1lb of boneless skinless organic chicken thighs--cubed
1 teaspoon of cumin
1 teaspoon of paprika
2 cloves of garlic, minced
1/4 cup of flat leaf parsley, finely chopped
Sea salt to taste

Directions:  In a large bowl mix the ingredients for the chicken kabobs together,


Then place the chicken on skewers:


Grill chicken on a hot grill until cooked through, about 10-15 minutes 


 Serve and enjoy!

Wednesday, June 18, 2014

Roasted Broccoli and Garlic


Roasted Broccoli and Garlic

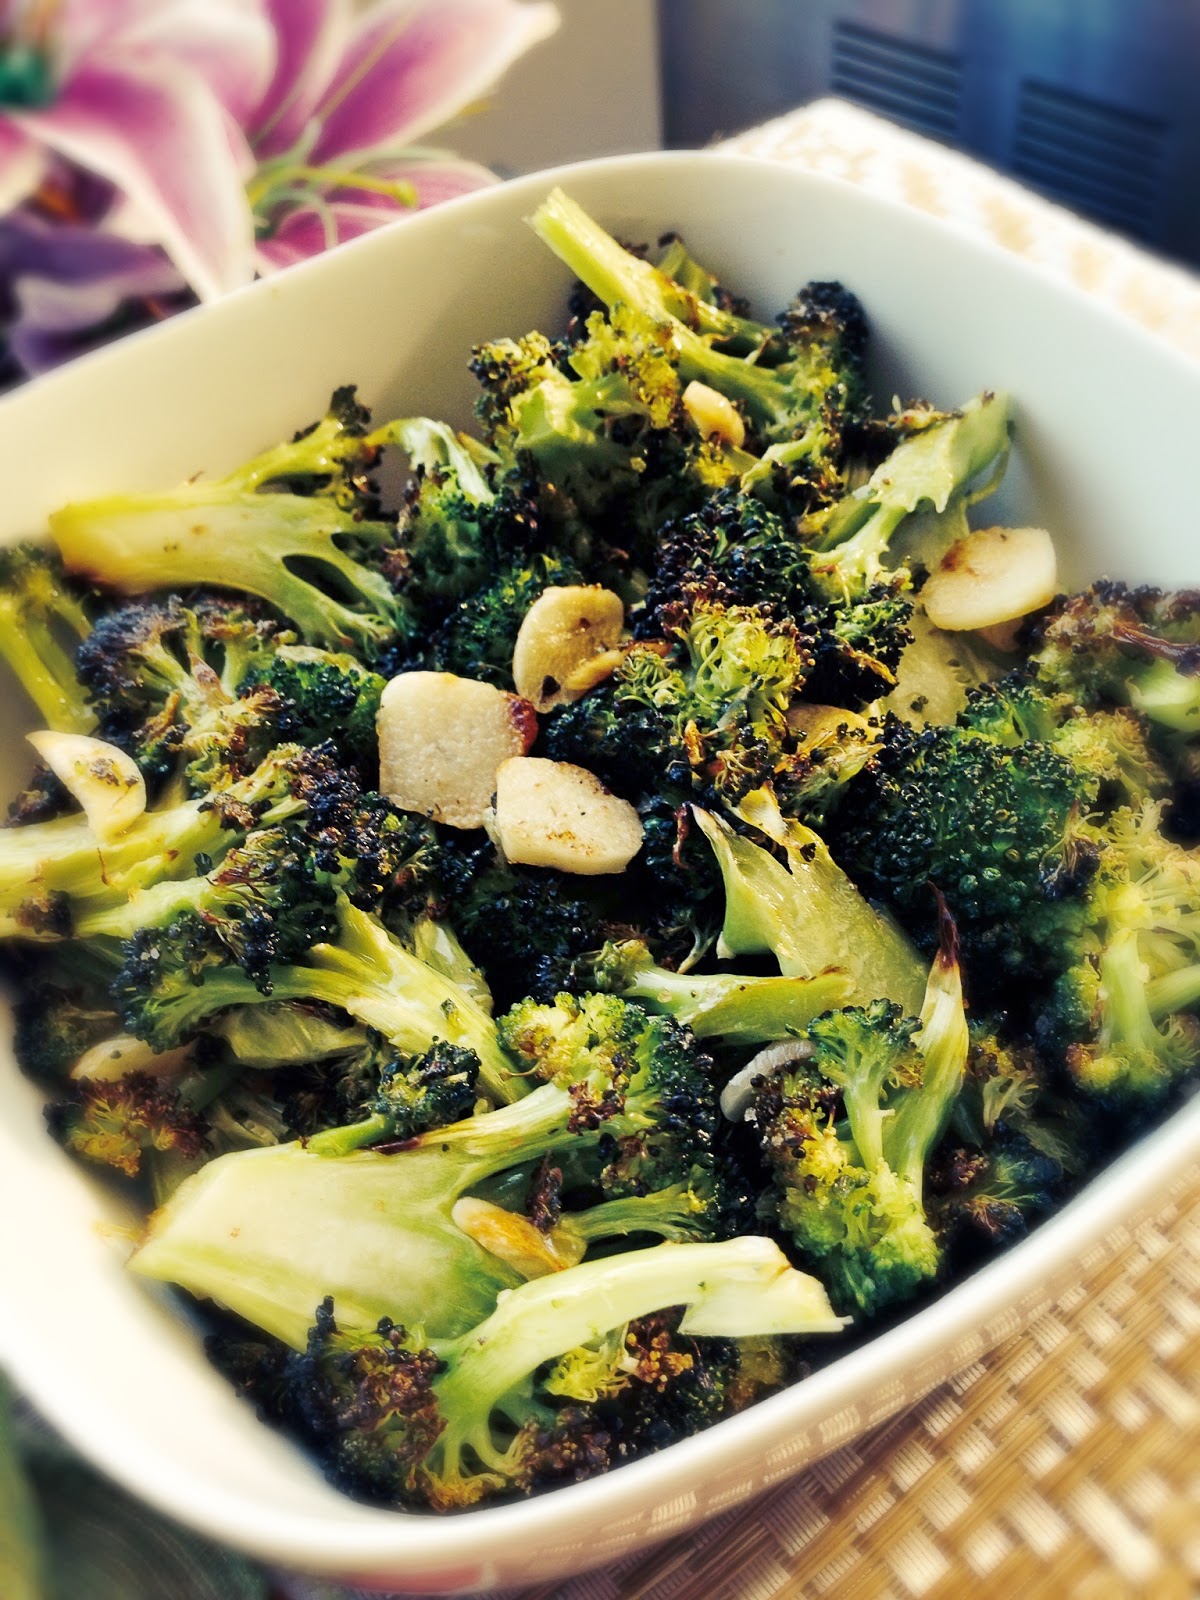
Trying to get my daughter to eat and love broccoli has not been easy.  This whole food texture thing she has is more trouble than I initially thought.  I mistakenly thought that since she loves roasted cauliflower then roasted broccoli would be a no-brainer---apparently not so with her.  Despite her refusal to eat broccoli, this roasted broccoli and garlic dish has become a new favorite for my husband and I.  We both love it! Not only do we love it, but I served it to some friends, and they loved it too!  I'm just going to have to keep trying with my daughter, she has not been won over by a love of broccoli--yet!

Prep time: 5 minutes
Cook time: 15 minutes
Total time: 20 minutes

Ingredients:
2.5 cups of broccoli sliced
3 large cloves of garlic sliced thinly
Coconut oil spray or 3 tablespoons of olive oil
Sea salt and black pepper to taste

Directions: Pre-heat oven to 400F degrees. Line a sheet pan with foil and spray it with coconut oil. Add broccoli, and sprinkle with sliced garlic.  Season with sea salt and black pepper then spray the broccoli generously with coconut oil spray.  If using olive oil, add broccoli to a bowl with olive oil and toss until broccoli is coated, then add it to the sheet pan, sprinkle sliced garlic, season with sea salt and black pepper. 


 Place in the oven and cook for 10-15 minutes or until broccoli starts to brown a bit.  Remove from oven, serve and enjoy.


Wednesday, June 4, 2014

White Bean Salad with Lemon Cumin Vinaigrette


White Bean Salad with Lemon Cumin Dressing

This salad represents all that this blog is about.  It's lazy in every sense of the word lazy and at the same time it's fresh and vibrantly flavorful.  I was talking to a girl friend  of mine  the other day about food and little ones.  She was in need of some advice about healthy choices for her little one. We went through the list of what she currently feeds her little one.  On her list was a simple salad of canned white beans drizzled with lemon juice and olive oil.  I thought it sounded delish, and I set out to make my own version of that salad.  Pair this salad with a crusty piece of sourdough rubbed with a little garlic and grass-fed butter and you've got a rustic and delicious meal that didn't require you to turn on the stove.  Lazy--yes, absolutely! But it tastes anything but lazy--that counts right?;-)

Ingredients:
15 ounce can of Organic White beans (drained and rinsed)
1/2 cup of feta cheese crumbled
1/2 cup of organic rainbow radish diced
1/2 cup of cherry tomatoes quartered
1/2  cup persian cucumbers diced
1/2 cup of red bell pepper diced
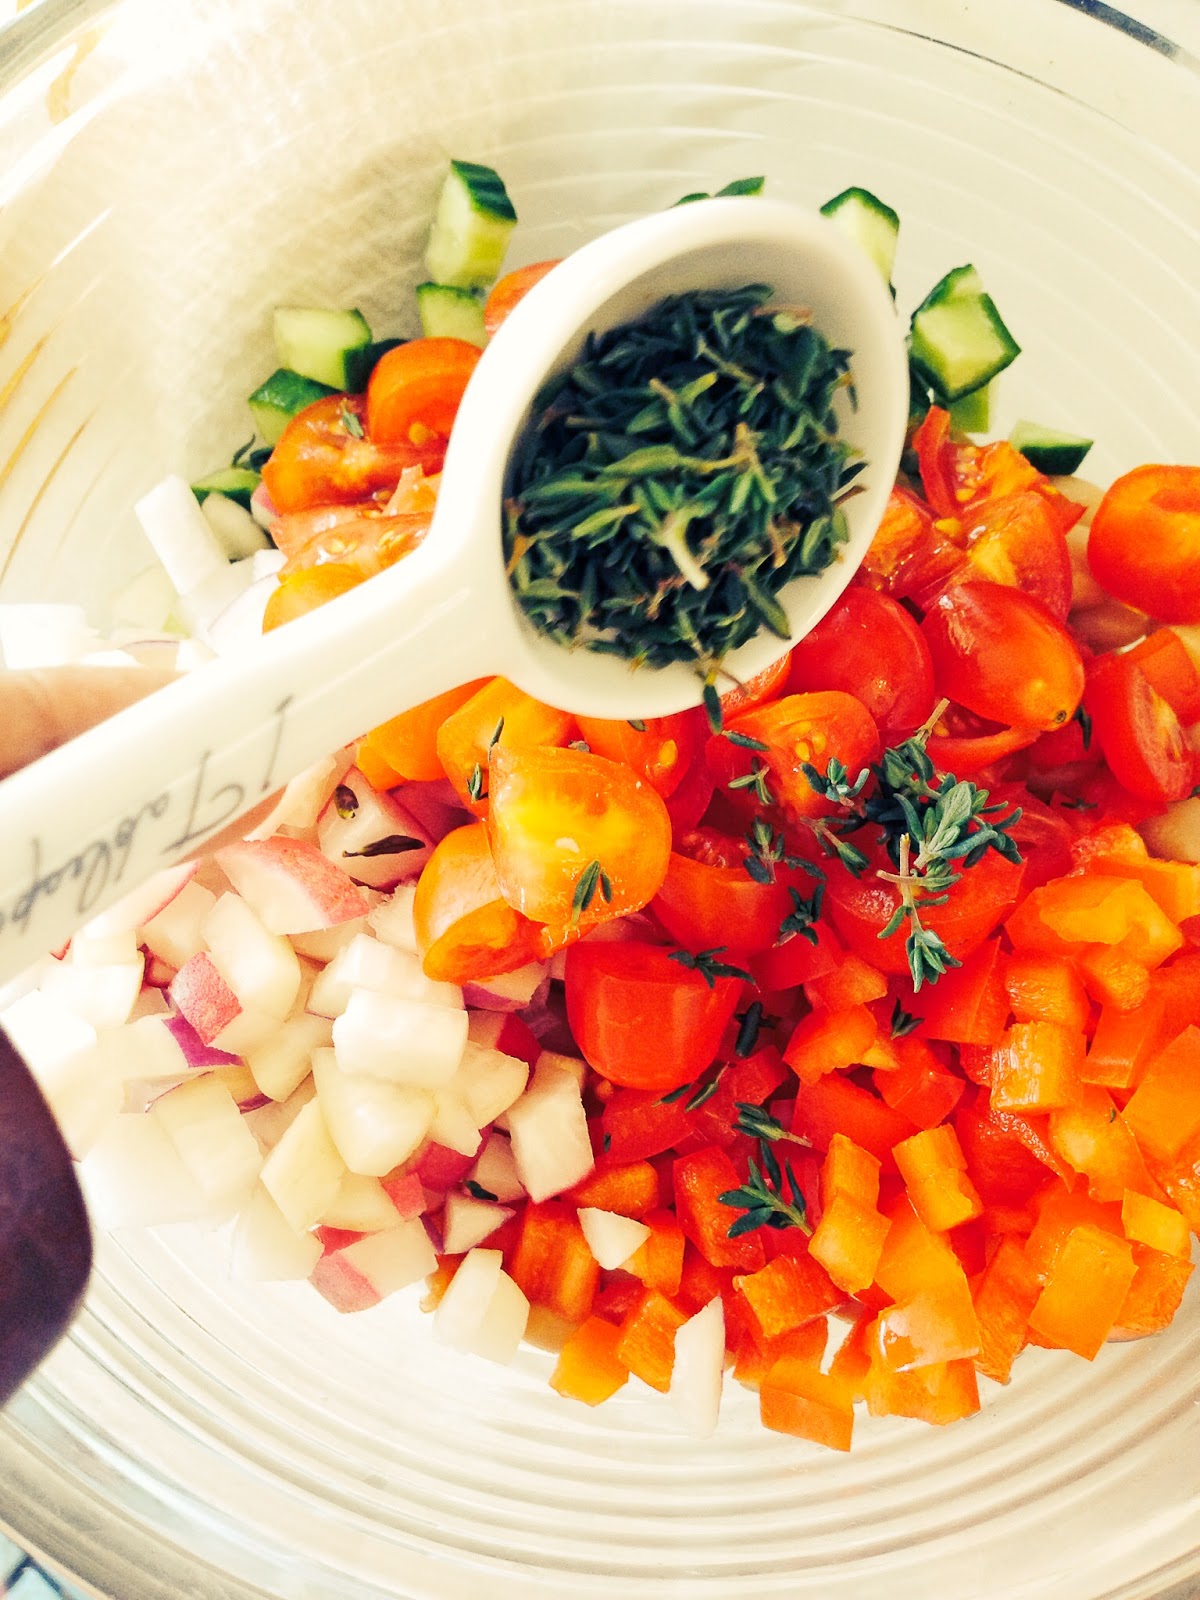
1 Tablespoon of fresh organic Thyme leaves
Sea salt and black pepper to taste

Vinaigrette
5 Tablespoons of fresh lemon juice
3 Tablespoons of olive oil
1/2 teaspoon of cumin
1 medium clove of garlic finely chopped
Sea salt to taste

Directions: Add all of the ingredients except for the sea salt to a large bowl and toss well.  

Add all the ingredients for the vinaigrette to a mason jar cover and shake until well combined.  If you don't have a mason jar, just whisk together all the ingredients for the vinaigrette in a bowl, and set aside. Salt the salad ingredients just before serving, this will prevent the tomatoes and cucumbers from becoming soggy.


 Drizzle with a generous amount of the vinaigrette, toss  again to combine, serve and enjoy!

Tuesday, May 6, 2014

Cucumber Salad with Lemon Basil Vinaigrette

Cucumber Salad with Lemon Basil Vinaigrette


I have a confession to make, sometimes I make salad when I don't want to cook a side---okay maybe I do that more than sometimes, I do it a lot. There is a reason I named this blog lazy girl dinners.  This salad is a result of me being lazy and needing to use the ingredients I had on hand.  It was a hit with both my husband and my daughter.  It was the first time I got her to eat cucumber without chewing it up and spitting it out. Slicing them with my spiral vegetable slicer had everything to do with that because when it comes to getting her to eat something, it always comes down to texture.

Prep time: 10 minutes
Cook time: none
Total time: 10 minutes

Ingredients:
2 large cucumbers sliced thinly
4 tablespoons of lemon juice
2 tablespoons of olive oil
1 tablespoon of fresh basil, finely chopped
Sea Salt to taste

Directions:
Add the lemon juice, olive oil, sea salt, and basil to a small bowl and whisk together. Spoon as much of the vinaigrette as you'd like over a serving of the cucumbers and enjoy!Note: If you are serving this at a dinner party--yes it's lazy but it's elegant and very delicious--then be sure to spoon the vinaigrette over the salad just before serving, otherwise the cucumbers will loose their crunch and get soggy.


Tuesday, April 29, 2014

Grilled Rib-eye with Spicy Dry-Rub


Grilled Rib-eye Steak with Spicy Dry-Rub

Now that it's warm again I can cutout a bit of my cooking by having my husband grill for us. He loves rib-eye steaks and it's fun for me to find different ways to spice them up. I love making marinades for steaks but sometimes it's fun just to mix a few dry spices together and see what happens. That is exactly what I did here. This do it yourself dry rub is definitely going into our menu line up again, it is so yummy.  The only problem with allowing my husband to grill the steak, was that he was not as gentle with the steak as I would have been, so I didn't get great pictures, but trust me when I say you will love this dry rub.


Prep Time: 2 minutes
Cook Time: 10-15 minutes
Total Time: 17 minutes
 Note: this is enough seasoning for a 1 pound steak, double or triple the amounts if you are grilling more steaks.

Ingredients Dry-Rub:
1/2 teaspoon of smoked paprika
1/2 teaspoon of dried thyme
1/2 teaspoon of garlic powder
1/2 teaspoon of onion powder
1/8 teaspoon of cayenne pepper
Sea salt to taste

Directions: Add the dry spices to a small bowl and mix them together until combined:


Season the both sides of the steak with sea salt, then rub both sides generously with the dry spice mixture.


Place on the grill and let cook  for 7-8 minutes on each side, remove from grill let sit for 5-7 minutes before enjoying.


 How easy was that?  I love it when my husband grills;-) Okay share your favorite dry rub seasoning?  I always buy one, this is the first time that I've made my own.

Monday, April 28, 2014

Sunday, July 7, 2013

Caesar Salad--The best recipe you'll ever find


I LOVE Caesar salad. Besides Greek salad, Caesar salad is my go to salad of choice. I love everything about Caesar salad, the romaine, the croutons, the tangy dressing, Caesar salad is just yummy! Although Caesar salad has a creamy dressing, it never feels heavy. I don't buy salad dressings, I always make my own. Although store bought is great in a time pinch, most store bought salad dressings have so many additives, that I tend to just skip buying them all together. I don't want to even imagine what most store bought Caesar salad dressings have in them!  I have made Caesar salad dressing at home with with a shortcut like Vegenaise, which is a vegan alternative to mayo. I've never been a fan of mayo, so if I need anything that calls for mayo, I just use the vegan alternative. This particular recipe uses 2 raw egg yolks, so your essentially making your own mayonnaise.  Since we are using raw egg yolks, make sure you use pasteurized egg yolks. I wouldn't want anyone to get sick. If you're not a bread person skip the croutons, but these are so good you should definitely try them. Use your favorite artisan bread. I picked up a fresh loaf of sourdough at a local bakery, but a ciabatta or any other fresh bread will work.


Pin It!
Pin It!


Here's what you need:
1 garlic clove pasted
3 tablespoons fresh lemon juice
1/2 teaspoon Worcestershire sauce
6 anchovy fillets, patted dry with paper towels, minced fine, and mashed to paste with fork ( or you can also use anchovy paste - 1 Tablespoon)
2 large egg yolks 
5 tablespoons grapeseed oil or canola oil
5 teaspoons extra virgin olive oil
3/4 cup of Parmesan cheese, freshly grated works best
Ground black pepper to taste
2 - 3 romaine hearts, roughly chopped ( rinsed and dried)

For croutons:
5 tablespoons extra virgin olive oil
1/2 teaspoon garlic paste from 1 medium clove
5 cups of a fresh artisan bread of your choice
4 tablespoons of water
1/4 teaspoon table salt
2 tablespoons finely grated Parmesan cheese

Directions for Croutons:
Combine 1 tablespoon of oil and  garlic paste in small bowl; set aside.

Place bread cubes in large bowl. Sprinkle with water and salt. Toss, squeezing gently so bread absorbs water. 


  • Place remaining 4 tablespoons oil and soaked bread cubes in 12-inch nonstick skillet. Cook over medium-high heat, stirring frequently, until browned and crisp, 7 to 10 minutes.Remove skillet from heat, push croutons to sides of skillet to clear center, add garlic/oil mixture to clearing and cook with residual heat of pan, 10 seconds:

  • Sprinkle with Parmesan; toss until garlic and Parmesan are evenly distributed. Transfer croutons to bowl; set aside:

  1. FOR THE SALAD: Whisk garlic paste and 2 tablespoons lemon juice together in large bowl. Let stand 10 minutes, VERY IMPORTANT: DO NOT to skip this step, otherwise your salad dressing will be taste too garlicky.

  2. Whisk Worcestershire sauce, anchovies, and egg yolks into garlic/lemon juice mixture. 


    While whisking constantly, drizzle canola oil and extra virgin olive oil into bowl in slow, steady stream until fully emulsified.


    Add 1/2 cup Parmesan and pepper to taste; whisk until incorporated:


  3. Add romaine to dressing and toss to coat. Add croutons and mix gently until evenly distributed. Taste and season with up to additional 1 tablespoon lemon juice:

    You can add chicken to this if you like, and it will be just as delicious!

    What's your favorite salad?

    Follow and Like me on Facebook:www.facebook.com/lazygirldinners