Showing posts with label gluten free recipes. Show all posts

Wednesday, October 14, 2015

Peruvian Chicken

Processed with VSCOcam with s3 preset

I love California, as a matter of fact I'd be hard pressed to name a state within this union that I'd consider leaving California for.  One of the many great things about living here, besides the diversity here, is the weather.  On a great day, the temperature ranges between 78F and 82F.  Since we live by the beach, there is seldom a day without a cool ocean breeze.  Lately however, the temperatures have been 10-20F degrees above normal, and for the last two weeks temps have settled in around 89-98F---HOT!!!!!!  So hot that the last thing I want to do is to turn on the stove.  So we've adapted, I've been marinating meat in the morning for my husband to grill in the evening when things start to cool down a bit.  This marinade is super simple, and if you've ever had grilled Peruvian chicken you know how yummy and it can be.  The vinegar in this really gives this chicken a yummy tang and kick.  I've tried this with Rice vinegar and white wine, both are yummy, but plain white distilled vinegar is just as yummy.

Pin It!
Pin It!


Here's what you need:
Ingredients
1 lb of boneless skinless organic chicken thighs
1 tablespoon cumin powder
1 tablespoon of smoked paprika
3 cloves of garlic grated
1 tablespoon of white wine vinegar--can sub with white vinegar or rice vinegar

Wednesday, October 7, 2015

Korean Barbecue Chicken

Korean Barbecue Chicken

I love Korean barbecue, what's not to love?  Grilled meat, pickled and fermented veggies...mmmh it's a veritable umami bomb on a plate.  The fermented veggies alone are enough to get me into the door of a Korean restaurant.  I love banchan savory sprouts, kimchi, cucumber kimchi, and dashi radish make the heaviness of the barbecued meats lighter.  I remember my first experience eating Korean food.  The week of my wedding my best friend suggested that we go to a Korean bath spa together.  She said it would be a great mini break for me to table the stress of planning a wedding and at the same time get my skin nice and polished for the wedding.  I happily agreed, we had gone to many a spa together throughout our friendship, so why not make another happy memory with my best friend before I sailed off into wedded bliss, I thought.  The day before our appointments my best friend called to say that something came up at work and she could not join me, but she insisted that I go alone because I needed to destress, so I did.  The spa was unlike any other the spa that I had ever been to. After checking in, I was led on a guided tour of the steam rooms, jade rooms, and showers.  Everyone within the walls, except for the technicians, was completely naked and Asian.  I stuck out like a sore thumb.   First of all, I wasn't at all prepared to be completely naked in front of anyone other than a technician. At all the spa's  that I had ever been to everyone wore something, be it a robe, or bathing suit, but not this spa.  I also was not prepared to leave without having had my body polish.  I had read the Yelp reviews and this place was the best!  I wanted to sparkle and shine at my wedding and the only thing standing in the way of that happening was me getting naked, so I did.  I was sitting in the sauna with three women, and they could sense my unease.  They were so kind, they chatted me up, and when I felt comfortable one of them asked me how I found out about the spa.  I told them and they laughed.  I'm guessing that the spa didn't get very many non Asian patrons, which is too bad, nakedness aside, it was a great spa. The spa lacked the more polished elegance of a Burke Williams, but what it lacked in elegance it made up for it other areas, namely the food area.  After getting my scrub, and detoxing in the sauna, I walked over to the jade rooms, and just beyond that was a bar and the scent coming from the bar was intoxicating.  The bar/restaurant had a full menu of soups with fermented and pickled veggies, JACKPOT! I grabbed a folded robe from a pedestal near the entrance into the bar--you didn't think they would make us eat naked did you?--and sat down to a deliciously healthy meal.  If only all spa's included this kind of service.  That was my first experience eating Korean food, and since then I've fallen in love with it.  This recipe is my take on chicken Korean barbecue.  I have to say that this chicken is delicious!  Better than the chicken that I've had at most restaurants that I've been to.  This recipe requires Gochujang--a spicy fermented chili paste. You may need to venture into an Asian market for the Gochujang.  I purchased a jar at my local Whole Foods, they had several varieties of it, I chose a garlic Gochujang.

Here's what you need:
Ingredients:
1lb of boneless skinless organic chicken thighs, cut each thigh into 3 or 4 pieces
1.5 tablespoons of Gochujang
2 teaspoons of sugar--can sub with maple sugar or syrup
1 teaspoon of garlic grated
3 green onions chopped finely both whites and green parts
1 teaspoon of grated ginger
2 teaspoons of sesame oil
1 teaspoon of olive or grapeseed oil
2 tablespoons of soy sauce
sea salt to taste
Directions: Season the chicken with sea salt and set aside.
To a large mixing bowl or medium size bake pan add the remaining ingredients,
combine and mix well,
then toss in the chicken, tossing to coat the chicken completely in the marinade.
Cover with foil and place in the refrigerator for at least an hour.
Remove the chicken from the refrigerator 30 minutes before cooking.  Grill the chicken on a hot grill, 5-7 minutes on each side, serve and enjoy!


Tuesday, May 12, 2015

Herbaceous Grilled Lamp Chops

Herbaceous Grilled Lamb Chops
Last weekend I visited a Persian market.  The market filled me with all sorts of food inspiration, but it mostly left me with a strong desire to eat lamb.  I guessing that desire came from the cooked foods section, which had fresh lamb kabobs and sharma. The market also housed a rather large meat department, it had lamb in every form, hooves, hearts, livers, basically every part of the lamb that a better cook than I am could possibly want to cook. A far cry from the selection at my local Whole Foods! I feel like I hit the lottery if they have stewed lamb meat once every 4 months.  Wouldn't it be fabulous to be able to walk into your local market and find, um..choices?  Like ramps in the spring time, in California--but I digress.  Let's just say, I left the Persian market with market envy.   I shop at Whole Foods so often that when I go into a conventional grocery store, I'm always amazed at how inexpensive things are.  Haha..call it reverse sticker shock! Thank you Whole Foods!  Surprisingly, I did not leave the Persian market with lamb.  I did find some great spices, some pomegranate molasses, and a few other great items.  I left with my new finds and a mission to cook these lamb chops.
Pin It!
Pin It!
Ingredients:
1 lb lamb chops
2 tablespoons of fresh rosemary, finely chopped
4-5 cloves of garlic minced
1 teaspoon lemon powder, can sub with lemon zest
1/2 teaspoon of olive oil
Directions: To a small bowl add garlic, rosemary, lemon zest and oil, mix well.
image
Dry lamb chops, season generously with sea salt. Rub the lamb chops with the herbaceous garlic paste.
image
Place lamb chops on a hot grill, and cook for 5-7 minutes on each side, or until lamb chops are cooked to your liking.  Remove from grill, serve with a fresh squeeze of lemon and enjoy!
image

Wednesday, March 4, 2015

Cauliflower Pizza Crust--How to make Cauliflower Pizza Crust

image
Cauliflower Pizza Crust
 
I'm trying to find different ways to serve vegetables to Page.  She has a new found love for pizza--before she wasn't at all impressed.  Recently, I've started to get her involved in helping me to make the meals we're eating.  I saw a food documentary about food, and kids.  In it the narrator said that the best way to get kids to eat vegetables is to have them take part in cooking. Page is at that age where she's very eager to help, so I thought why not take advantage of that.   I've also really wanted to try out a cauliflower pizza crust on our new baking steel.  I have to say that I was more than impressed with the results--so was Page.   Now for those of you wondering if this will taste anything like that delicious yeasty bread that you're used to with pizza--the short answer is no.  Bread is bread--this is an alternative to bread.  Although it's not bread--it mimics bread in form, and it is so delicious that it stands on it's own.  The reason cauliflower is most often used by people as a substitution for grains is because it has such a mild flavor.  It also has great texture. This recipe requires that you add cheese.  I used parmesan, but you could use mozzarella, or pecorino, or a combination of your favorite Italian cheeses.  I also used fresh basil, but you can use rosemary, or another herb of your choosing, dried or fresh--totally up to you.

Pin It!
 
Prep time: 10 minutes
Cook time: 15 minutes
Ingredients:
1 small head of cauliflower
1/4 teaspoon of garlic powder
1/4 teaspoon of truffle salt
1 tablespoon of finely chopped fresh basil
1 cup of freshly grated parmesan--or cheese of your choice
1 egg
Directions: Pre-heat your oven and pizza stone or baking steel  to 450F for 45 minutes. Steam the cauliflower for 5-7 minutes--or until fork tender.
image
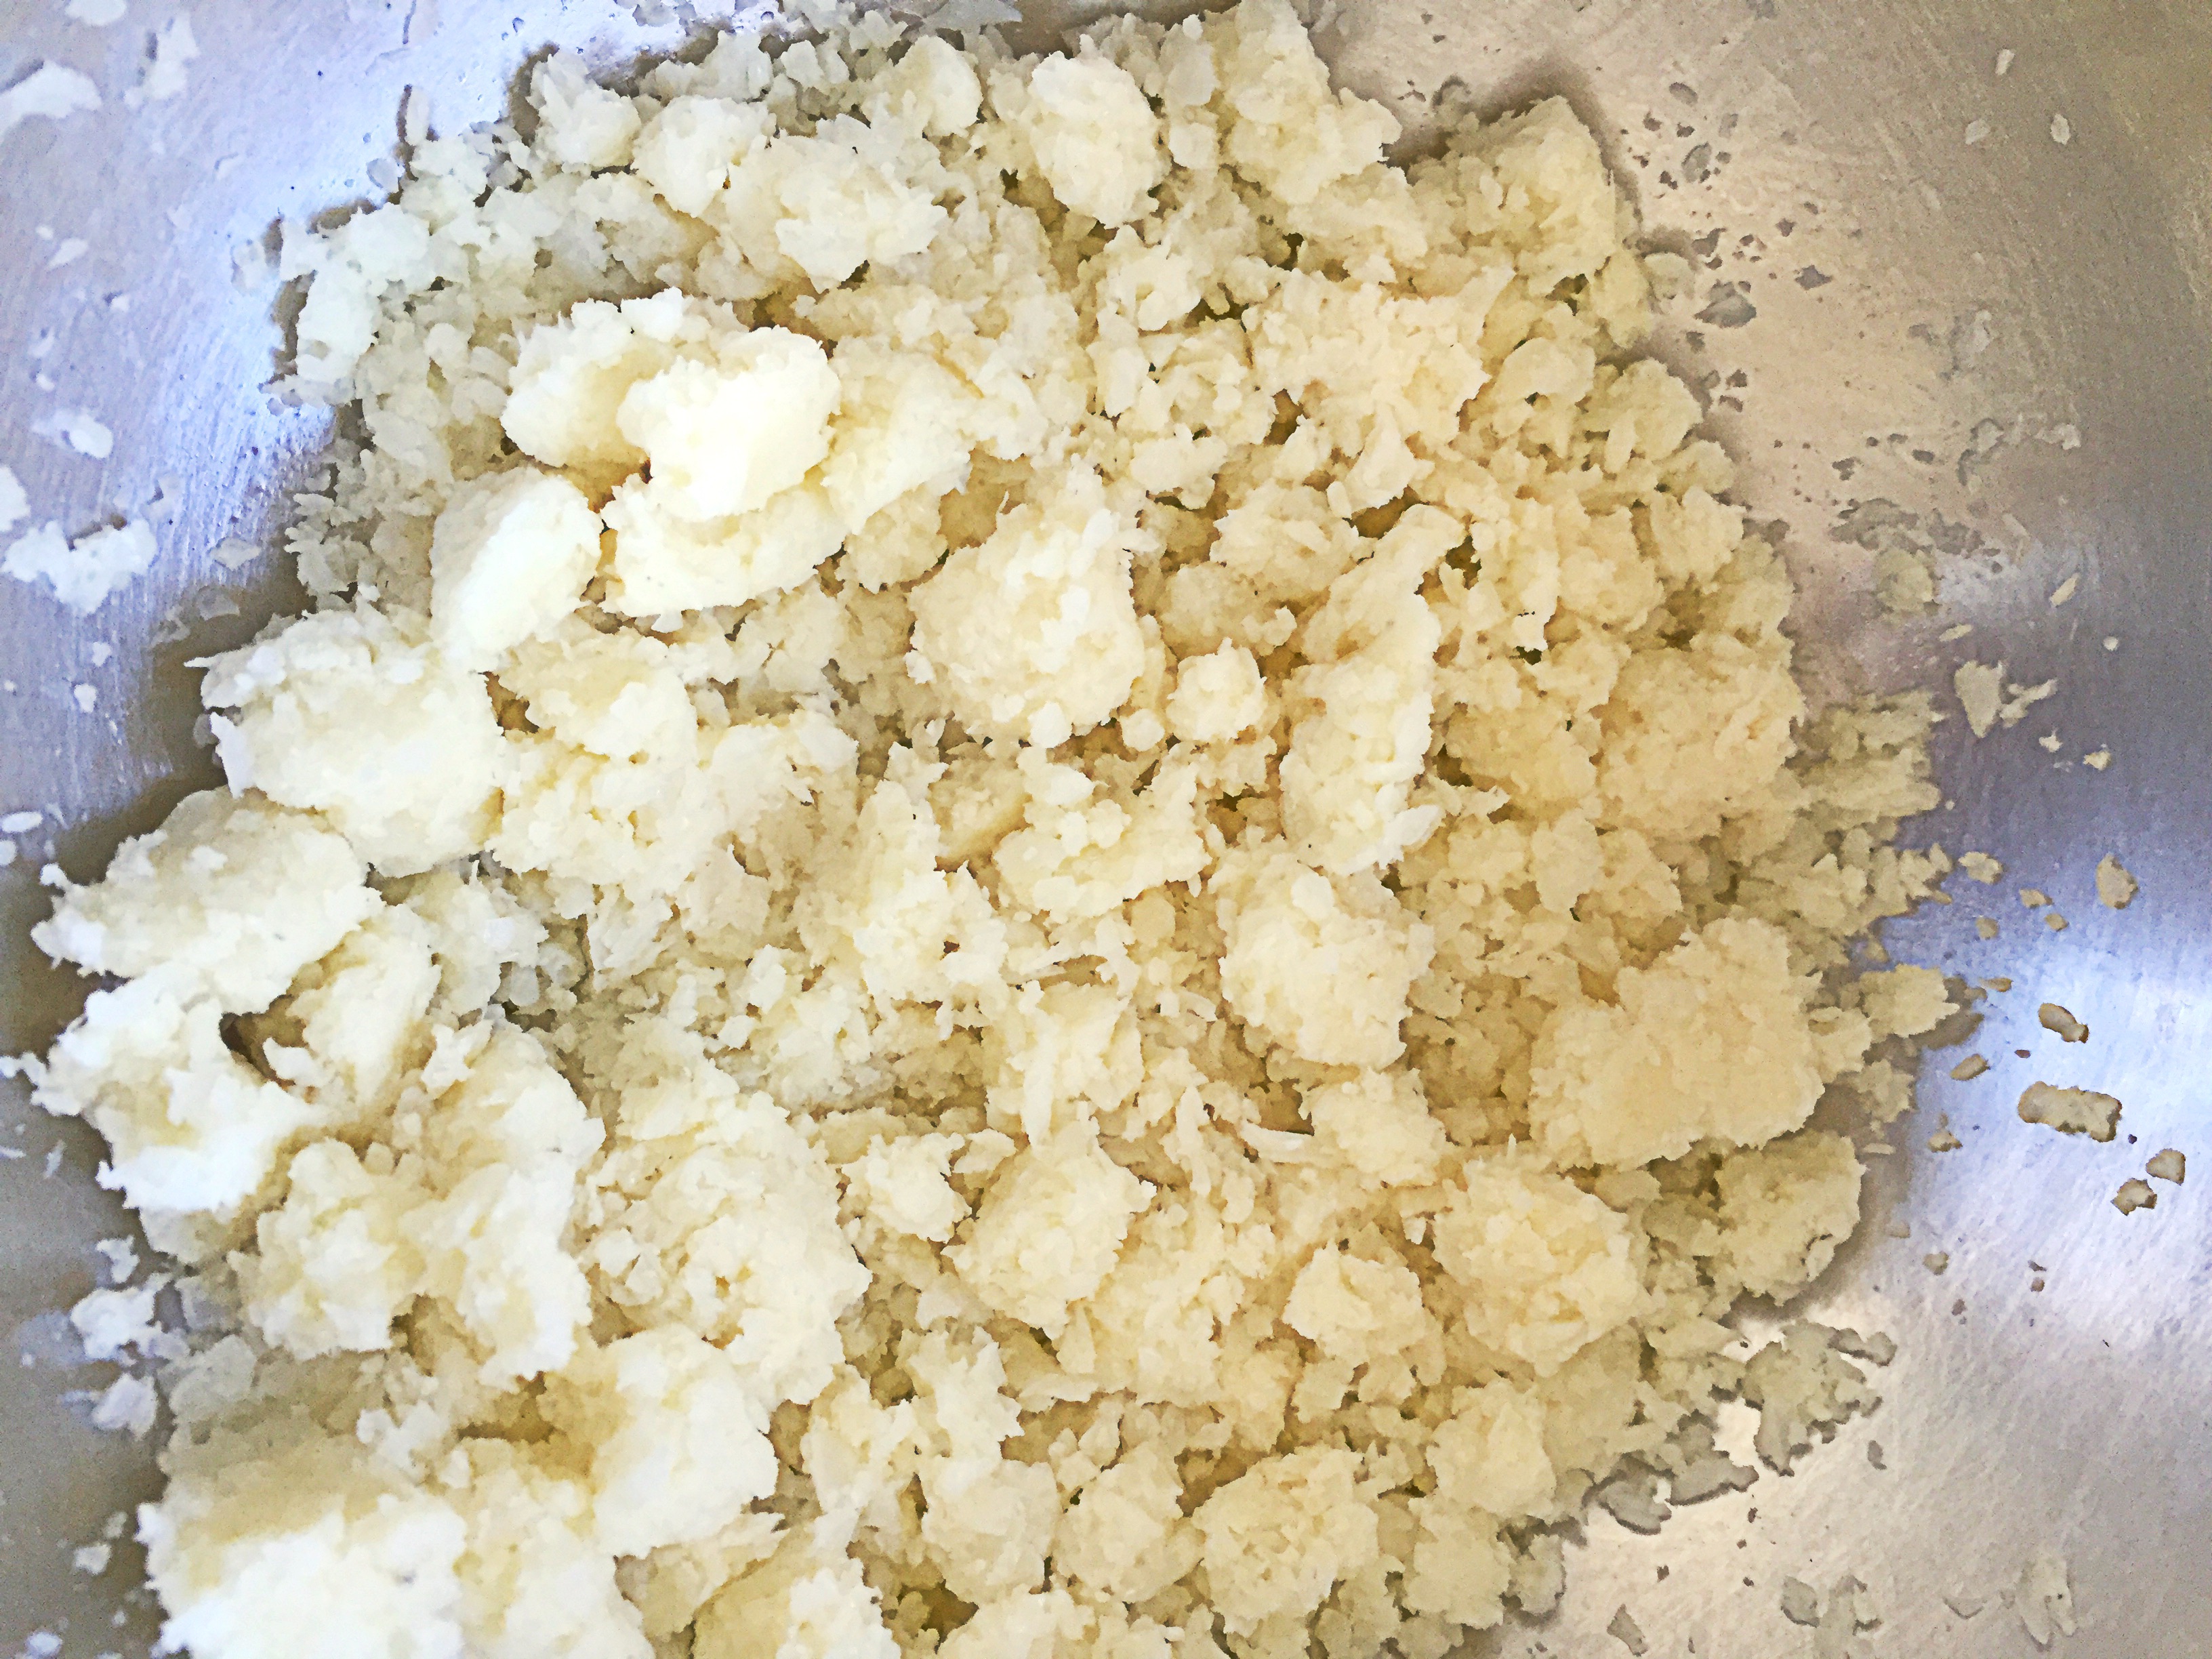
Transfer cauliflower to a processor and process until cauliflower looks like grains of rice.
image
Transfer processed cauliflower to a clean kitchen towel, or a nut milk bag, and squeeze until the cauliflower becomes dry.  You want to squeeze out as much water as you can.
image
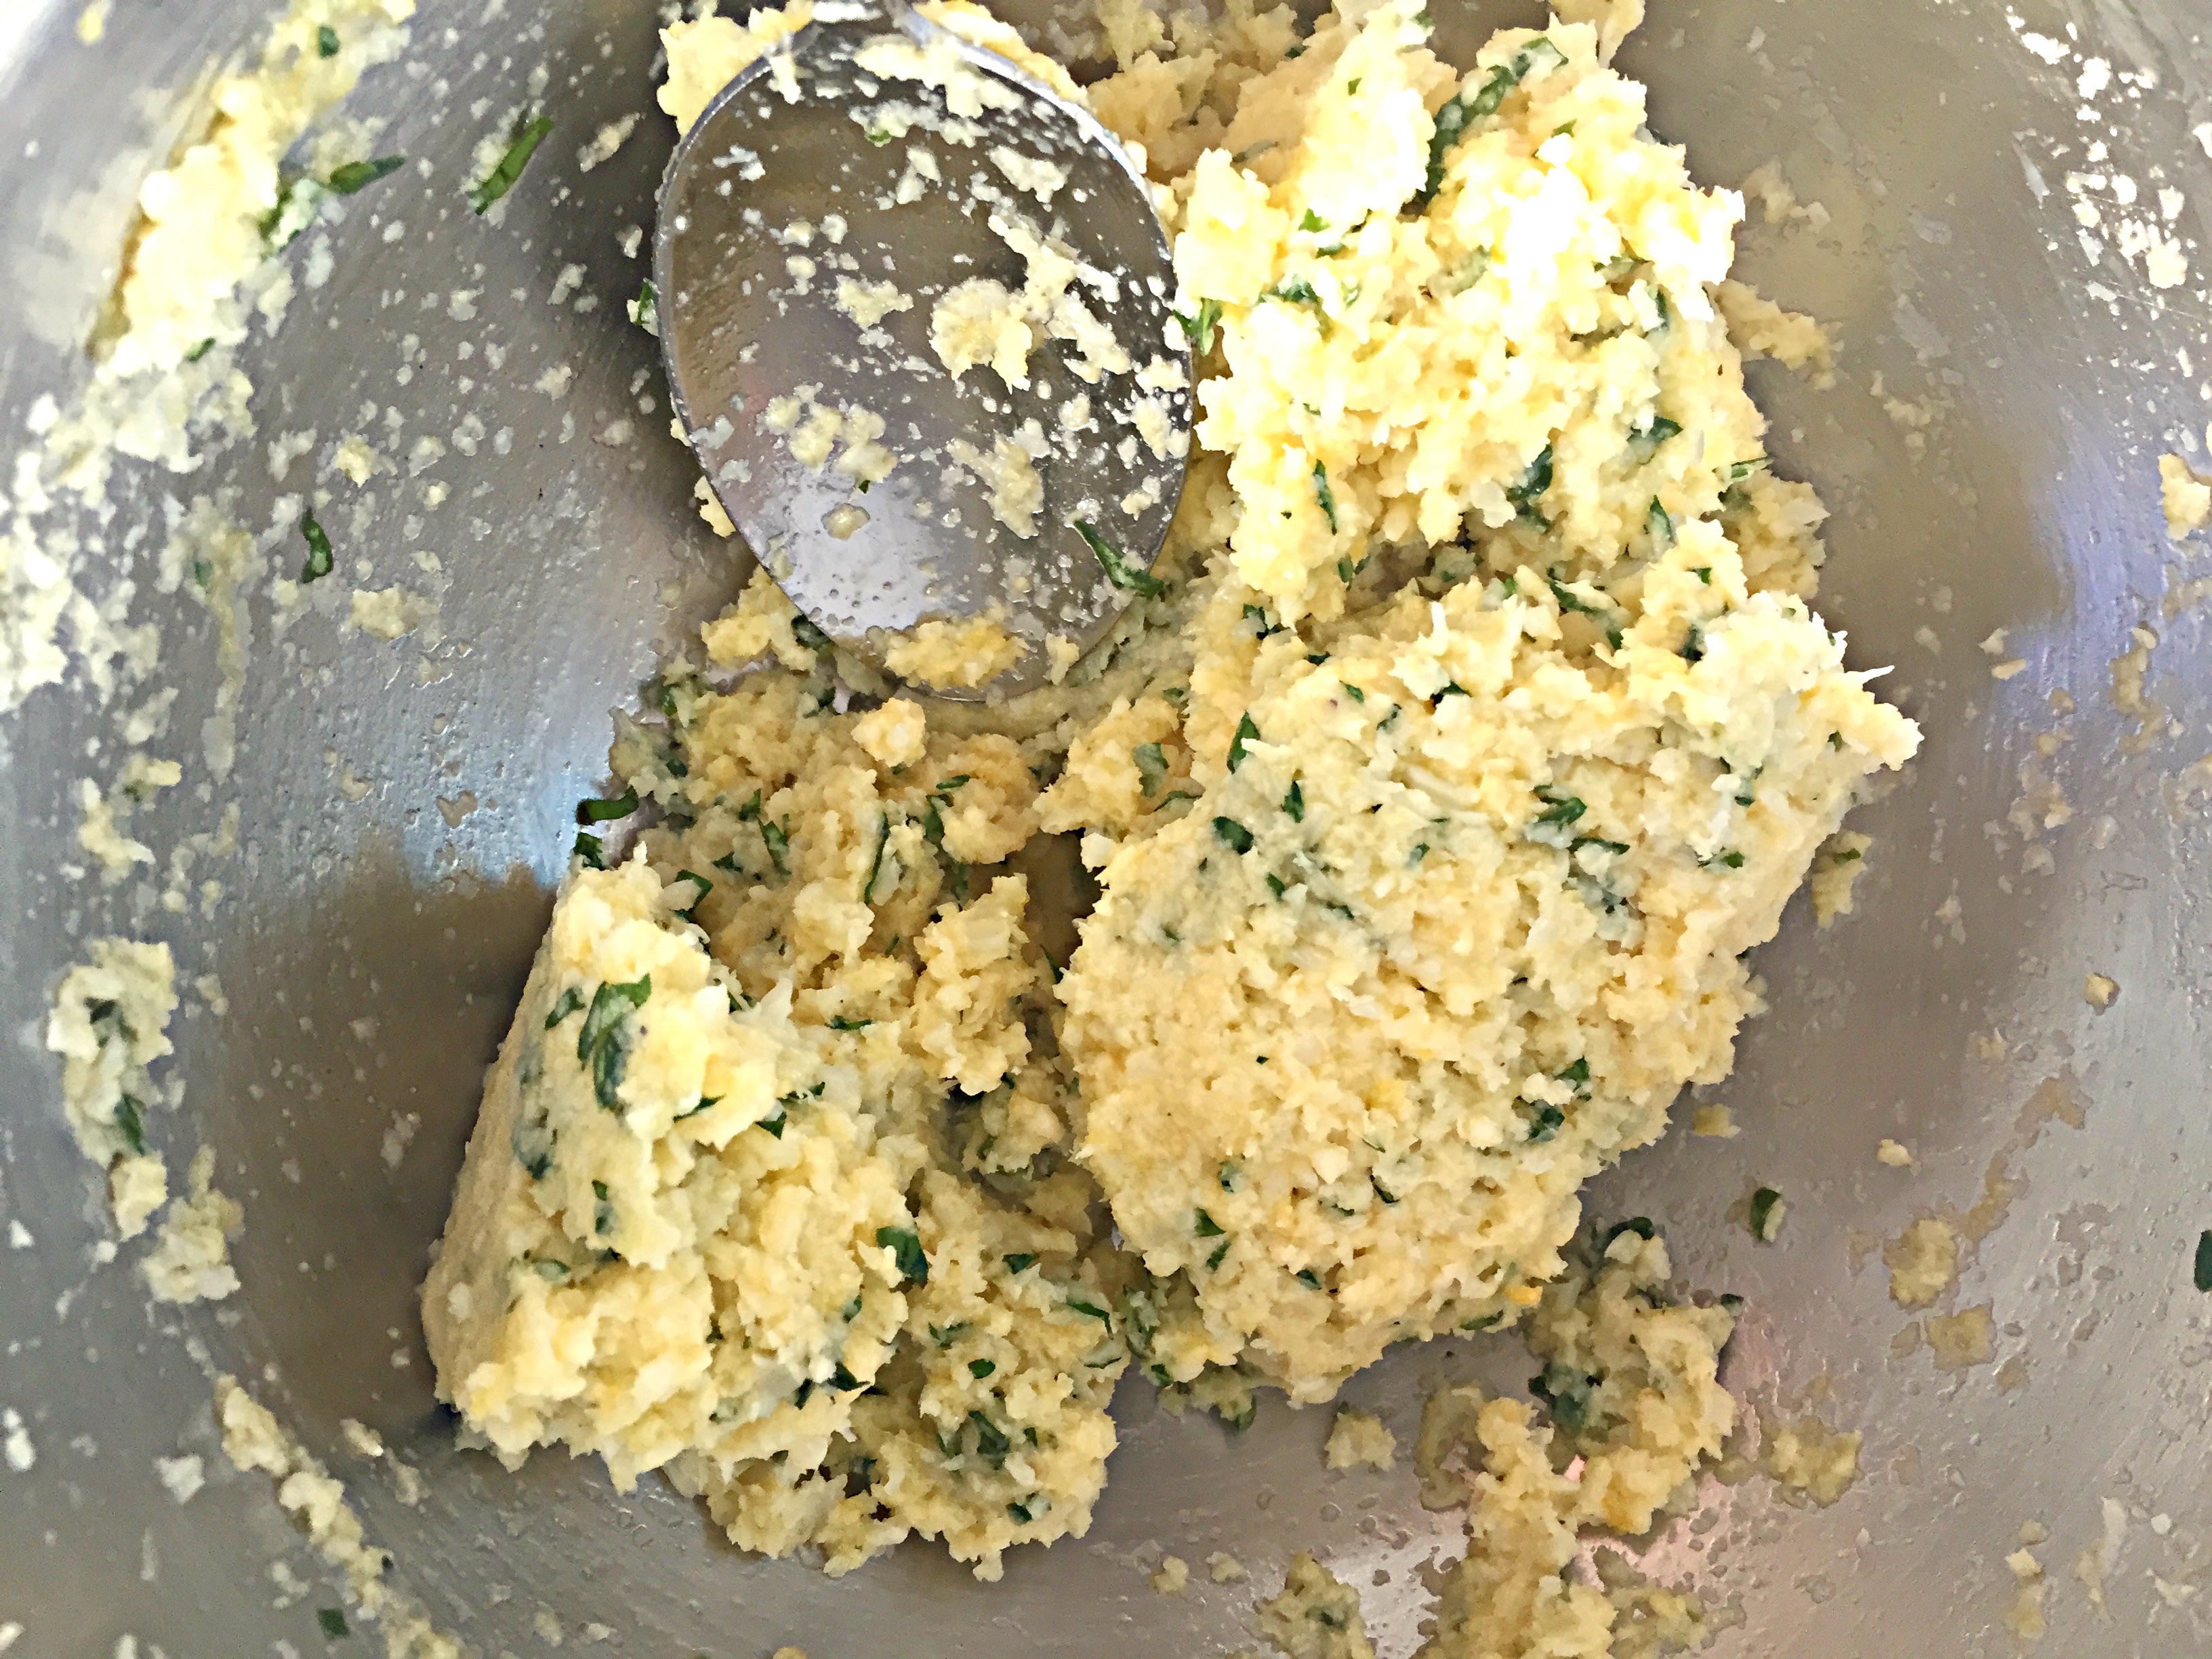
Transfer the cauliflower to a medium size bowl, and add garlic powder, salt, basil, and cheese--mix together into a ball.
image
image
image
Spray a sheet of parchment paper with oil.  Add the cauliflower mixture to the center of the parchment paper, and with your hands begin to flatten and form it into the shape of a pizza.
image
image
Once you have the shape you want, place it in the oven for 10-12 minutes.
image
Once it's golden brown and bubbly like this:  remove it from the oven.
image
image
Now you can top it with your favorite tomato sauce, cheese and toppings.
image
Once you have it topped, place it in the oven to cook until the cheese and topping melt.  Remove from oven, cut serve and enjoy!
image
This made a 10-12 inch pizza, not a crumb was left over.  Everyone enjoyed it--my husband didn't even know that the crust was made from cauliflower until Page told him! If you like this try my recipe for Tortilla Pizza!

Wednesday, February 4, 2015

Roasted Cabbage Wedges with Cider Herb Vinaigrette

Roasted Cabbage Wedges with Cider Herb Vinaigrette
One of my favorite winter vegetables is cabbage.  I love it in a hearty soup, braised in a crock on the stove, or roasted in the oven. Cabbage seems to be one of those vegetables for me that not matter how I cook it, it's comforting in every way! This recipe is a favorite of mine, the roasted cabbage alone is awesome, but the vinaigrette really takes it to another level!
Pin It!
 
 
Prep time: 5 minutes
Cook time: 15 minutes
 
Ingredients:
1 small head of cabbage quartered with core intact, so it doesn't fall apart
3-4 tablespoons of oil
4 cloves of garlic sliced thinly
sea salt and black pepper to taste
Vinaigrette
2 tablespoons of Apple cider vinegar
1 tablespoon of mustard oil
1 tablespoon of finely chopped cilantro
sea salt to taste
 
Directions: Add the ingredients for the vinaigrette to a bowl, mix well and set aside.
image
Pre-heat the oven to 425F.
image
Add the cabbage to a foil lined bake sheet, then drizzle with oil  and season with sea salt and black pepper on both sides. Lastly top with sliced garlic, and place in the oven.
image
Cook  for 10-15 and cabbage takes on some color.  Remove from oven, drizzle each wedge with some of the vinaigrette, serve and enjoy!
 
image

image
If you like this recipe check out my recipes for Indian Spiced Cabbage and Ground Chicken and Cabbage Curry!
Follow and Like me on Facebook: www.facebook.com/lazygirldinners

Tuesday, February 3, 2015

DIY BBQ Rub--Lazy Girl All Purpose Barbecue Seasoning

Lazy Girl BBQ Spice Rub
By now you know that I love to make my own dry rubs and seasonings. I am a particular fan of the Trader Joe's brand BBQ rub, but it's not organic, and it contains sugar.  So of course I had to make my own version--without the sugar. I find that most things that call for sugar, either need less than the recipe calls for, or  don't need it at all.  If you want to add sugar to this, then by all means add it, 1 teaspoon of maple sugar won't kill you, but it really isn't necessary for this recipe, this seasoning is fantastic all own its own. Also a bit of spice is nice in the recipe but I have made it optional.  My daughter isn't a fan of spicy foods, so I often leave the spice as a later addition for the grown ups.  This truly is an all purpose seasoning, it taste great on chicken, pork, tofu, or steak.
Pin It!


Prep time: 5 minutes
Cook time: none
Ingredients:
2 teaspoons of smoked paprika
1 teaspoon of onion flakes (can sub onion powder)
1 teaspoon of satsuma powder (can sub 2 teaspoons of orange zest)
1 teaspoon of cumin
1 teaspoon of ground coffee
1 teaspoon of himilayan sea salt
1/2 teaspoon of red pepper flakes (optional)
 
Directions: Add all ingredients to a small bowl,
image
Mix well:
imageTransfer to an air tight container until ready to use:
image
 
This is such a great seasoning, and it's not just something to use on grilled meats.  I used it to make oven roasted barbecue chicken the other night, and it was a huge hit!
 
image
 
Follow and like me on Facebook:  www.facebook.com/lazygirldinners

Tuesday, November 4, 2014

Rice Puffs--How to Make Rice Puff Snacks

Rice Puffs
Rice Puffs
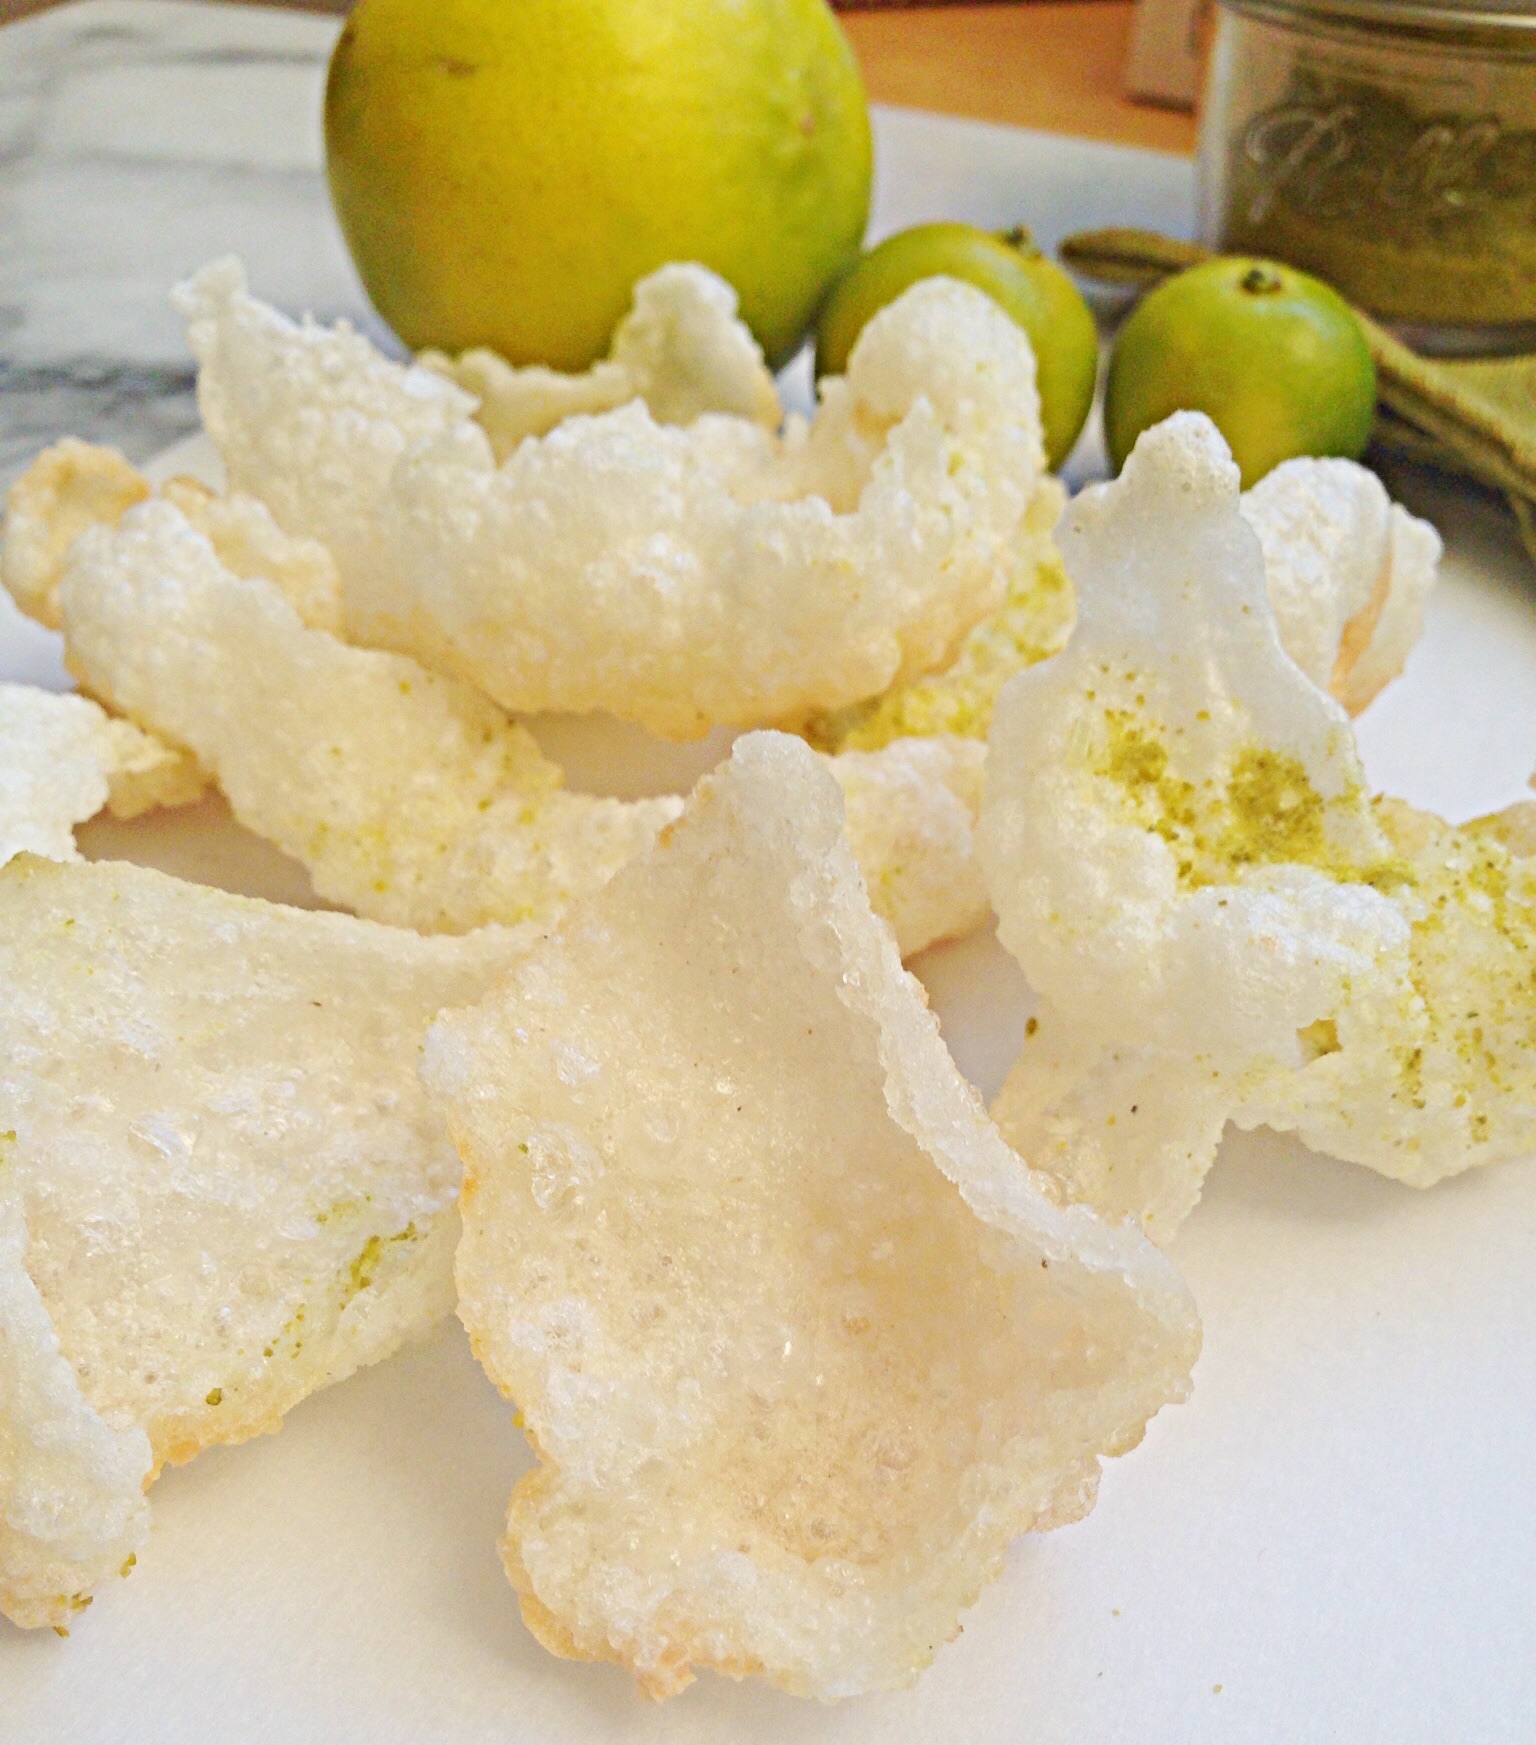
Today I'm giving you a recipe for ultra crispy, and delicious homemade rice puffs. I'm not a huge fan of rice, but my daughter and my husband are.  They are especially fond of Basmati rice. I love the way that Basmati rice smells.  It has it's own unique aroma, no other rice smells as good cooking as Basmati does.  I buy Basmati in  area close by called Little India.  I go there every so often to stock up on Indian spices as well.  The only problem with that is that I always leave with a 20 pound bag of GMO free Basmati rice!  It's enough rice to feed my family for a year---we don't eat rice that often.  I almost always end of giving most of it away, it's just too much, but they don't sell it in smaller quantities.  I have had this recipe for rice puffs in my que for a long while now, just haven't had the rice to make it. I got the idea from a recipe in Modernist Cuisine,  but found a simpler more home cook friendly version of it on Chef Steps.  I've added my own spin on it with the addition of the lime salt, but if you haven't gotten around to making my Lime powder, then  plain sea salt will do, and these will still be amazing! You don't have to use Basmati to make these, you can use any rice. Still don't have a dehydrator?  Buy one it will be the best $40 bucks you've spent in a long while.  The alternative is to put the rice puree in the oven set to the lowest setting 150F leave the oven door just a bit ajar, and check it before it reaches the 2 hour mark.  Check at 1.5 hour mark, you don't want this to crisp up and burn.
Pin It!
Pin It!
Prep time: 20 minutes
Cook time: 10 minutes
Drying time: 2 hrs
Ingredients:
3/4 cup of rice
3 and 1/4 cups of water
1/2 cup 0f safflower oil
3 teaspoons of lime powder
1 teaspoon of sea salt (powdered--just add sea salt to a spice mill and blend until powdered)
Directions: Add the lime powder sea salt to a bowl mix well and set aside.  Add rice and water to a pot, cook until rice is tender and falling apart--there will still be water in the pot.
image
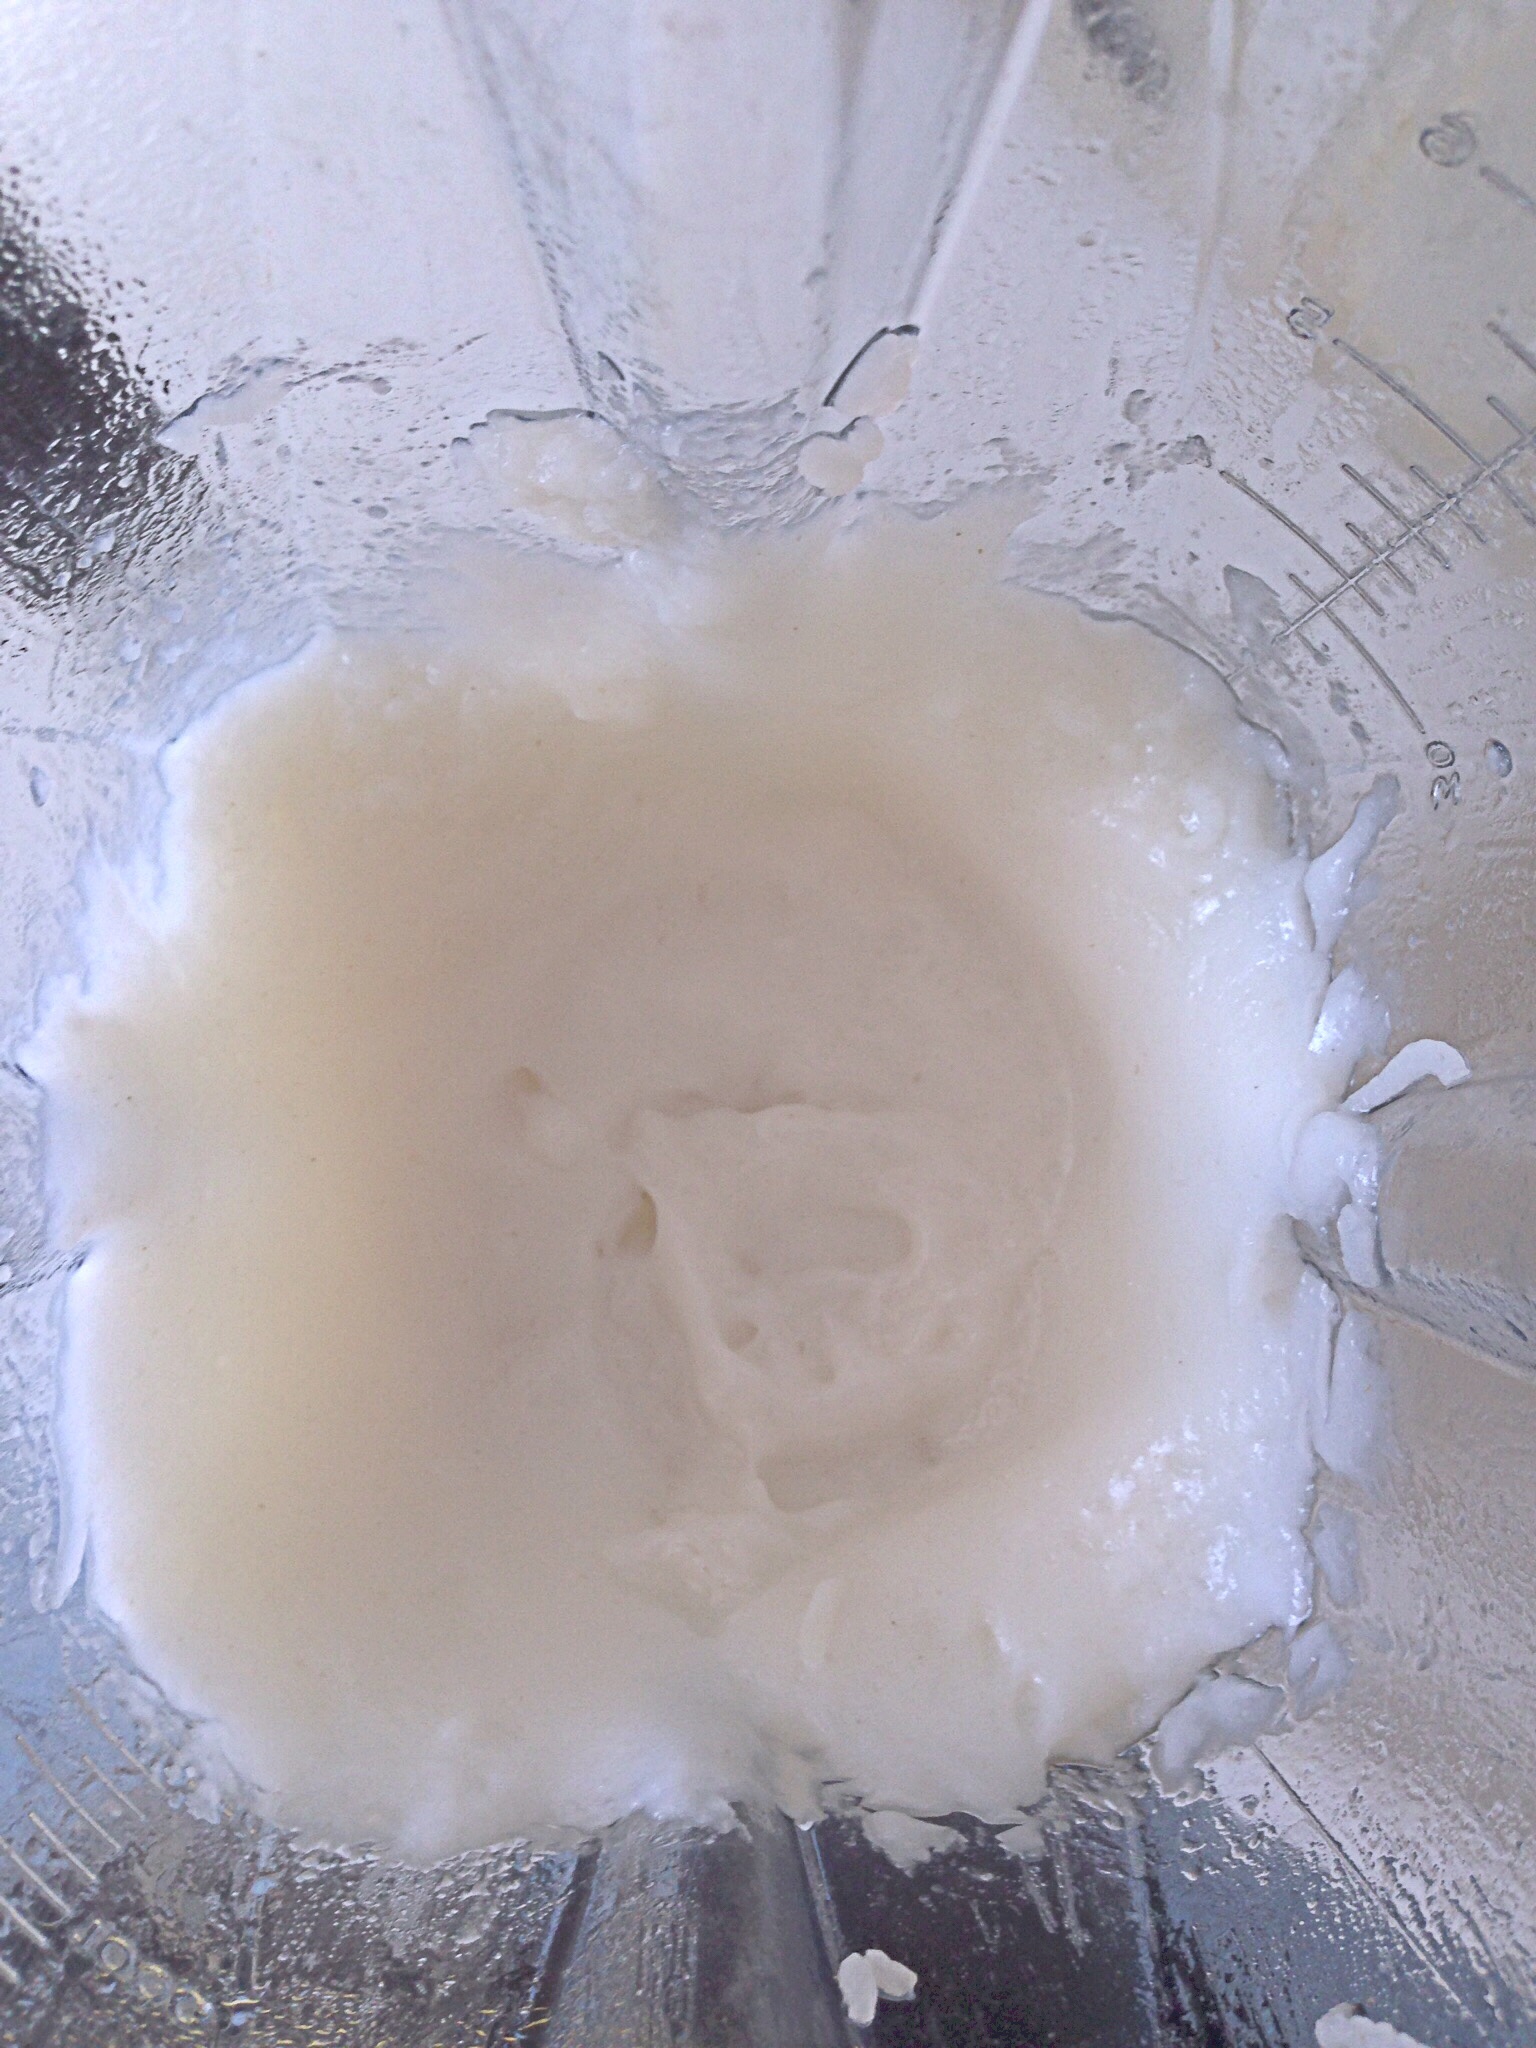
Transfer the cooked rice along with any left over water to a blender and blend until smooth.
image
Pour the rice puree out onto silpat's smooth out into thin layers.
image
Place in the dehydrator on 122F and allow to dehydrate for 2 hours.  The dehydrated rice puree should be pliable but also have a snap to it.
image
Note: If you dehydrate for too long, the rice puffs will not puff, if you dehydrate for too short a period, they will not puff either.  When you place your rice puffs in the hot oil they should sink  to the bottom of the pot and then immediately rise and puff.
Once your puree has been dehydrated, heat the oil to 374F, while the oil is heating break the rice sheet into bite size pieces.  When the oil reaches temperature, drop the rice sheet pieces into the oil, they should drop to the bottom and rise and puff up immediately, fry for 2-3 seconds then remove from oil and season with lime salt immediately,
image
let the rice puff's cool, then enjoy!
image