Showing posts with label low fat recipes. Show all posts

Tuesday, May 19, 2015

Crispy Pork Larb

Crispy Pork Larb
Crispy Pork Larb
This is one of those dinners that is both healthy and delicious.  Trust me when I tell you when you take one bite of this you will be forever grateful that I started this blog--yes it's that good!  For those of you who do not know, Larb is a Thai street food.  It's so good that it'll make you question how we do street food in America.  It's bright, fresh, and full of the umami flavors that will make you go Mmmmmm... If you don't fancy pork, no problem, you can try this with ground chicken, turkey, or even lamb and beef.  Check out my recipe for Chicken larb here.  This is one of my favorite ways to use ground meat, it's so simple that this meal almost makes itself!

Pin It!
Pin It!


Prep time: 5 minutes
Cook time: 10 minutes


Ingredients:
1 pound of ground pork
3 large cloves of garlic thinly sliced
1/4 cup of diced red bell pepper
1/2 of a red onion, sliced thinly
1/2 cup of fresh mint leaves
1/2 cup of fresh basil leaves
1/2 cup of fresh cilantro leaves
1 head of romaine lettuce, leaves removed to use as cups
1/2 cup of sliced persian cucumbers
1/3 cup of fresh lime juice
1 tablespoon of a good quality fish sauce, I used red boat
2  tablespoons of soy sauce
1/4 cup of water
Sea salt to taste
2 tablespoons of cooking oil of your choice
red pepper flakes to taste
Directions:
Heat oil, garlic and red bell pepper and cook until garlic is fragrant--about 15 seconds.
image
Add in ground meat season with sea salt and cook until brown about 5-7 minutes.
image
Once brown, add in soy sauce, fish sauce, water and red pepper flakes if using.
image
Cook until liquid evaporates and pork is brown and crispy about 2 minutes. Add in lime juice, toss well, remove from heat.  Add the meat to the lettuce cups, top with a generous amount of the fresh herbs, cucumbers, red onion, red pepper flakes, and a squeeze of additional lime juice, enjoy! So good!
image

image

Tuesday, May 12, 2015

Herbaceous Grilled Lamp Chops

Herbaceous Grilled Lamb Chops
Last weekend I visited a Persian market.  The market filled me with all sorts of food inspiration, but it mostly left me with a strong desire to eat lamb.  I guessing that desire came from the cooked foods section, which had fresh lamb kabobs and sharma. The market also housed a rather large meat department, it had lamb in every form, hooves, hearts, livers, basically every part of the lamb that a better cook than I am could possibly want to cook. A far cry from the selection at my local Whole Foods! I feel like I hit the lottery if they have stewed lamb meat once every 4 months.  Wouldn't it be fabulous to be able to walk into your local market and find, um..choices?  Like ramps in the spring time, in California--but I digress.  Let's just say, I left the Persian market with market envy.   I shop at Whole Foods so often that when I go into a conventional grocery store, I'm always amazed at how inexpensive things are.  Haha..call it reverse sticker shock! Thank you Whole Foods!  Surprisingly, I did not leave the Persian market with lamb.  I did find some great spices, some pomegranate molasses, and a few other great items.  I left with my new finds and a mission to cook these lamb chops.
Pin It!
Pin It!
Ingredients:
1 lb lamb chops
2 tablespoons of fresh rosemary, finely chopped
4-5 cloves of garlic minced
1 teaspoon lemon powder, can sub with lemon zest
1/2 teaspoon of olive oil
Directions: To a small bowl add garlic, rosemary, lemon zest and oil, mix well.
image
Dry lamb chops, season generously with sea salt. Rub the lamb chops with the herbaceous garlic paste.
image
Place lamb chops on a hot grill, and cook for 5-7 minutes on each side, or until lamb chops are cooked to your liking.  Remove from grill, serve with a fresh squeeze of lemon and enjoy!
image

Wednesday, February 11, 2015

How to make Onion Powder--DIY Onion Powder

DIY Onion Powder--How to make Onion Powder
Recently I was chatting with some professional chefs online one of them was talking about using dried powders like garlic and onion in a recipe that he was playing with.  He wanted to know where he could find better quality powders.  The discussion quickly went from people being helpful, to people questioning whether any chef of good standing would ever use a dried product versus a fresh product. One person in particular, said absolutely not!  Others, said of course and then went on to make a case for when dried spices are needed, and in those cases how using dry spices make the dish better.  The discussion got me thinking about how often I use dried spices, and what dry ingredients I use.  The truth is that I am one of those cooks, who relies heavily on fresh ingredients.  The produce bin in my refrigerator is always stocked with, fresh thyme, parsley, mint, cilantro, basil, and whatever other herb is in season--ALWAYS.  I can't imagine cooking without the use of fresh herbs.  At the same time, my cupboards are stocked with the dried version of all the fresh herbs that I just mentioned, and many, many other dry spices, like garlic powder, cumin, tarragon, onion powder...the list could literally fill this page!  If you've been following my blog, then you know that I make many of my own spices.   When the person in that forum asked about sourcing onion powder, my immediate thought was, why not just make it? So I did.  It's a simple process, but the onion powder that you get from this process is the best that you will probably ever taste--or smell--the smell had me salivating--this is the stuff that great onion dips, and soups are built from!
Pin It!


Prep time: 10 minutes
Cook time: 6-8 hours--
Ingredients:
2 large onions sliced thinly
Directions: Evenly spread the sliced onions on a dehydrator sheet.
image
If using an oven, place the onions on a parchment lined bake sheet. Set the temperature on your dehydrator to 125F.  If using an oven, set it to the lowest possible setting 150F.  Let the onions dehydrate until brittle, then remove and let cool.
image
Once the onions have cooled, place them in a spice grinder/coffee grinder and blend into a powder.  Stop here if you want onion flakes,
image
 
image
Transfer to an airtight container until ready to use.
 
image
 

Tuesday, September 2, 2014

Roasted Garlic--How to Roast Garlic

How to Roast Garlic

Can you image cooking without garlic? I can't! I love it! Garlic lends so much flavor to a savory dish, it's hard to imagine not having it to use. I love garlic in every state, raw, blanched, powdered, and roasted.  Each has it's own unique flavor. Roasted garlic is so delicious, and there are so many uses for it. I add roasted garlic to a plain tomato sauce to instantly take it from bland to fantastic! I add roasted garlic to one of my favorite roasted eggplant dishes. I spread roasted garlic on a good piece of crusty bread and dip it into a balsamic, red pepper, and olive oil vinaigrette, and of course, I add roasted garlic to mashed potatoes, or my cauliflower potato mash! There are a plethora of uses for roasted garlic, (like using it for my Roasted Garlic and Lemon Chicken recipe), once you learn how to roast garlic, you will wonder why you've been cooking without it!
Pin It!
Pin It!


Prep time: 2 minutes
Cook time:30-45 minutes

Ingredients:
1 large bulb of garlic
1 teaspoon of olive oil
sea salt and black pepper to taste (optional)
1 sheet of foil--must be big enough to fully enclose the garlic

Directions: Pre-heat the oven to 400F. With a knife slice the top off of the garlic. Place the garlic inside of the foil, pour the oil over the top of the garlic, making sure to cover all exposed garlic. add sea salt and black pepper if using, 

Fold all sides of the foil, making sure that the garlic is fully enclosed. Place the garlic bulb in your oven 

Cook  for 45 minutes, or until garlic is beautifully golden brown.  

Allow to cool for 10-15 minutes, then remove by squeezing, or by removing each individual clove of garlic with a pairing knife, and enjoy!

Tuesday, July 8, 2014

Marinated Mushroom Steaks


Marinated Mushroom Steaks

I make an entire meatless meal at least once a week.  Going vegetarian, or vegan, even once a week is great for your health, excellent for your pocket book, and a very environmentally friendly thing to do.  One of my favorite vegetarian meals is faux steak, with beans, rice, salsa, and plantains.  It's simple--yes! But so delicious, and it reminds me of the delicious dinners I had while in Puerto Rico.  I switch out the steaks for marinated, grilled mushrooms, and the result is perfection!

Prep time: 30 minutes
Cook time: 7-10 minutes

Ingredients: 
2 large Portabello mushrooms, undersides and stem removed
1/2 teaspoon of worcestershire sauce
1 large garlic clove sliced thinly
1 tablespoons of olive oil
1 tablespoon of white wine vinegar
sea salt and black pepper to taste

Directions: Mix together all the ingredients for the marinade in a small bowl.  Pour over Mushrooms and let marinade for 30 minutes.  Grill on a hot grill for 3-4 minutes on each side, remove from grill and serve!

Wednesday, May 28, 2014

Cucumber Tomato and Feta Salad with Balsalmic Vinaigrette


Cucumber Tomato and Feta Salad with Balsamic Vinaigrette

Salads are my go to lazy girl side.  They require minimum effort and absolutely no cooking.  It doesn't get much better than that in my book, and salads are good for you.  Salads also go with practically everything.  My husband is a big fan of salads in general, he's one of those people who has to have a meal anchored by vegetables or he doesn't feel like he has gotten a complete meal.  I'm like that too.  When we traveled to Puerto Rico several years ago, we were both impressed with the food: steak, chicken, rice and beans, peppers, plantains. However, the food was always missing that anchor of vegetables, which we are both accustom to.  We always asked if there was a vegetable dish that we could order to round out our meal. We never found a vegetable dish, but they always had a basic salad.  

Prep time: 7-10 minutes
Cook time: none
Total time: 10 minutes

Ingredients:
1 medium cucumber sliced thinly or cubed
1/2 cup of organic cherry tomatoes sliced in half
1/4 cup of crumbled feta cheese
Ingredients Balsamic vinaigrette:
Sea salt to taste
Black pepper to taste
4 tablespoons of Balsamic vinegar
1 small clove of garlic chopped finely
3 tablespoons of olive oil

Directions: Add the cucumber and tomatoes to a medium sized bowl, top with feta and set aside. In a small bowl whisk the ingredient for the vinaigrette, spoon over the cucumber salad and enjoy!


Tuesday, May 6, 2014

Cucumber Salad with Lemon Basil Vinaigrette

Cucumber Salad with Lemon Basil Vinaigrette


I have a confession to make, sometimes I make salad when I don't want to cook a side---okay maybe I do that more than sometimes, I do it a lot. There is a reason I named this blog lazy girl dinners.  This salad is a result of me being lazy and needing to use the ingredients I had on hand.  It was a hit with both my husband and my daughter.  It was the first time I got her to eat cucumber without chewing it up and spitting it out. Slicing them with my spiral vegetable slicer had everything to do with that because when it comes to getting her to eat something, it always comes down to texture.

Prep time: 10 minutes
Cook time: none
Total time: 10 minutes

Ingredients:
2 large cucumbers sliced thinly
4 tablespoons of lemon juice
2 tablespoons of olive oil
1 tablespoon of fresh basil, finely chopped
Sea Salt to taste

Directions:
Add the lemon juice, olive oil, sea salt, and basil to a small bowl and whisk together. Spoon as much of the vinaigrette as you'd like over a serving of the cucumbers and enjoy!Note: If you are serving this at a dinner party--yes it's lazy but it's elegant and very delicious--then be sure to spoon the vinaigrette over the salad just before serving, otherwise the cucumbers will loose their crunch and get soggy.


Tuesday, April 29, 2014

Grilled Rib-eye with Spicy Dry-Rub


Grilled Rib-eye Steak with Spicy Dry-Rub

Now that it's warm again I can cutout a bit of my cooking by having my husband grill for us. He loves rib-eye steaks and it's fun for me to find different ways to spice them up. I love making marinades for steaks but sometimes it's fun just to mix a few dry spices together and see what happens. That is exactly what I did here. This do it yourself dry rub is definitely going into our menu line up again, it is so yummy.  The only problem with allowing my husband to grill the steak, was that he was not as gentle with the steak as I would have been, so I didn't get great pictures, but trust me when I say you will love this dry rub.


Prep Time: 2 minutes
Cook Time: 10-15 minutes
Total Time: 17 minutes
 Note: this is enough seasoning for a 1 pound steak, double or triple the amounts if you are grilling more steaks.

Ingredients Dry-Rub:
1/2 teaspoon of smoked paprika
1/2 teaspoon of dried thyme
1/2 teaspoon of garlic powder
1/2 teaspoon of onion powder
1/8 teaspoon of cayenne pepper
Sea salt to taste

Directions: Add the dry spices to a small bowl and mix them together until combined:


Season the both sides of the steak with sea salt, then rub both sides generously with the dry spice mixture.


Place on the grill and let cook  for 7-8 minutes on each side, remove from grill let sit for 5-7 minutes before enjoying.


 How easy was that?  I love it when my husband grills;-) Okay share your favorite dry rub seasoning?  I always buy one, this is the first time that I've made my own.

Wednesday, April 16, 2014

Crispy Smelt with a Parsley Lemon Viniagrette


Crispy Smelt with Parsley Lemon Vinaigrette
I LOVE Smelt, LOVE them. In fact I love them so much I wish that I could eat them year round.  If you've never tried smelt, then after you read this blog, stop by your grocery store, and get some! They are rich in omega-3 fatty acid, so not only are they delicious, but they're great for you. Smelt are small boned fish, like anchovies, so you can eat them whole, even the head. if you're so inclined. If you're really lucky, like I have been thus far, you'll find them fresh at your grocer.  I'm told that most grocers sell them frozen in bags.  Fresh is best, but these are so good that I would imagine they would still be good even after they've been frozen and defrosted. But if you have a choice, why not choose fresh?

Prep Time: 10 minutes
Cook time: 10 minutes
Total Time: 20 minutes

Ingredients
1 pound of Smelt (cleaned)
1/2 cup of coconut flour
Sea salt and black pepper to taste
1/2 cup of coconut oil

Ingredients for Parsley Lemon Vinaigrette
1/4 cup of fresh organic flat leaf parsley finely chopped
5 tablespoons of Lemon juice
3 Tablespoons of olive oil
2 cloves of garlic grated
Sea salt and black pepper to taste

Directions: Melt the coconut oil in a cast iron skillet, and bring up to temperature. Season the smelt with sea salt and pepper:


Dredge through the coconut flour, coating all sides of the fish with the flour:

Carefully add the fish to the hot oil and fry until golden brown on all sides, about 5-7 minutes:

 Add the ingredients for the parsley lemon vinaigrette to a bowl and whisk until well combined, spoon over the fish and enjoy! These make a great appetizer at a party, just make sure that you buy enough, because no one can eat just one of these!

Like this recipe? Then you'll love my video recipes, subscribe to my Lazy Girl Dinners Youtube channel for quick do it yourself and how to cook videos.


Tuesday, April 15, 2014

Mussels in White Wine Sauce

Mussels in White Wine Sauce


This week I decided to switch things up a bit with a few sea food recipes.  My husband isn't a big fan of mussels unless they're drenched in cream, but I prefer them a little more on the light side---although I agree a great cream sauce never hurt a mussel. My daughter isn't a fan of eating sea food just yet, but she loved playing with the mussel shells. Mussels are  great for those of us who are budget minded, they cost just a few dollars a pound, and a pound is more than enough for 2 people. A few things worth noting about mussels, as with most seafood the fresher they are, the better tasting they are. Discard any mussels that are not closed and tightly sealed, remove the hairy beards before cooking, and clean them thoroughly by scrubbing each mussel shell and then soaking them, with 1-2 tablespoons of flour added to a large bowl of water, for 10-15 minutes before cooking in order to expell any remaining sand.

Prep time: 10 minutes
Cook time: 10 minutes
Total time: 20 minutes
Ingredients:
1 lb of Mussels
1/4 cup of shallot minced
1/2 cup of white wine Sauvignon Blanc works amazingly
2 cloves of garlic
2 tablespoons of lemon juice
1/4 cup of finely chopped parsley
1 teaspoon of bonito flakes (optional)
2 tablespoons of olive oil
Directions: Heat olive oil, add garlic and shallot to a sauce pan, and sauté until shallots are translucent, add in the bonito flakes if you're using them and mix for 10-20 seconds. Add in the wine, and bring to a simmer, add in the mussels and cover the pot, cook for 8-10 minutes then turn off the fire. Remove the cover, the mussels should be open, and cooked fully, sprinkle with lemon juice, and parsley transfer to a bowl and enjoy!

Wednesday, April 9, 2014

Basil Chicken

Basil Chicken Recipe

So everyone has that one friend whom they idolize, you know the one who is super intelligent, charismatic, gorgeous, and the kind of mother to her children you only wish you could be. Well that person for me is my friend Jennifer. She has the energy of the energizer bunny--actually I think she could out last that bunny 3 times over, She's a great friend, reliable without fault, and on top of all that, she is a great cook. One of her signature dishes is basil Chicken.  It's beyond delicious, the sweet notes of basil mixed with the Unami flavors imparted by the soy sauce in this dish make it heaven on a plate.  She makes hers with the whole parts of chicken, usually legs, or drummetts. I decided to try it using ground chicken, because who couldn't use another way to use ground meat?  I'm so glad I did, it is equally as delicious as using chicken with bones, but much less time consuming, because there aren't any bones.

Prep time: 5-7 minutes
Cook time : 15 minutes
Total time: 20 minutes

Ingredients:
1 pound of ground chicken
3/4 cups of fresh basil chopped
1 small brown onion or shallot chopped
2 tablespoons of soy sauce
2 large cloves of garlic
2 tablespoons of olive oil/ghee
1/2 teaspoon of red pepper flakes
Sea salt to taste

Directions: heat oil in skillet, add garlic, sauté for 30 seconds, then add the onion, and cook until translucent. Add the ground chicken and brown. Add in the soy sauce, basil and red pepper flakes, cook for 2 minutes then turn off the fire. Serve over brown rice, or in lettuce cups.


Wednesday, March 26, 2014

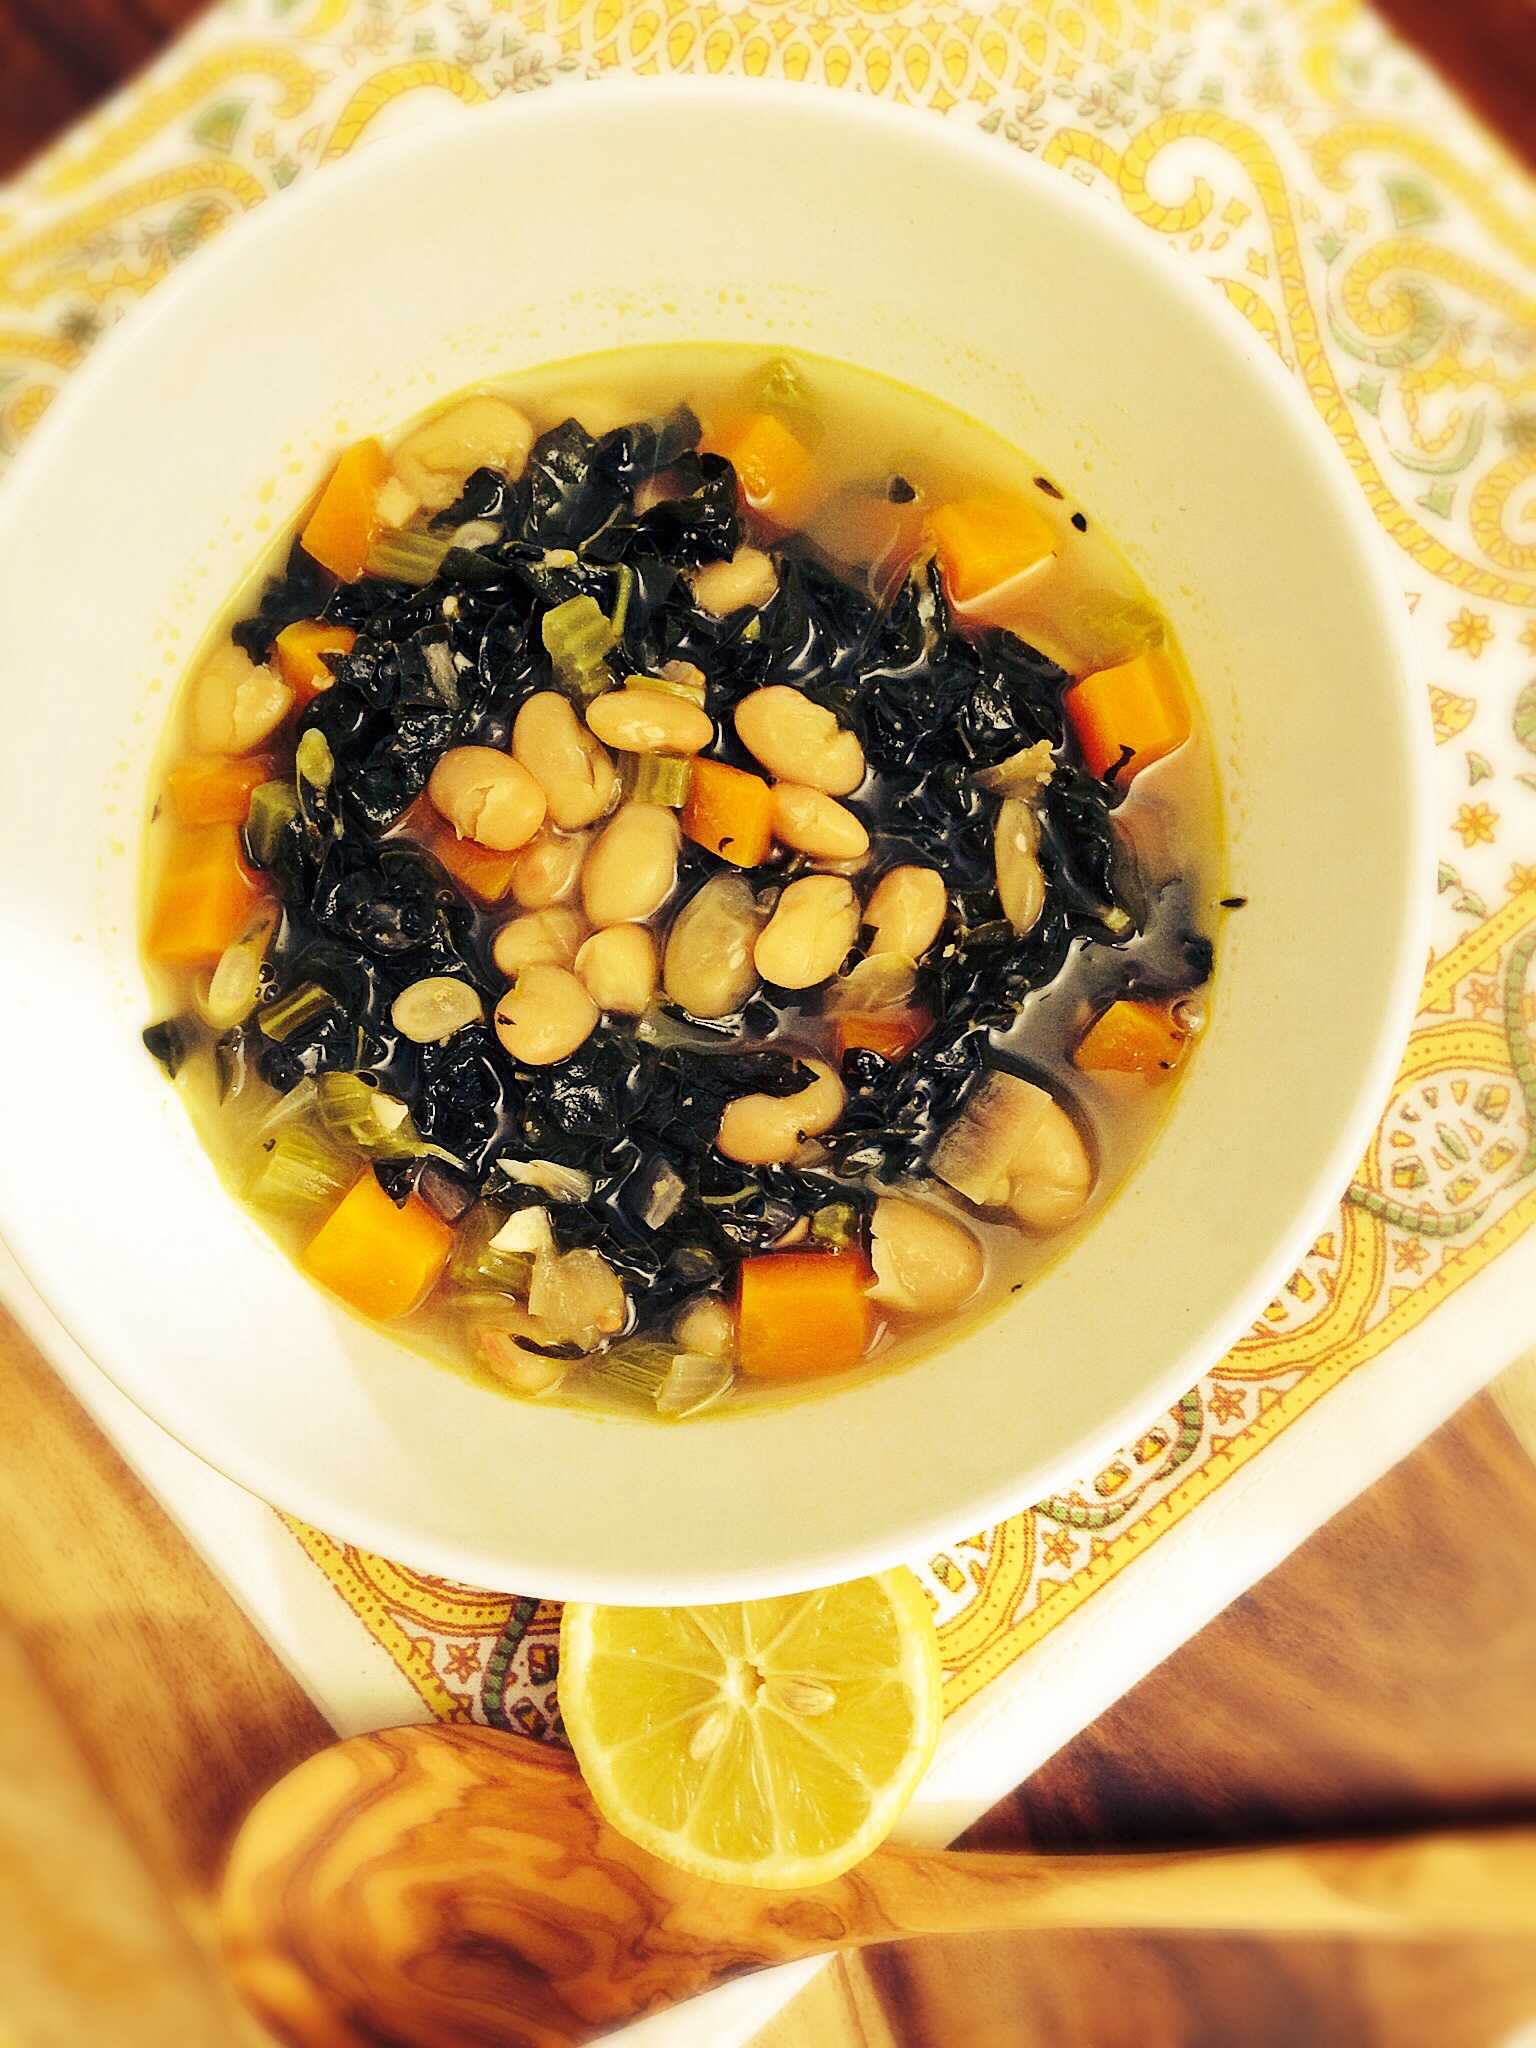
Kale and White Bean Soup

Kale and White Bean Soup

I feel like I haven't shared enough vegetarian recipes with you guys, at least not as a full meal. My daughter is just beginning to appreciate veggies the way my husband and I do...thank God, I was beginning to worry she would be one of those kids who would refuse everything green. But somehow, and by the grace of god she has taken to eating veggies. While I was making this she kept reaching up to steal pieces of carrots! It made my heart leap with every bite she took! She loves this soup, and I love that she loves it, because it's nothing but veggies!

Prep time: 10-15 minutes
Cook time: 25 minutes
Total time: 35-40 minutes

Ingredients:
1 bushel of organic kale, sliced thinly
1 cup of shallots, chopped
1 cup of carrots, cubed
1 cup of celery, cubed
3 cloves of garlic, chopped
3/4 cup of white wine Sauvignon Blanc
4 cups of vegetable stock
1.5 tablespoons of lemon juice
1/2 teaspoon of thyme
Sea salt and black pepper to taste
2 tablespoons of olive oil
15 oz can of Organic white beans, drained and rinsed

Directions: Heat the oil on medium heat, add garlic, shallots, celery, and carrots, cook until tender,
image
add in thyme and kale, sauté for 5 minutes.
image
Add in the wine, vegetable stock and beans, bring to a boil and cook until greens are tender about 15 minutes. Add in lemon juice,  adjust the seasoning with sea salt and black pepper, serve and enjoy

Wednesday, March 19, 2014

Charbroiled Sardines with Parsley and Thyme.

Charbroiled Sardines with Parsley and Thyme
It's not often here that I can walk up to my local Whole Foods Market fish counter and get fresh sardines. So when the opportunity to do so  occurred, I jumped at it.  I am a huge fan of small sustainable fish, like sardines, and smelt.  I'll even go out on a limb and say that I like smelt fish more than sardines, but smelt fish are even harder to come by than fresh sardines.  If you've never made fresh sardines before, then you have been missing out! They're so easy to make, and so delicious!
Prep Time: 7 minutes
Cook Time: 7-10 minutes
1 pound of fresh Sardines split down the middle
1/2 cup of parsley
1/4 cup thyme
1 clove of garlic
3 tablespoons of lemon juice
1 tablespoon of olive oil
Sea salt and Black pepper to taste
Directions: Pre-heat the oven to 400F.  Line a bake sheet with parchment or foil. Pulse all the ingredients with the exception of the sardines in a small blender or processor. You can skip the processor and opt to chop all the herbs finely and then mix with the oil and lemon. Place the sardines on the lined bake sheet, add the herb mixture to the inside of each sardine. Season with sea salt and black pepper then place in the oven and cook for 7-10 minutes, or until sardines are cooked through and have charred on top a bit. Remove from the oven, serve and enjoy!
image

Wednesday, February 26, 2014

Makeover Chicken Taco's

Leftover Makeover Chicken Taco's

One of my favorite things to do is reinvent a dinner out of something we ate the night before. Let's face it, leftovers are nice, but a freshly made dinner is better. While buying a whole chicken works out great for our budget, we are always left with leftover chicken. This recipe is result of me and more importantly my husband not wanting to eat the same roast chicken I served the night before. It's super simple to make, and very delicious.


Prep time: 10 minutes
Cook time 10 minutes
Total time: 20 minutes

Ingredients:
2.5 cups of Pre cooked chopped chicken
2 small cloves of garlic
1 tablespoon of cumin
1/2 teaspoon smoked paprika
1/2 teaspoon of garlic powder
1/2 cup of  diced onion
2 tablespoons of olive oil
1 tablespoon of freshly chopped cilantro
6 large organic corn taco shells
Sea salt to taste


Directions:
Heat the oil on a cast iron skillet, add the garlic and onion and cook for 3 minutes. Add in the chicken, cumin, garlic powder, paprika, sea salt and toss well. Cook for another 5-7 minutes. Add in the cilantro, remove from heat, and serve inside corn tortillas, with your choice of toppings.