Showing posts with label chicken recipes. Show all posts

Wednesday, October 14, 2015

Peruvian Chicken

Processed with VSCOcam with s3 preset

I love California, as a matter of fact I'd be hard pressed to name a state within this union that I'd consider leaving California for.  One of the many great things about living here, besides the diversity here, is the weather.  On a great day, the temperature ranges between 78F and 82F.  Since we live by the beach, there is seldom a day without a cool ocean breeze.  Lately however, the temperatures have been 10-20F degrees above normal, and for the last two weeks temps have settled in around 89-98F---HOT!!!!!!  So hot that the last thing I want to do is to turn on the stove.  So we've adapted, I've been marinating meat in the morning for my husband to grill in the evening when things start to cool down a bit.  This marinade is super simple, and if you've ever had grilled Peruvian chicken you know how yummy and it can be.  The vinegar in this really gives this chicken a yummy tang and kick.  I've tried this with Rice vinegar and white wine, both are yummy, but plain white distilled vinegar is just as yummy.

Pin It!
Pin It!


Here's what you need:
Ingredients
1 lb of boneless skinless organic chicken thighs
1 tablespoon cumin powder
1 tablespoon of smoked paprika
3 cloves of garlic grated
1 tablespoon of white wine vinegar--can sub with white vinegar or rice vinegar

Wednesday, October 7, 2015

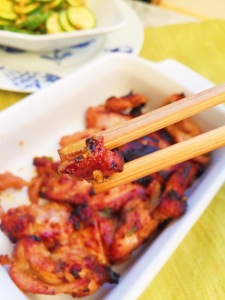
Korean Barbecue Chicken

Korean Barbecue Chicken

I love Korean barbecue, what's not to love?  Grilled meat, pickled and fermented veggies...mmmh it's a veritable umami bomb on a plate.  The fermented veggies alone are enough to get me into the door of a Korean restaurant.  I love banchan savory sprouts, kimchi, cucumber kimchi, and dashi radish make the heaviness of the barbecued meats lighter.  I remember my first experience eating Korean food.  The week of my wedding my best friend suggested that we go to a Korean bath spa together.  She said it would be a great mini break for me to table the stress of planning a wedding and at the same time get my skin nice and polished for the wedding.  I happily agreed, we had gone to many a spa together throughout our friendship, so why not make another happy memory with my best friend before I sailed off into wedded bliss, I thought.  The day before our appointments my best friend called to say that something came up at work and she could not join me, but she insisted that I go alone because I needed to destress, so I did.  The spa was unlike any other the spa that I had ever been to. After checking in, I was led on a guided tour of the steam rooms, jade rooms, and showers.  Everyone within the walls, except for the technicians, was completely naked and Asian.  I stuck out like a sore thumb.   First of all, I wasn't at all prepared to be completely naked in front of anyone other than a technician. At all the spa's  that I had ever been to everyone wore something, be it a robe, or bathing suit, but not this spa.  I also was not prepared to leave without having had my body polish.  I had read the Yelp reviews and this place was the best!  I wanted to sparkle and shine at my wedding and the only thing standing in the way of that happening was me getting naked, so I did.  I was sitting in the sauna with three women, and they could sense my unease.  They were so kind, they chatted me up, and when I felt comfortable one of them asked me how I found out about the spa.  I told them and they laughed.  I'm guessing that the spa didn't get very many non Asian patrons, which is too bad, nakedness aside, it was a great spa. The spa lacked the more polished elegance of a Burke Williams, but what it lacked in elegance it made up for it other areas, namely the food area.  After getting my scrub, and detoxing in the sauna, I walked over to the jade rooms, and just beyond that was a bar and the scent coming from the bar was intoxicating.  The bar/restaurant had a full menu of soups with fermented and pickled veggies, JACKPOT! I grabbed a folded robe from a pedestal near the entrance into the bar--you didn't think they would make us eat naked did you?--and sat down to a deliciously healthy meal.  If only all spa's included this kind of service.  That was my first experience eating Korean food, and since then I've fallen in love with it.  This recipe is my take on chicken Korean barbecue.  I have to say that this chicken is delicious!  Better than the chicken that I've had at most restaurants that I've been to.  This recipe requires Gochujang--a spicy fermented chili paste. You may need to venture into an Asian market for the Gochujang.  I purchased a jar at my local Whole Foods, they had several varieties of it, I chose a garlic Gochujang.

Here's what you need:
Ingredients:
1lb of boneless skinless organic chicken thighs, cut each thigh into 3 or 4 pieces
1.5 tablespoons of Gochujang
2 teaspoons of sugar--can sub with maple sugar or syrup
1 teaspoon of garlic grated
3 green onions chopped finely both whites and green parts
1 teaspoon of grated ginger
2 teaspoons of sesame oil
1 teaspoon of olive or grapeseed oil
2 tablespoons of soy sauce
sea salt to taste
Directions: Season the chicken with sea salt and set aside.
To a large mixing bowl or medium size bake pan add the remaining ingredients,
combine and mix well,
then toss in the chicken, tossing to coat the chicken completely in the marinade.
Cover with foil and place in the refrigerator for at least an hour.
Remove the chicken from the refrigerator 30 minutes before cooking.  Grill the chicken on a hot grill, 5-7 minutes on each side, serve and enjoy!


Tuesday, February 3, 2015

DIY BBQ Rub--Lazy Girl All Purpose Barbecue Seasoning

Lazy Girl BBQ Spice Rub
By now you know that I love to make my own dry rubs and seasonings. I am a particular fan of the Trader Joe's brand BBQ rub, but it's not organic, and it contains sugar.  So of course I had to make my own version--without the sugar. I find that most things that call for sugar, either need less than the recipe calls for, or  don't need it at all.  If you want to add sugar to this, then by all means add it, 1 teaspoon of maple sugar won't kill you, but it really isn't necessary for this recipe, this seasoning is fantastic all own its own. Also a bit of spice is nice in the recipe but I have made it optional.  My daughter isn't a fan of spicy foods, so I often leave the spice as a later addition for the grown ups.  This truly is an all purpose seasoning, it taste great on chicken, pork, tofu, or steak.
Pin It!


Prep time: 5 minutes
Cook time: none
Ingredients:
2 teaspoons of smoked paprika
1 teaspoon of onion flakes (can sub onion powder)
1 teaspoon of satsuma powder (can sub 2 teaspoons of orange zest)
1 teaspoon of cumin
1 teaspoon of ground coffee
1 teaspoon of himilayan sea salt
1/2 teaspoon of red pepper flakes (optional)
 
Directions: Add all ingredients to a small bowl,
image
Mix well:
imageTransfer to an air tight container until ready to use:
image
 
This is such a great seasoning, and it's not just something to use on grilled meats.  I used it to make oven roasted barbecue chicken the other night, and it was a huge hit!
 
image
 
Follow and like me on Facebook:  www.facebook.com/lazygirldinners

Tuesday, December 9, 2014

Sous Vide chicken Thighs with Thyme and Garlic

Sous Vide Chicken Thighs With Thyme and Garlic
OMG! When I tell you, that this preparation of chicken is the best that I've eaten in years, believe me! My husband ordered me the new Anova immersion circulator through a Kickstarter campaign back in May. I waited patiently, and it arrived last week. My first thought when it finally arrived was to make these chicken thighs. I had watched this you-tube video , (there are 3 parts watch them all part2part 3), of Michael Voltaggio making these chicken thighs sometime ago.  I was just in the early stages of learning about sous vide cooking, which means under vacuum cooking.  All of the things that I had read about sous vide had seemed so complex--holding temperatures, the right temperatures for different meats, cooking times--but Michael made it seem so simple, and it was! Sous vide cooking is the ultimate in lazy girl cooking.  It involves less effort than most slow cooker recipes, and the results are amazing!  This particular recipe literally involved 8 minutes of active cooking time.  If you add in the 5 minutes it took for me to salt, and bag the chicken for cooking, then it's 13 whole minutes of your time.  So super easy! Sous vide cooking is the future of  the slow cooking movement.  After using my immersion circulator, it's not hard for me to see why.  Unlike in conventional stove top and slow cooker cooking, in which flavor and nutrients cook out into the air, with sous vide cooking all of the flavor and nutrients stay in the food.  Every single bite that I took of this chicken was infused with the flavor of thyme, the nuttiness of the butter and garlic, and the umami flavor of the truffle salt that I used.  It was like eating  the juiciest and most flavorful  piece of fried chicken that I've ever eaten, only this chicken wasn't fried. It was cooked slowly in a water bath at a low temperature.  The best thing about immersion circulators is that they can free you from weekday cooking.  You can cook these on Sunday with your immersion circulator, put them in an ice bath, and then refrigerate and "cook" or crisp the skin  3 or 4 days later.  As a side note, if you're wary about cooking foods in plastic, like I was, there are plenty of safe BPA and Phathalate free options for out there to assist you.  Most food grade vacuum bags are both BPA and Phathalate free.  Foodsaver is one brand, even ziplock bags are-yes you can even sous vide in a Ziploc , see how here--but it has to be Ziploc not an off brand.  I use Vacmaster. Here is an article all about plastics and sous vide cooking.  If you are still wary, here is a silicone option, or you can use mason jars to sous vide in--just note that cooking in a mason jar will require additional cook time.
Pin It!


Prep time: 5 minutes
Cook time: 1.5 hours
Ingredients:
3 chicken thighs skin on
6 sprigs of fresh thyme
1 teaspoon of grassfed butter cut 3 ways
sea salt to taste -- I used a truffle salt
3 cloves of garlic smashed
3- tablespoons of a high heat oil
Directions:  Season the chicken with sea salt
image
Place chicken- flat- into a food saver type bag--must be food grade-and hopefully bpa free--Food Savers are.  Top each piece of chicken with one clove of garlic, and a tab of butter. Lastly add the thyme, then vacuum and seal, using a edge sealer like a food saver, or if you have a vacuum chamber sealer as I do, vacuum it for 25-30 seconds with a 1.6 second seal.
image
To a stock pot add enough water to fill half of your pot, or above the minimum water level of your immersion circulator.  Turn on the circulator, and adjust the temperature to 149F.
image
Once your circulator has reached temperature, add the sealed bag and cook for 1.5 hours.
image
 
 
Make sure that your chicken is fully immersed.image
At the 1 hr and 20 minute mark, prepare an ice bath DO NOT SKIP THIS STEP, it's a matter of food safety when cooking foods at low temps in an air free environment!--fill a bowl with ice and a little bit of water about 4 cups of ice to 1 cup of water--I added some frozen lime cubes as a weight. When the chicken has cooked for 1.5 hours turn off your circulator, and remove the bagged chicken from the water--be careful the water is hot--immediately immerse the bagged chicken into the ice bath and let sit for 1 hour undisturbed.  After the 1 hour ice bath, place it in the refrigerator, until you're ready to cook..
image
 
Once you're ready to brown the skin, cut open the bag, and remove the chicken. It won't look like it has been cooked, but it is fully cooked at this point--except for the skin.  Discard the garlic and thyme.
image
Add the oil to a skillet/frying pan, and bring to temperature.  Once the oil is hot, add the chicken, skin side down, lower the heat to medium, and cook until skin is nice and crispy--about 6 minutes, flip the chicken over and cook on the other side for 1- 2 minutes.  Remove from the pan and enjoy!!!!! This looks as amazing as it tastes!
image
Follow and like me on Facebook: www.facebook.com/lazygirldinners

Wednesday, July 30, 2014

Lemony Chicken Orzo Soup

Lemon Orzo Chicken Soup

Last week I was out with my husband running errands and we were trying to decide on lunch.  He wanted something filling, and I wanted a really great salad.  As easy as salads are to make and obtain, very few match the salads that I make myself.  I knew it would not be easy to find a place to eat in which we would both leave happy.  After verbally running through a list of eateries, my husband saying no to some, me saying no to others, we both compromised and settled on Panera. I ordered my salad, and after some time mulling over the menu, my husband ordered a bowl of lemon orzo soup.  The ceasar salad  I ordered, was not as great as the  Ceasar salad I make at home, but I was expecting that. However, my husband really enjoyed his soup.  I didn't taste the soup, but it looked really good, and since he enjoyed it, I decided I would try to make it at home for him.  He is such a big fan of soups in general. When I make soup, which is not often, he rants and raves, because to him, soups are a big treat. The key to any great soup is the broth.  I made some broth with the leftover carcass of a roast chicken that we had for dinner.  I will share that recipe and two other ways to make chicken broth with you later.  For this soup use the best organic chicken broth that you can find.  I used a gluten free orzo for this, you can leave it out for a paleo version of this soup, or use a regular pasta orzo for an authentic Lemon chicken orzo soup.
Pin It!
Pin It!


Prep time: 5 minutes
Cook time: 45 minutes

Ingredients:
1lb boneless skinless chicken thighs or 4 cups of pre-cooked chicken cubed
1 cup of diced carrots (3 medium carrots)
1 cup of diced celery (4 celery stalks)
1 large onion diced
2 large cloves of garlic (finely chopped)
1 cup of spinach finely chopped
2-3 tablespoons of finely chopped cilantro
3-4 Tablespoons of Lemon juice less or more depending on your taste
6 cups of organic chicken broth
1/2 cup of orzo
Sea salt and black pepper to taste
2 tablespoon of olive oil

Directions: Season chicken with sea salt and black pepper and set aside. In a stock pot heat oil, add onion, carrot, celery and garlic. Saute until onions turn translucent, add chicken stock, and chicken. Bring to a boil, reduce heat and simmer until chicken is cooked through, about 15-20 minutes.


  Add in orzo and cook until orzo is al dente (10 minutes), then stir in spinach, cilantro and lemon juice, turn off fire, serve and enjoy!


Wednesday, July 16, 2014

Grilled Cumin Spiced Chicken Kabobs

Grilled Cumin Spiced Chicken Kabobs

I made these chicken kabobs over the fourth of July weekend, and everyone loved them.  They were super easy to make and didn't require a lot of time or effort to marinate. They're a perfect quick fix dinner item, so I'm giving you the recipe.  My husband is still raving about these.  It just goes to show that a great meal doesn't require a lot of time or ingredients.

Prep time:10 minutes
Cook time:15 minutes
Total time: 25 minutes

Ingredients:
1lb of boneless skinless organic chicken thighs--cubed
1 teaspoon of cumin
1 teaspoon of paprika
2 cloves of garlic, minced
1/4 cup of flat leaf parsley, finely chopped
Sea salt to taste

Directions:  In a large bowl mix the ingredients for the chicken kabobs together,


Then place the chicken on skewers:


Grill chicken on a hot grill until cooked through, about 10-15 minutes 


 Serve and enjoy!

Tuesday, June 3, 2014

Smokey Paprika and Lime Chicken Kabobs

Smokey Paprika and Lime Chicken Kabobs

I think that there is definitely an art to marinades. I'm still learning that particular art. I recently purchased the highly acclaimed Modernist Cuisine book set. It's massive and filled with information--extremely useful information. I'm only on the second book about 1000 pages into this probably 7000 page set, and the information that I've learned has completely changed the way that I view cooking.  This set is amazing! If you're interested in the how's and why's of cooking, from a scientific perspective---then you want this set. If you can save the $550 plus dollars it costs to buy this book set then I highly recommend it.  Or just stay tuned to my blog, lot's of changes are coming.  Not to mention appliances. One is the immersion circulator that I've been wanting for years.  Another is a vacuum chamber sealer.  I returned my Food saver in preparation for this machine.  This machine makes marination super easy, and effective.  It sucks out all of the air in the chamber and compresses everything in it. Thus making pickles in a matter of minutes, and  infusing steak or chicken and fish with marinades in minutes. Long gone will be my days of marinating anything over night.  I'm really excited for my vacuum chamber to arrive. Not having my Food Saver or a vacuum machine has been torture, but life goes on.  This particular marinade is a mixture of dry and wet ingredients.  It's really delicious, and so flavorful, that it doesn't need more than a few minutes to flavor the chicken--gotta love a quick marinade with no fancy equipment.


Ingredients
1 teaspoon of onion powder
1 teaspoon of garlic powder
1 teaspoon of smoked paprika
1 tablespoon of olive oil
1 tablespoon of lime juice
1 lb of skinless boneless chicken thighs, cubed into one inch pieces
Sea salt and black pepper to taste

Directions: Add the onion powder, garlic powder, smoked paprika, olive oil and lime juice to a small bowl and mix well.

Season the chicken generously with sea salt and black pepper, add it to a large bowl.  Add the marinade paste to the chicken then toss well to cover the chicken with the marinade.

Place chicken on skewers and grill cooking until chicken is cooked through about 10-12 minutes. Serve and enjoy!


Wednesday, April 9, 2014

Basil Chicken

Basil Chicken Recipe

So everyone has that one friend whom they idolize, you know the one who is super intelligent, charismatic, gorgeous, and the kind of mother to her children you only wish you could be. Well that person for me is my friend Jennifer. She has the energy of the energizer bunny--actually I think she could out last that bunny 3 times over, She's a great friend, reliable without fault, and on top of all that, she is a great cook. One of her signature dishes is basil Chicken.  It's beyond delicious, the sweet notes of basil mixed with the Unami flavors imparted by the soy sauce in this dish make it heaven on a plate.  She makes hers with the whole parts of chicken, usually legs, or drummetts. I decided to try it using ground chicken, because who couldn't use another way to use ground meat?  I'm so glad I did, it is equally as delicious as using chicken with bones, but much less time consuming, because there aren't any bones.

Prep time: 5-7 minutes
Cook time : 15 minutes
Total time: 20 minutes

Ingredients:
1 pound of ground chicken
3/4 cups of fresh basil chopped
1 small brown onion or shallot chopped
2 tablespoons of soy sauce
2 large cloves of garlic
2 tablespoons of olive oil/ghee
1/2 teaspoon of red pepper flakes
Sea salt to taste

Directions: heat oil in skillet, add garlic, sauté for 30 seconds, then add the onion, and cook until translucent. Add the ground chicken and brown. Add in the soy sauce, basil and red pepper flakes, cook for 2 minutes then turn off the fire. Serve over brown rice, or in lettuce cups.


Wednesday, February 26, 2014

Makeover Chicken Taco's

Leftover Makeover Chicken Taco's

One of my favorite things to do is reinvent a dinner out of something we ate the night before. Let's face it, leftovers are nice, but a freshly made dinner is better. While buying a whole chicken works out great for our budget, we are always left with leftover chicken. This recipe is result of me and more importantly my husband not wanting to eat the same roast chicken I served the night before. It's super simple to make, and very delicious.


Prep time: 10 minutes
Cook time 10 minutes
Total time: 20 minutes

Ingredients:
2.5 cups of Pre cooked chopped chicken
2 small cloves of garlic
1 tablespoon of cumin
1/2 teaspoon smoked paprika
1/2 teaspoon of garlic powder
1/2 cup of  diced onion
2 tablespoons of olive oil
1 tablespoon of freshly chopped cilantro
6 large organic corn taco shells
Sea salt to taste


Directions:
Heat the oil on a cast iron skillet, add the garlic and onion and cook for 3 minutes. Add in the chicken, cumin, garlic powder, paprika, sea salt and toss well. Cook for another 5-7 minutes. Add in the cilantro, remove from heat, and serve inside corn tortillas, with your choice of toppings.


Sunday, February 23, 2014

Roast Chicken with Cilantro Pesto

Roast Chicken With Cilantro Pesto

I make roast chicken a lot for my family. Mainly because it's easy, and I know everyone will enjoy it. However, because I make it so often, I am always trying to come up with ways to make it differently, ways in which I can add flavor, this pesto does exactly that. It adds a ton of flavor, but requires minimal extra work. You throw all the ingredients in the blender or a food processor, push a button and it's done! Leftover, pesto, if you have any, can be spread on bread as the condiment to leftover chicken salad sandwiches...talk about yum! If you don't want to roast an entire chicken, you can scale this down and use just 2 chicken breasts, it doesn't matter. I find that buying a whole organic chicken is often less expensive than buying just 2 organic chicken breasts. So I always prefer to save money and buy the whole chicken. I reinvent the leftover chicken into tacos, salad, soup or tostadas.


Prep time: 10 minutes
Cook time: 45 minutes
Total time: 55 minutes

Ingredients:
1 whole Organic Nongmo Air-chilled Chicken
2 cloves of garlic
2-3 Tablespoons of Olive oil
1/2 teaspoon of thyme
Sea salt and black pepper to taste

Ingredients for Cilantro Pesto:
2 cups of cilantro
1/2 cup of olive oil
1/2 cup of freshly grated Parmesan cheese
1/4 cup of  toasted hazelnuts
Sea salt and black pepper to taste

Directions: Pre-heat the oven to 425F. Season the chicken generously with sea salt and black pepper, then rub it with the garlic and oil. Line a baking dish with foil, place the chicken on it and place it in the oven and cook for 45 minutes or until the chicken is cooked through. Meanwhile, place all the ingredients for the pesto in a blender or processor, and blend until smooth.  Serve the pesto however you'd like, I smear it on the chicken, with an additional spoonful or two, so that I can dip as I go. It's so delicious!!!! If you haven't read my blog on  How to roast Chicken, Steps to making the perfect roast chicken  now would be a great time. My recipe for  Roast Chicken with Lemon and Garlic works the pesto as well.


Sunday, January 19, 2014

Lime and Red Pepper Flake Chicken Wings


I am not a huge sports fan, and thankfully neither is my husband! I can't sit through games. In our house politics is what has us yelling at the television and calling the players idiots. That doesn't mean that we don't enjoy game day foods like chicken wings. I for one am a huge fan of spicy buffalo wings, but they aren't huge on my husbands list of favorite things to eat. So if I want them, I have have to invent ways to indulge my craving and make them palatable for him. This recipe does just that. The tang of the lime, matched with the spice of the red pepper flake, make for a tasty and satisfying wing!

Prep Time: 5 minute
Cook Time: 25 minutes
Total time: 30 minutes

Ingredients:
1 lb of chicken wings
1/4 of lime juice
3 cloves of garlic crushed or grated
Zest of 2 limes
1/2 teaspoon of red pepper flakes
Sea salt to taste
2 tablespoons of olive oil

Directions: Pre-heat the oven to 425F. Pat dry your wings with a paper towel, In a bowl season the chicken with sea salt, then add the lime zest, olive oil, garlic, red pepper flakes and mix well. Place the chicken on a foil lined baking sheet and place in the oven, cook for 20-25 minutes, until the chicken is crisped and cooked through. Remove from the oven, sprinkle evenly with lime juice and enjoy!


Sunday, December 1, 2013

Tamales


Now that Thanksgiving is over, you're probably trying to think of ways to use all of the leftovers. These tamales are a great way to rid your refrigerator of all that left over turkey. They're simple to make, but very delicious! If you're family ate all the turkey and you don't have any leftover, chicken works just as well for these tamales, in fact I usually make these with chicken.

Prep time: 5 minutes
Cook time: 30minutes
Total time: 35 minutes

Ingredients:
2 cups of cooked turkey or chicken shredded
1 cup corn meal
1/2 cup flour
1.5 teaspoons baking powder
1/2 teaspoon baking soda
3/4 cups of buttermilk ( substitute with 3 /4 cup of yogurt, or add 1 teaspoon of white vinegar to 3/4 cup of milk and let sit for 10 minutes before using)
1/4 teaspoon of sea salt
1 10 ounce can of  enchilada sauce
1 teaspoon of cumin
1.5 cups of creamed corn (see my recipe Here)
1 egg
1 cup of shredded cheese cheddar

Directions:
  1. Preheat oven to 400°. Combine 1/4 cup cheese, corn meal, egg, milk, sea salt, baking powder, baking soda, cumin, creamed corn and flour in a large bowl, stirring just until moist. Pour mixture into a baking dish coated with cooking spray. Bake at 400° for 15 minutes or until set. Pierce entire surface liberally with a fork; pour enchilada sauce over top. Top with turkey/chicken, and sprinkle with remaining 3/4 cup cheese. Bake at 400° for 15 minutes or until cheese melts. Remove from oven; let stand 5 minutes. Serve with sour cream, and salsa, and enjoy!

Wednesday, November 6, 2013

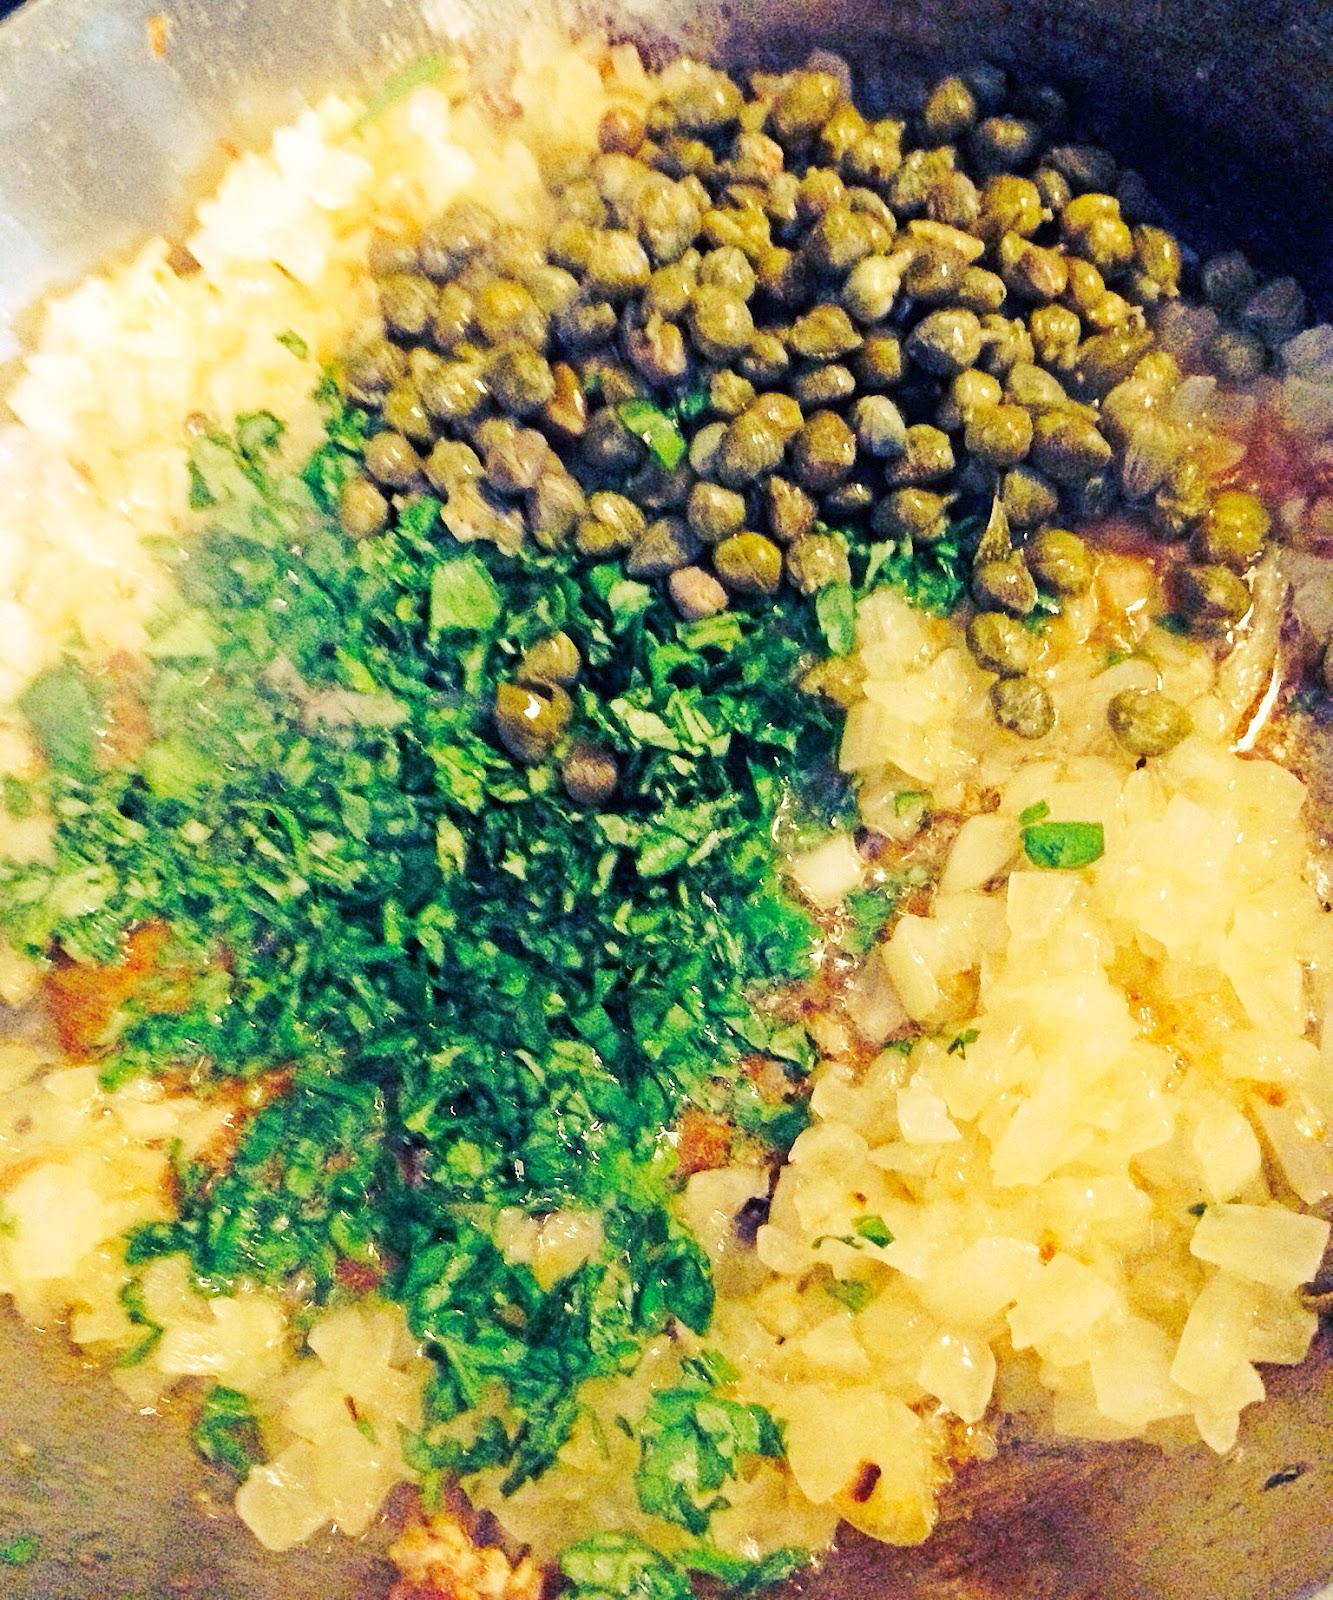
Braised Chicken in Caper Sauce

Braised Chicken in Caper Sauce


I love capers, something about their salty brininess speaks to my taste buds. This dish is so simple, and easy to make. All the work is in remembering that you're cooking it, so that you don't burn down the house!


Prep time: 5 minutes
Cook time: 25 minutes
Total time: 30 minutes

Ingredients:
1lb of chicken ( I used skinless, boneless thighs, you can use bone in with skin, but just be aware it will extend the cooking time a bit.)
1/3 cups white wine vinegar
1.5 cups of organic chicken broth
1/3 cup of capers drained and rinsed
1/2 cup of fresh parsley
1 medium onion
Sea salt and black pepper to taste


Directions:
  • Heat 2 Tbsp. oil in a large heavy skillet over medium heat. Season the chicken with sea salt and black pepper, then add the chicken and brown on both sides. Add in the  onion; cook, stirring often, until softened. Add the parsley, and capers to skillet; cook for 1 minute. 


    Stir in broth and vinegar.  Reduce heat to medium-low; cover and simmer until meat is tender and  cooked through falling off the bone, about 20 minutes.
  • Transfer chicken to a large platter. Spoon sauce over chicken; garnish with parsley.