Showing posts with label dehydrator recipes. Show all posts

Wednesday, April 15, 2015

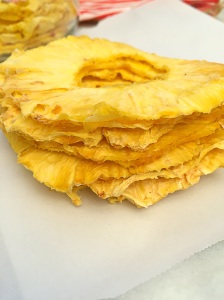
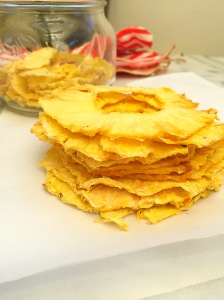
Pineapple Rings--How to make dehydrated Pineapple Rings

Dehydrated Pineapple Rings
One of my go to snacks is dehydrated fruit.  I'm a particular fan of pineapple rings.  But, if you've ever purchased organic dehydrated pineapple rings, then you probably know that pineapple rings are a snack that can be out right expensive! I mean outlandishly expensive! On top of the expense, it's pretty hard to find pineapple rings that haven't been soaked in baths of sugar.  I'm not a fan of adding sugar to dehydrated fruit.  It's sort of an oxymoron to me that sugar is added to dehydrated fruit at all, because if you know anything about dehydration--then you know that the sugar in fruits concentrate when dehydrated, so there really isn't a need to add sugar--unless you're dehydrating something really tart like cranberries then I could see the purpose of adding sugar. Last week I purchased a pineapple, I fully intended to eat it fresh. However,when I cut, and tasted it-- it was pretty tasteless. Disappointing for sure. The pineapple clearly needed to ferment more.  Rather than chuck it, I sliced it and put it in the dehydrator and made pineapple rings. The resulting pineapple rings were not only flavorful, but they were sweet--everything you want would want in a fresh bite of pineapple--minus the juice of course.  The pineapple rings lasted all of 2 minutes, my sister in-law, my niece and Page, gobbled them right up--I'm pretty sure they would've passed on the fresh slices.
Pin It!
 
 
Prep time: 10 minutes
Cook time 6-8 hrs 10-12hr for thicker slices
Ingredients:
2 whole fair trade organic pineapple
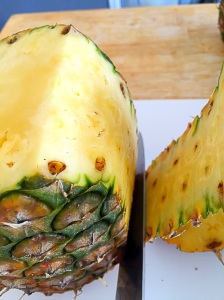
Directions: Remove the stem from the pineapple, then slice off the top and bottom.  Slice off the skin, making sure to remove all the eyelets.
image
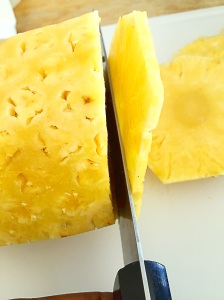
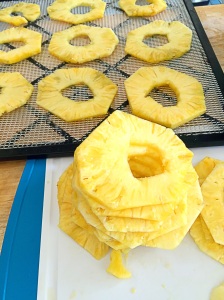
Now slice the pineapple thinly.
image
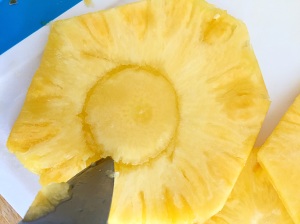
Keep in mind that the thicker you slice it, the longer it will take to dry.  If it's too thin your pineapple rings will turn out crisp, if they are a bit thicker, they'll be more leathery, so it' just a matter of what you're seeking in consistency.  After slicing, cut out the center core by carving a circular cut in the middle of the pineapple.
image
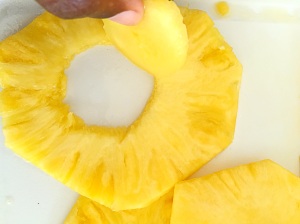
Remove the core and discard it.
image
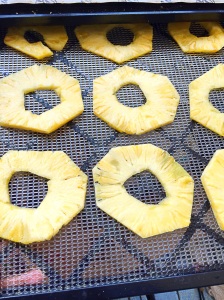
Place the pineapple rings on your dehydrator sheet,
image
Set the dehydrator to 135F.  If you're doing this in the oven, set the oven to 150F or the lowest possible setting.  Dehydrate for 6-8 hours, 10-12hrs if you cut thicker slices.
image
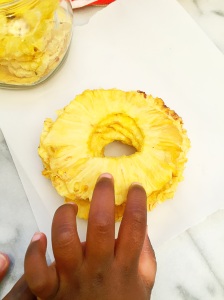
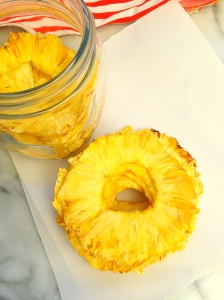
Once dry let cool, then enjoy!
image
Page could not wait for me to take a picture, she loves these so much!
image
image
if you like this recipe, try the recipe for my pineapple fruit roll-ups!
Wednesday, February 11, 2015

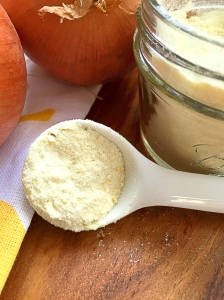
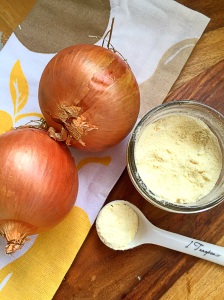
How to make Onion Powder--DIY Onion Powder

DIY Onion Powder--How to make Onion Powder
Recently I was chatting with some professional chefs online one of them was talking about using dried powders like garlic and onion in a recipe that he was playing with.  He wanted to know where he could find better quality powders.  The discussion quickly went from people being helpful, to people questioning whether any chef of good standing would ever use a dried product versus a fresh product. One person in particular, said absolutely not!  Others, said of course and then went on to make a case for when dried spices are needed, and in those cases how using dry spices make the dish better.  The discussion got me thinking about how often I use dried spices, and what dry ingredients I use.  The truth is that I am one of those cooks, who relies heavily on fresh ingredients.  The produce bin in my refrigerator is always stocked with, fresh thyme, parsley, mint, cilantro, basil, and whatever other herb is in season--ALWAYS.  I can't imagine cooking without the use of fresh herbs.  At the same time, my cupboards are stocked with the dried version of all the fresh herbs that I just mentioned, and many, many other dry spices, like garlic powder, cumin, tarragon, onion powder...the list could literally fill this page!  If you've been following my blog, then you know that I make many of my own spices.   When the person in that forum asked about sourcing onion powder, my immediate thought was, why not just make it? So I did.  It's a simple process, but the onion powder that you get from this process is the best that you will probably ever taste--or smell--the smell had me salivating--this is the stuff that great onion dips, and soups are built from!
Pin It!


Prep time: 10 minutes
Cook time: 6-8 hours--
Ingredients:
2 large onions sliced thinly
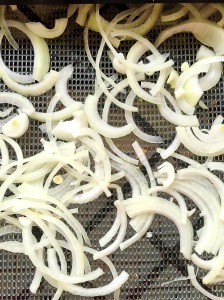
Directions: Evenly spread the sliced onions on a dehydrator sheet.
image
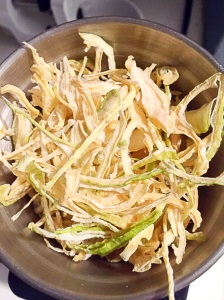
If using an oven, place the onions on a parchment lined bake sheet. Set the temperature on your dehydrator to 125F.  If using an oven, set it to the lowest possible setting 150F.  Let the onions dehydrate until brittle, then remove and let cool.
image
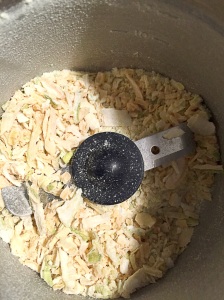
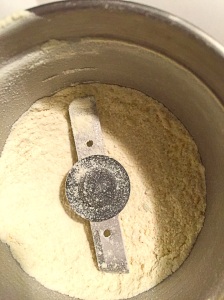
Once the onions have cooled, place them in a spice grinder/coffee grinder and blend into a powder.  Stop here if you want onion flakes,
image
 
image
Transfer to an airtight container until ready to use.
 
image
 

Wednesday, December 3, 2014

Preserved Lemon Salt--How to make Sour Salts

Preserved Lemon Sour Salt
This blog has been a year in the making. Sour salts and the use of sour salts first caught my attention after reading an article in Bon Appetite Magazine about  how the chef at State Bird Provisions was using sour salts to brighten up dishes, and make use of an ingredients that would otherwise not get used.  His approach was simple, dehydrate something as simple as a preserved lemon, grind it into a powder, and boom you’ve created a flavorful salt without even trying.  After reading that article, I knew that I wanted to try making a preserved lemon salt.  I put it on my list of things to blog about, but never got around to it–it has been almost a year since I read that article! Of all the sour salts I have on my list to make, the preserved lemon sour salt has always intrigued me the most--that and a lime pickle salt--I love a good lime pickle! My first thought was to make my own preserved lemons and lime pickle.  But rather than make you all--and myself wait for me to make a preserved lemon, which would further prolong me making this sour salt, I thought  I'd just skip ahead a few steps and buy some preserved lemon's from my local Whole Foods. Christmas is just a few weeks away, and since I'm giving these salts away as gifts I cant wait to make preserved lemons from scratch.
Pin It!
Makes about 4 ounces of sour salt.
Prep time: 5 minutes
Drying time: 2hrs
Ingredients:
4 preserved lemons (sliced thinly)
Directions: Pre-heat oven to 150F if using an oven.  If using a dehydrator set it to 135F. Place preserved lemon slices evenly onto your dehydrator sheets, if using a stove,  spread over a wire rack set inside of a bake sheet.
image
Bake or dehydrate  until hard and brittle, it took about 1.5 hours in my dehydrator. Once slices are hard and crisp, transfer to a spice mill/ blender and grind until powdery,
image
Transfer the powder to an air tight container.
image
You've just created a gourmet salt.  You can sprinkle this on chicken, and fish.  Add it to my North African Lamb Stew, or to some grilled lamb chops, the possibilities are endless.
image